Beginner
•
How to Build a GitHub-Connected Documentation Generator with No Code
A step-by-step guide that shows you how to build a GitHub-connected AI documentation generator from scratch using Emergent - no coding required.
Written By :

Avilasha Chalki
Hey there!
In this tutorial, we're going to build something incredibly useful: a GitHub-Connected Documentation Generator that automatically creates and updates technical documentation for your code repositories.
The idea is simple: instead of manually writing and maintaining documentation (which everyone hates doing), this app connects to your GitHub repos and uses AI to generate professional documentation automatically.
Basically, we'll build an intelligent system that:
Connects to your GitHub account and accesses your repositories
Analyzes your codebase automatically
Generates comprehensive documentation (API docs, architecture summaries, file explanations)
Updates documentation whenever you push new code
Lets you view, download, and share documentation easily
Tracks version history so you can see how your docs evolved
Using this approach, solo developers have turned similar tools into profitable businesses (one founder reached $86k ARR in 12 months), and teams use it to eliminate "tribal knowledge" and onboard new developers faster.
By the end of this guide, you'll have a working documentation generator connected to your GitHub repos, built entirely on Emergent without writing any code.
Let's get started!
Why We're Building This
Before we dive into the technical details, let's talk about why this project is worth building.
The Real Need Inside Tech Teams
Every development team faces the same documentation problem:
The documentation dilemma:
Developers hate writing documentation
Documentation becomes outdated quickly
New team members struggle without good docs
"Tribal knowledge" lives in people's heads, not in written form
Maintenance becomes a full-time job nobody wants
What this tool solves:
- Automatic generation - Documentation writes itself from your code
- Always up-to-date - Regenerates when code changes
- Onboarding tool - New developers understand the codebase faster
- Knowledge preservation - Nothing gets lost when people leave
- Team collaboration - Everyone has access to the same information
- Zero maintenance burden - AI handles updates automatically
Think of it as having a live technical writer embedded in your codebase. Every time you push code, the documentation updates automatically. Your GitHub repository becomes self-documenting.
The Business Potential
This isn't just a useful internal tool - it's a proven business model.
Real-world success story:
A solo founder built a similar product and grew it to $86k ARR in 12 months, fully bootstrapped and profitable.
Why this works as a business:
Strong market demand:
B2B customers (companies paying for team plans)
B2C customers (individual developers paying for their projects)
Growing need as codebases become more complex
Clear value proposition:
Saves dozens of hours per month
Reduces onboarding time from weeks to days
Prevents costly knowledge loss
Improves code quality through better understanding
Scalable pricing model:
Per repository pricing
Team plans for organizations
Usage-based tiers (small projects free, large codebases paid)
Enterprise features (custom deployment, priority support)
So you're not just building a dev tool - you're building something with real revenue potential if you iterate and find product-market fit.
What Makes This Project Perfect for Beginners
It's practical: You'll actually use this tool yourself
It's achievable: Can be built in a few hours on Emergent
It's extendable: Lots of features you can add later
It's monetizable: Proven business model to follow
It's impressive: Great portfolio piece to show employers or clients
Let's build it.
Understanding How It Works
Before we start building, let's understand the architecture and workflow of our documentation generator.
The Core Flow
Here's what happens when a user uses your app:
First, the user authenticates through GitHub OAuth by clicking “Connect GitHub,” granting your app read-only access to repository names, file contents, commit history, and branches, as shown in the OAuth consent screen.
After authentication, the user sees all their repositories - public, private, and organization-owned - and selects the ones they want documented.
Next comes the AI analysis: your app fetches the repository’s code files and sends them to GPT-5 (or Claude/Gemini) with a structured prompt, allowing the AI to generate a full documentation package including project overview, architecture, file-by-file explanations, API references, setup instructions, and dependency breakdowns, visually represented as raw code flowing into an AI engine and structured documentation coming out.
Finally, the generated documentation is displayed in a clean interface, can be downloaded as a PDF, versioned for history tracking, and shared via a public link.
What You Need Before Starting
Before we build, make sure you have these prerequisites ready:
1. Emergent Account
What it is: The platform where you'll build your documentation generator
How to get it: Sign up at emergent.sh
Cost: Free tier works perfectly for this project
2. GitHub Account with Repositories
What you need: A GitHub account with at least one repository
Why: You need actual code to test the documentation generator
For this tutorial: We used an existing pre-built app on Emergent and pushed the code to GitHub to test the documentation generator.
Since Emergent has no platform lock-in, you can:
Push your code to any GitHub repository
Deploy anywhere you want
Export your project anytime
Integrate with other services freely
Your app isn't trapped in Emergent's ecosystem. You own it completely.
Building on Emergent
Now let's build this thing. We'll go through each step, from the initial prompt to a working application.
Step 1: The First Prompt
Open Emergent and enter this prompt to start building:
Step 2: Answering the Agent's Clarifying Questions
The first prompt is intentionally simple - it includes only the core functionality.
This avoids overwhelming the agent and also lowers your credit usage.
Since Emergent is agentic, it will ask follow-up questions.
Here are the questions it asked us and the choices we made:
a. AI Documentation Generation – Which LLM?
We chose OpenAI (GPT-5) for its strong reasoning abilities.
b. LLM API Key
We used Emergent’s universal LLM key.
c. User Authentication
We selected Google OAuth, since it’s simple and ready out of the box.
d. GitHub Integration
We used GitHub OAuth, with standard repo access permissions.
Step 3: Creating a GitHub OAuth App
For your app to access users' GitHub repositories, you need to create a GitHub OAuth application. This sounds technical, but it's actually straightforward.
The agent will guide you through this with step-by-step instructions. Here's what you'll do:
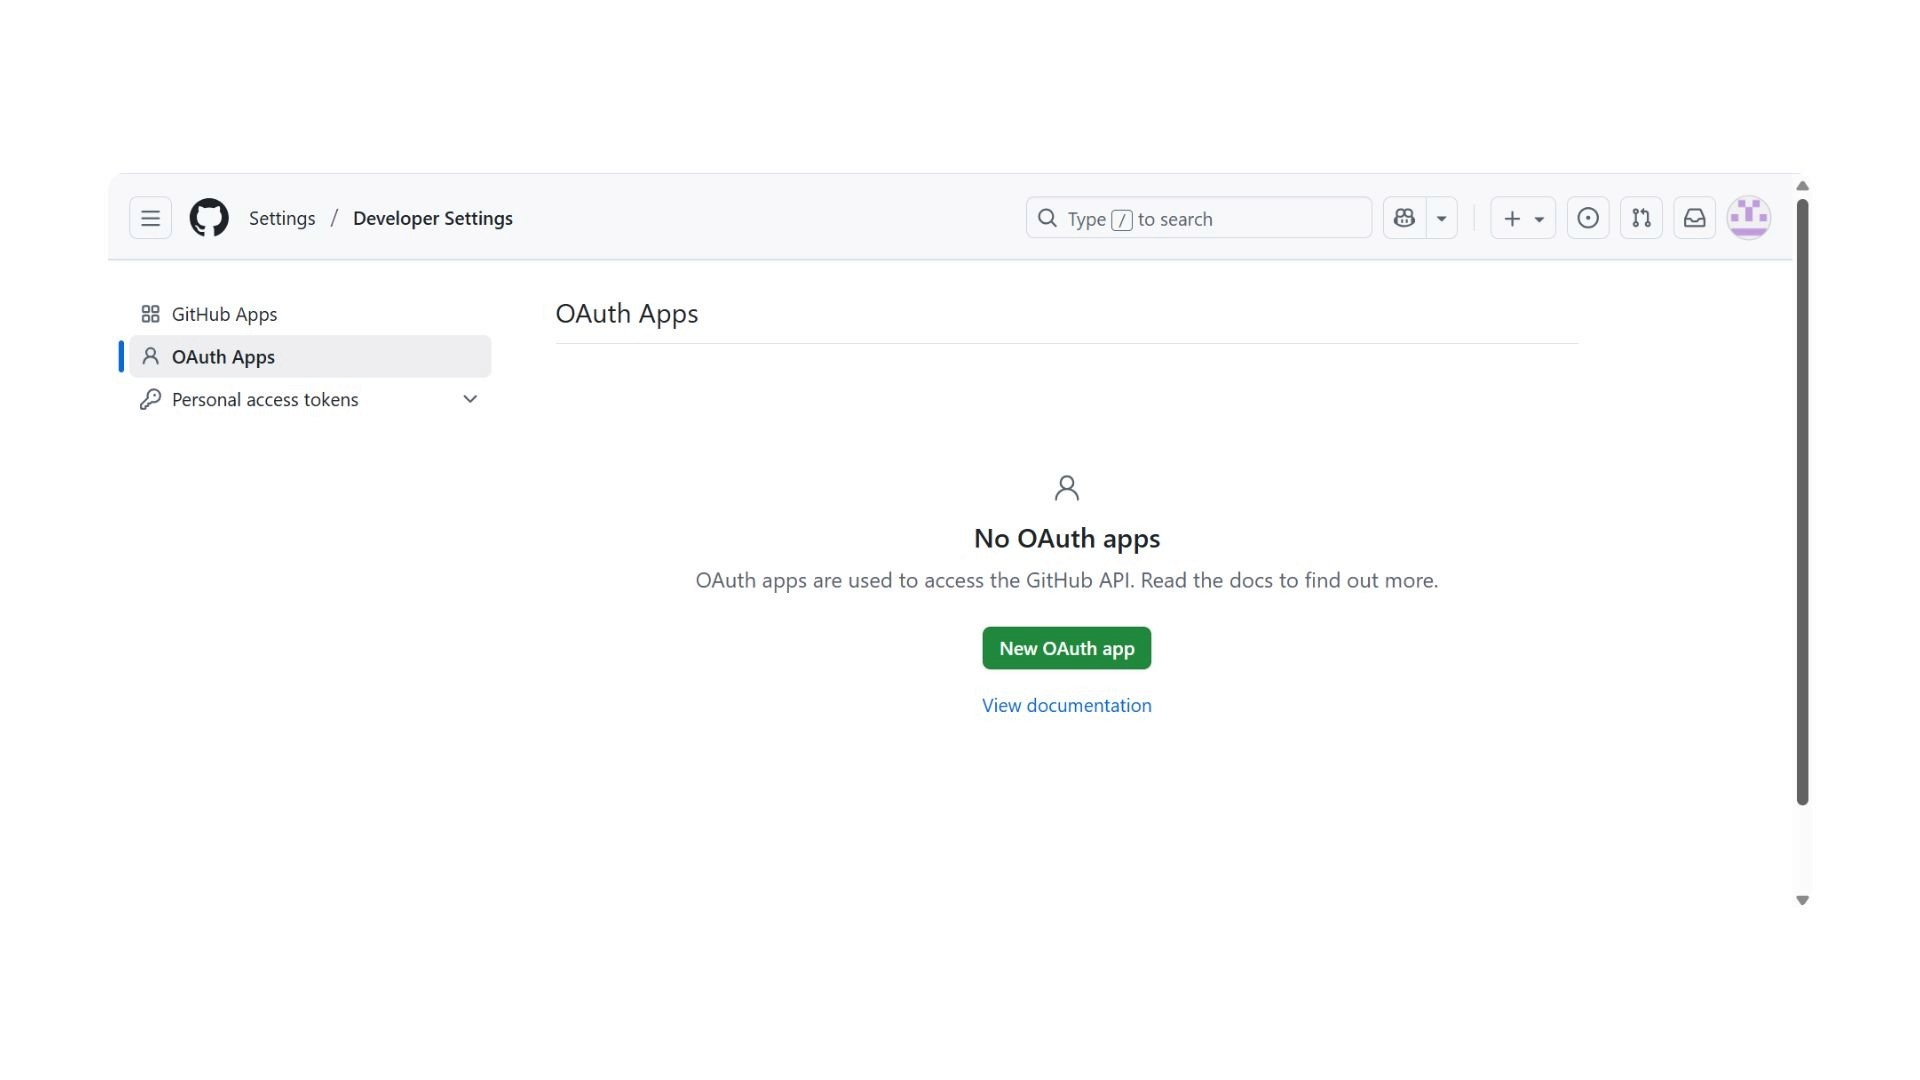
a. Visit the GitHub Developer Portal
Go to: https://github.com/settings/developers
Click "OAuth Apps" in the left sidebar, then "New OAuth App"
b. Fill in the Application Details
Application name:
GitDoc Automator
Homepage URL: The Emergent agent will provide this. It looks like:
https://your-app-name.preview.emergentagent.com
Application description:
Automatically generate documentation for GitHub repositories using AI
Authorization callback URL: The agent will provide this exact URL. It looks like:
https://your-app-name.preview.emergentagent.com/auth/github/callback
Important: Use the exact URLs the Emergent agent gives you. Don't modify them or the OAuth won't work.
c. Register and Get Credentials
Click "Register application"
You'll see your new OAuth app with two important pieces of information:
Client ID - A public identifier (looks like: Iv1.a1b2c3d4e5f6g7h8)
Client Secret - A private key (click "Generate a new client secret" to create it)
Security warning: Keep your Client Secret private! Don't share it publicly or commit it to code repositories.
d. Provide Credentials to Emergent
Copy both the Client ID and Client Secret.
Go back to your Emergent chat and tell the agent:
Here are my GitHub OAuth credentials:
Client ID: Iv1.a1b2c3d4e5f6g7h8
Client Secret: abc123def456ghi789jkl012
The agent will securely store these and complete the GitHub integration.
Step 4: Testing the First Preview & Debugging
After the agent completes the initial build, you'll get a preview link to test your app. Click it to see the first version.
This was our first version of the landing page :

What you should see:
Login page with "Sign in with Google"
After login, "Connect GitHub" button
Dashboard showing "No repositories connected yet"
Time to test the core functionality. This is where we encountered and fixed several issues.
Issue 1: Cannot Connect to GitHub
What happened:
When we clicked "Connect GitHub," nothing happened. The button seemed broken.
How we fixed it:
We just told the agent that GitHub was not getting connected, and asked it to fix it.
What the agent did:
The agent analyzed the error and realized the callback URL in our GitHub OAuth app didn't match what the application was using. It provided the correct callback URL and asked us to update it in GitHub.
We went back to GitHub Developer Settings → OAuth Apps → GitDoc Automator, updated the Authorization callback URL with the new one the agent provided, and saved.
Result: GitHub connection button now worked!
Issue 2: Cannot Load Repositories
What happened:
After connecting GitHub successfully, the repository list showed "Loading..." forever and never displayed any repos.
How we diagnosed it:
Opened browser console (F12) and saw:
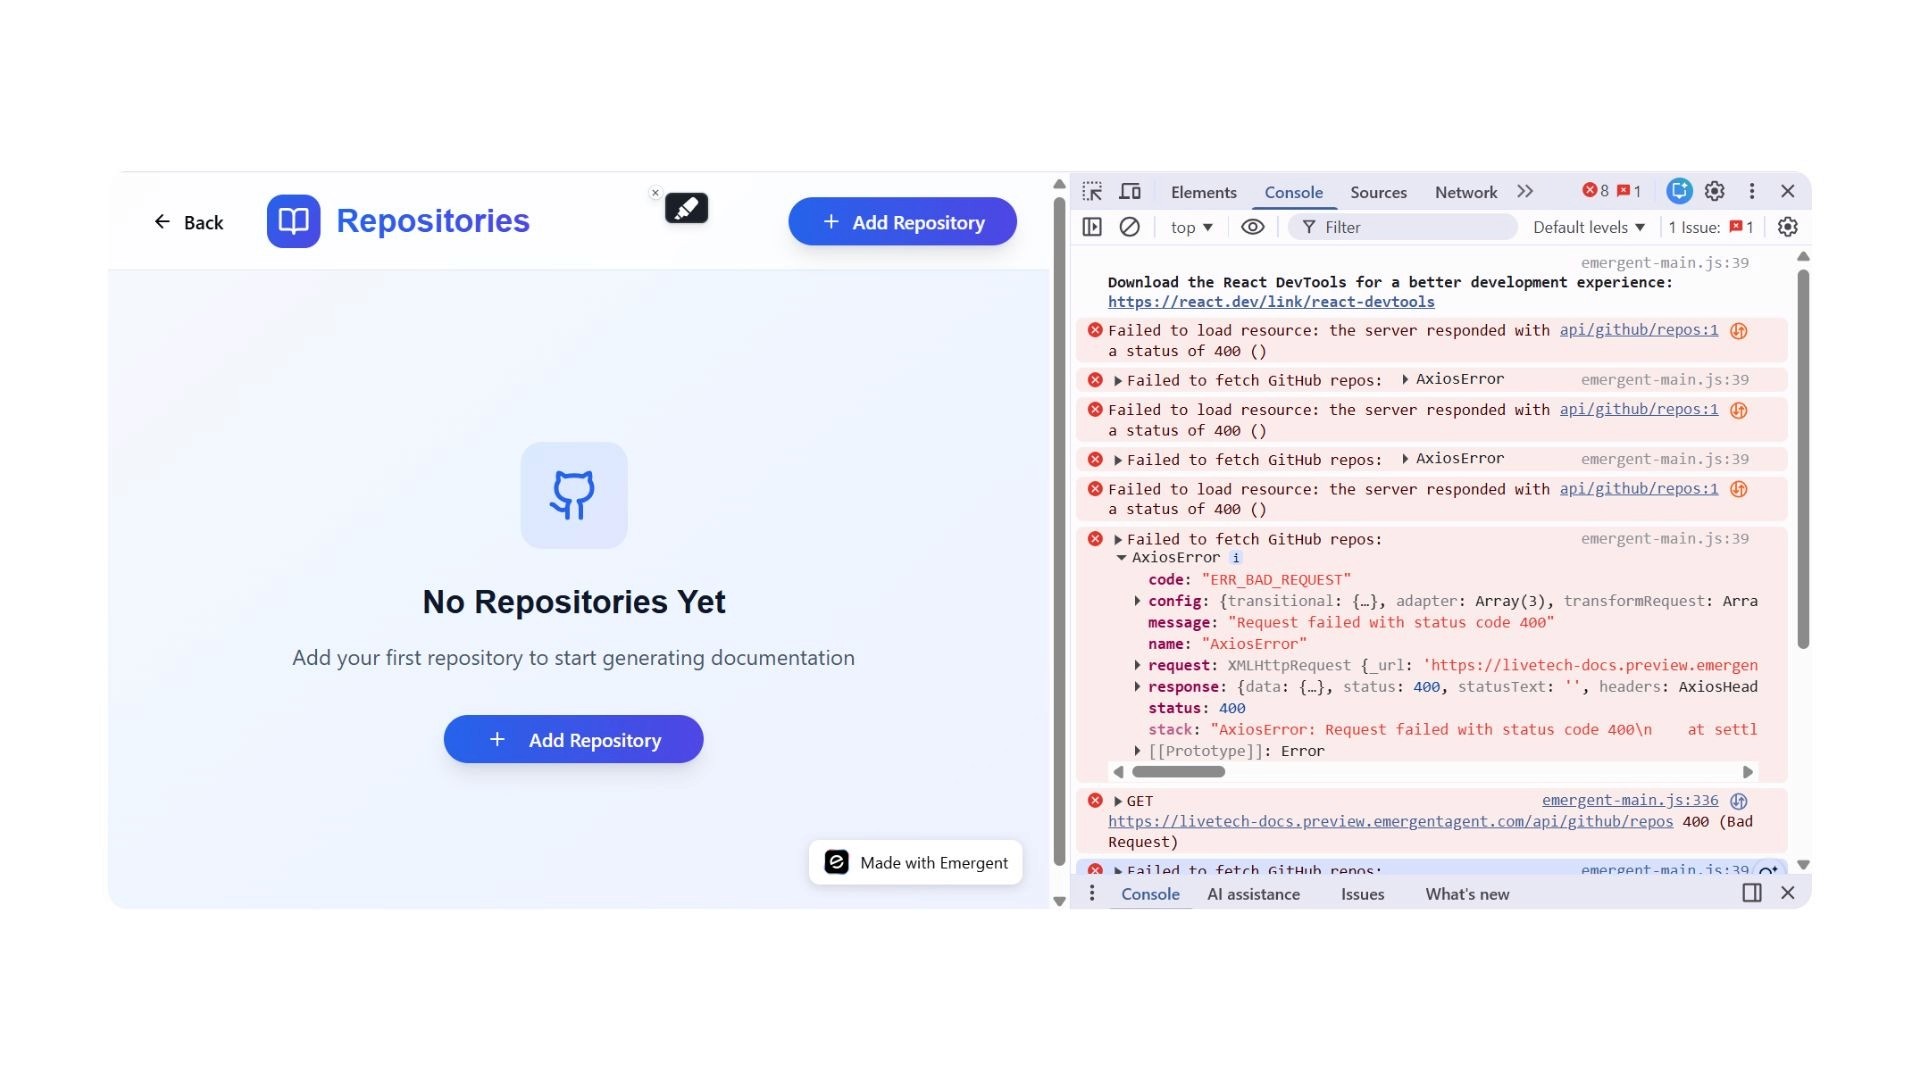
What this means:
An Axios Error is a failure in the HTTP request-response cycle. In this case, status code 403 means "Forbidden" - the app tried to fetch repository data from GitHub but didn't have permission.
How we fixed it:
We sent the error to the agent, using this exact prompt :
What the agent did:
Added a handleGitHubCallback() function that processes the OAuth code, exchanges it for an access token, shows success/error messages, cleans the URL, and refreshes the stats.
Result: Repositories now loaded correctly!
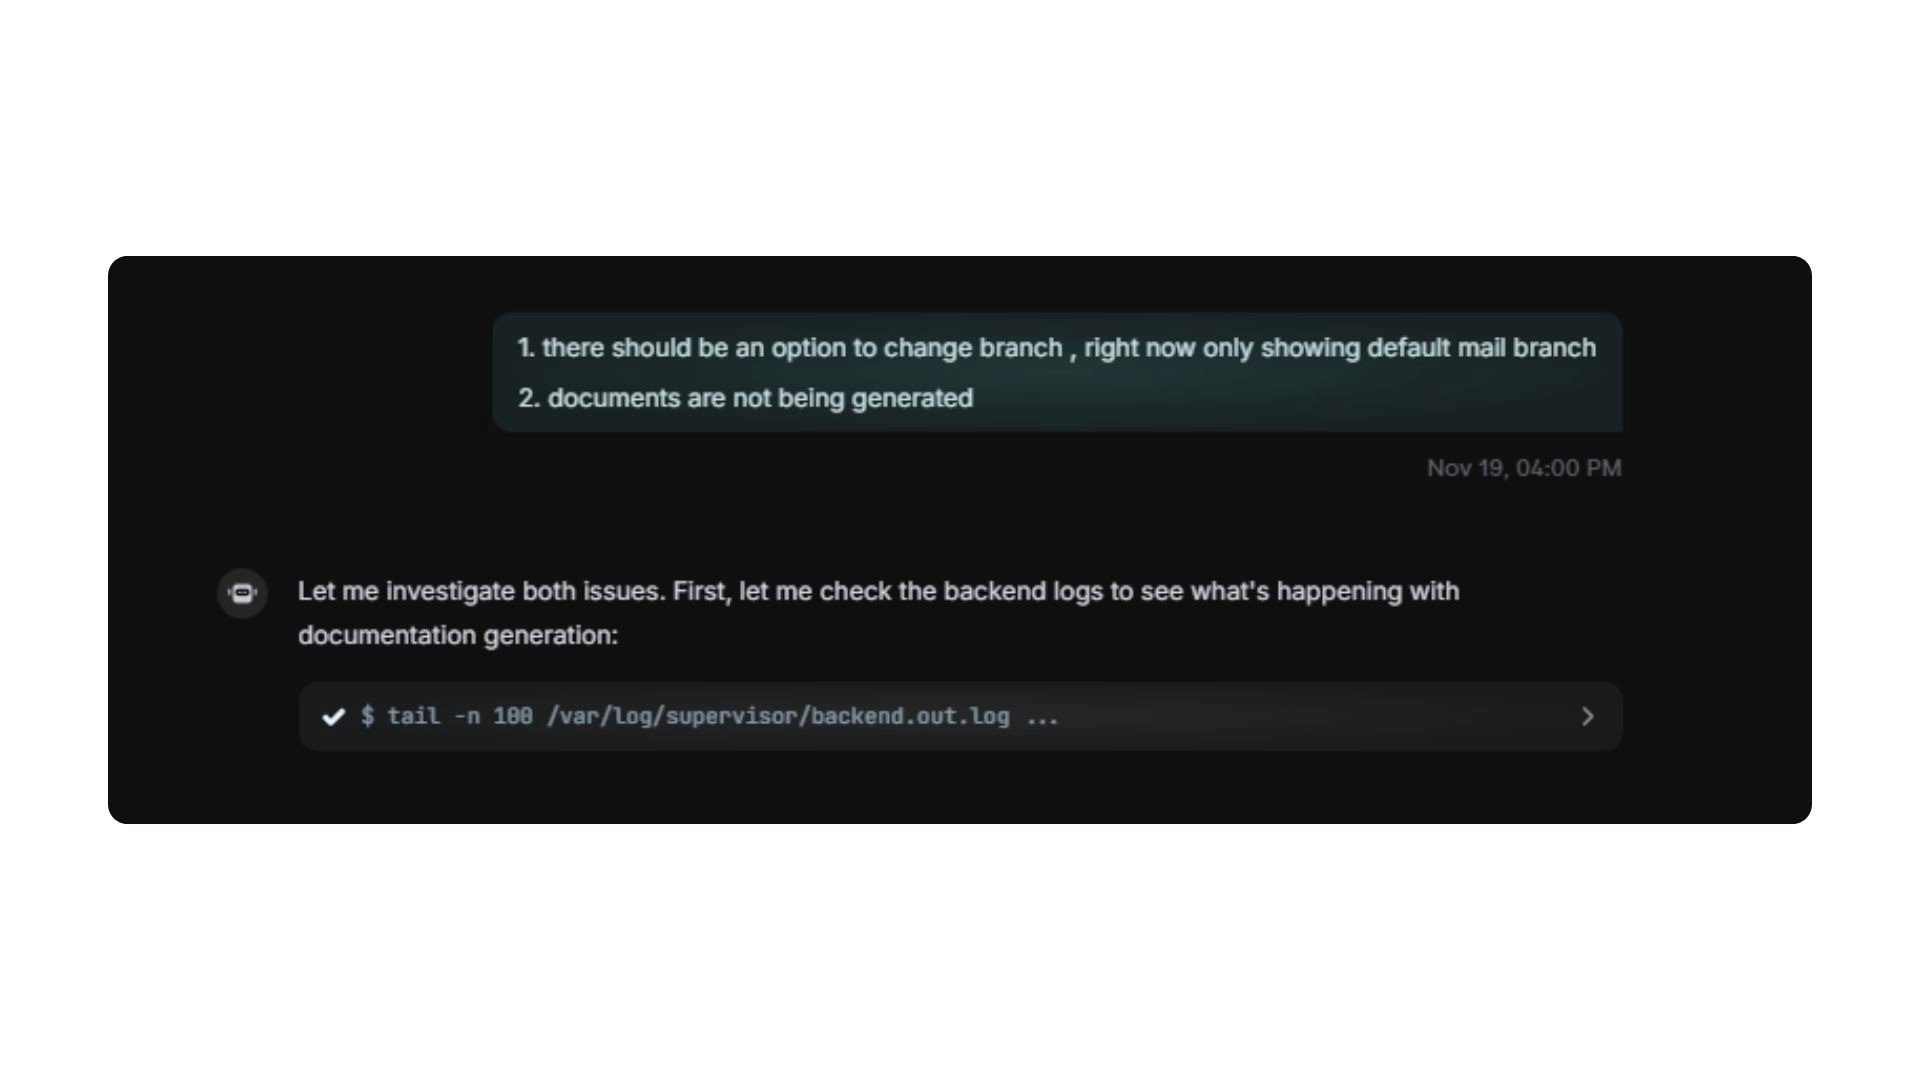
Issue 3: Cannot Change Branches / Generate Documentation
What happened:
We could see repositories, but:
The branch selector dropdown didn't work (showed "main" but couldn't switch to other branches)
Clicking "Generate Documentation" showed a loading spinner but never completed
How we fixed it:
We reported both errors to the agent:
What the agent did:
Fixed the GitHub OAuth (correct Client ID), resolved BadGateway errors by switching from gpt-5 to gpt-4o, added full branch-selection support with new endpoints and webhook handling, and confirmed working flows for OAuth, repo listing, branch selection, documentation generation, markdown rendering, version history, auto-sync, and documentation download.
The agent made changes to both /app/frontend/src/App.js (frontend) and /app/backend/server.py (backend), then restarted the services.
Result: Both features now worked! We could switch branches and generate documentation successfully.
The Output: Your Working Documentation Generator
GitHub Authentication: Users securely connect their GitHub account via OAuth to enable repo access.
Repository Selection: Displays all user repos with name, description, language, last updated date, and a “Generate Docs” button.
Branch Selection: Users choose the branch (main, develop, feature branches) before generating documentation.
AI Documentation Generation: Fetches repo code, analyzes it with GPT-5/GPT-4o, and generates structured docs (overview, architecture, files, API, setup, dependencies).
PDF Download: Allows users to export the generated documentation as a professionally formatted PDF.
Documentation History: Stores previous versions with timestamps for comparison, viewing, and downloading.
Here is what it looked like for us :
Improving Your Application
Your v1 is working, but there's so much more you can build. Here are the most valuable improvements to consider:
1. Automatic Regeneration on New Commits
Docs update automatically whenever new code is pushed. A GitHub webhook notifies your app, it regenerates the documentation, and the user gets an email. Add it by saying: “Enable automatic documentation regeneration on every new commit and notify the user by email.” This ensures documentation is always up to date.
2. Better UI & Customization
Improve the experience with syntax-highlighted code blocks, dark mode, a searchable table of contents, and options to choose which sections to include. Add it by prompting: “Add syntax highlighting, dark mode, documentation section toggles, and a search bar.”
3. Team Collaboration Features
Upgrade to team-level workflows: shared workspaces, roles (admin/editor/viewer), comments, activity logs, and approval flow for publishing docs. Add it by prompting: “Add team invites, commenting, activity logs, and role-based permissions.” This turns the app into a full team platform and increases monetization potential.
Monetizing your Application
There are several strong ways to monetize GitDoc Automator, depending on the audience you’re targeting and how advanced your feature set becomes. The simplest and most effective approach is a tiered SaaS model.
1. Freemium Model (Most Recommended)
Offer a free tier with limited repositories and monthly generations, then upgrade users to paid tiers with more capacity and premium features.
Free: 1–2 repos, limited generations, basic docs
Pro ($19–29/mo): unlimited repos, unlimited generations, PDF export, priority support, longer version history
Team ($99–149/mo): collaboration, permissions, shared workspaces, API access, white-label docs
Enterprise: custom pricing, self-hosting, SLAs, advanced security
2. Usage-Based Pricing
Charge per generation or per monitored repository. This works well for developers who prefer pay-as-you-go.
Examples: $0.50–$2 per generation or $5–$10 per repo/month.
3. Add-On Upsells
Introduce optional paid upgrades such as premium AI models, advanced diagrams, custom templates, Slack/Discord notifications, API access, or analytics dashboards.
4. Target Markets & Pricing
Individual devs: $9–29/mo
Small teams: $49–99/mo
Mid-size companies: $199–499/mo
Enterprise: $1000+/mo with custom contracts
If you want the exact steps on how to integrate stripe into your application, check it out here.
Wrapping Up
And that’s it - you’ve just built a fully functional, GitHub-connected AI documentation generator without writing a single line of code.
You now have an app that authenticates with GitHub, analyzes repositories using advanced LLMs, generates clean technical documentation, supports version history, and delivers everything through a polished UI. From here, you can extend it with automatic updates on new commits, richer UI customization, team collaboration tools, and even full-scale monetization with paid tiers or usage-based pricing.
Whether you plan to use this tool internally for your own projects or turn it into a real SaaS business, you now have the foundation to take it in any direction you want.
The best part? You built the entire thing on Emergent - fast, agentic, and without code slowing you down.
Go ahead and ship your v1, iterate with users, and turn this into something truly powerful.