


Here's how to build an Android app with AI in one afternoon using Emergent, prompt by prompt, from first description to a build I tested on my phone.
Two Ways to Build an Android App With AI
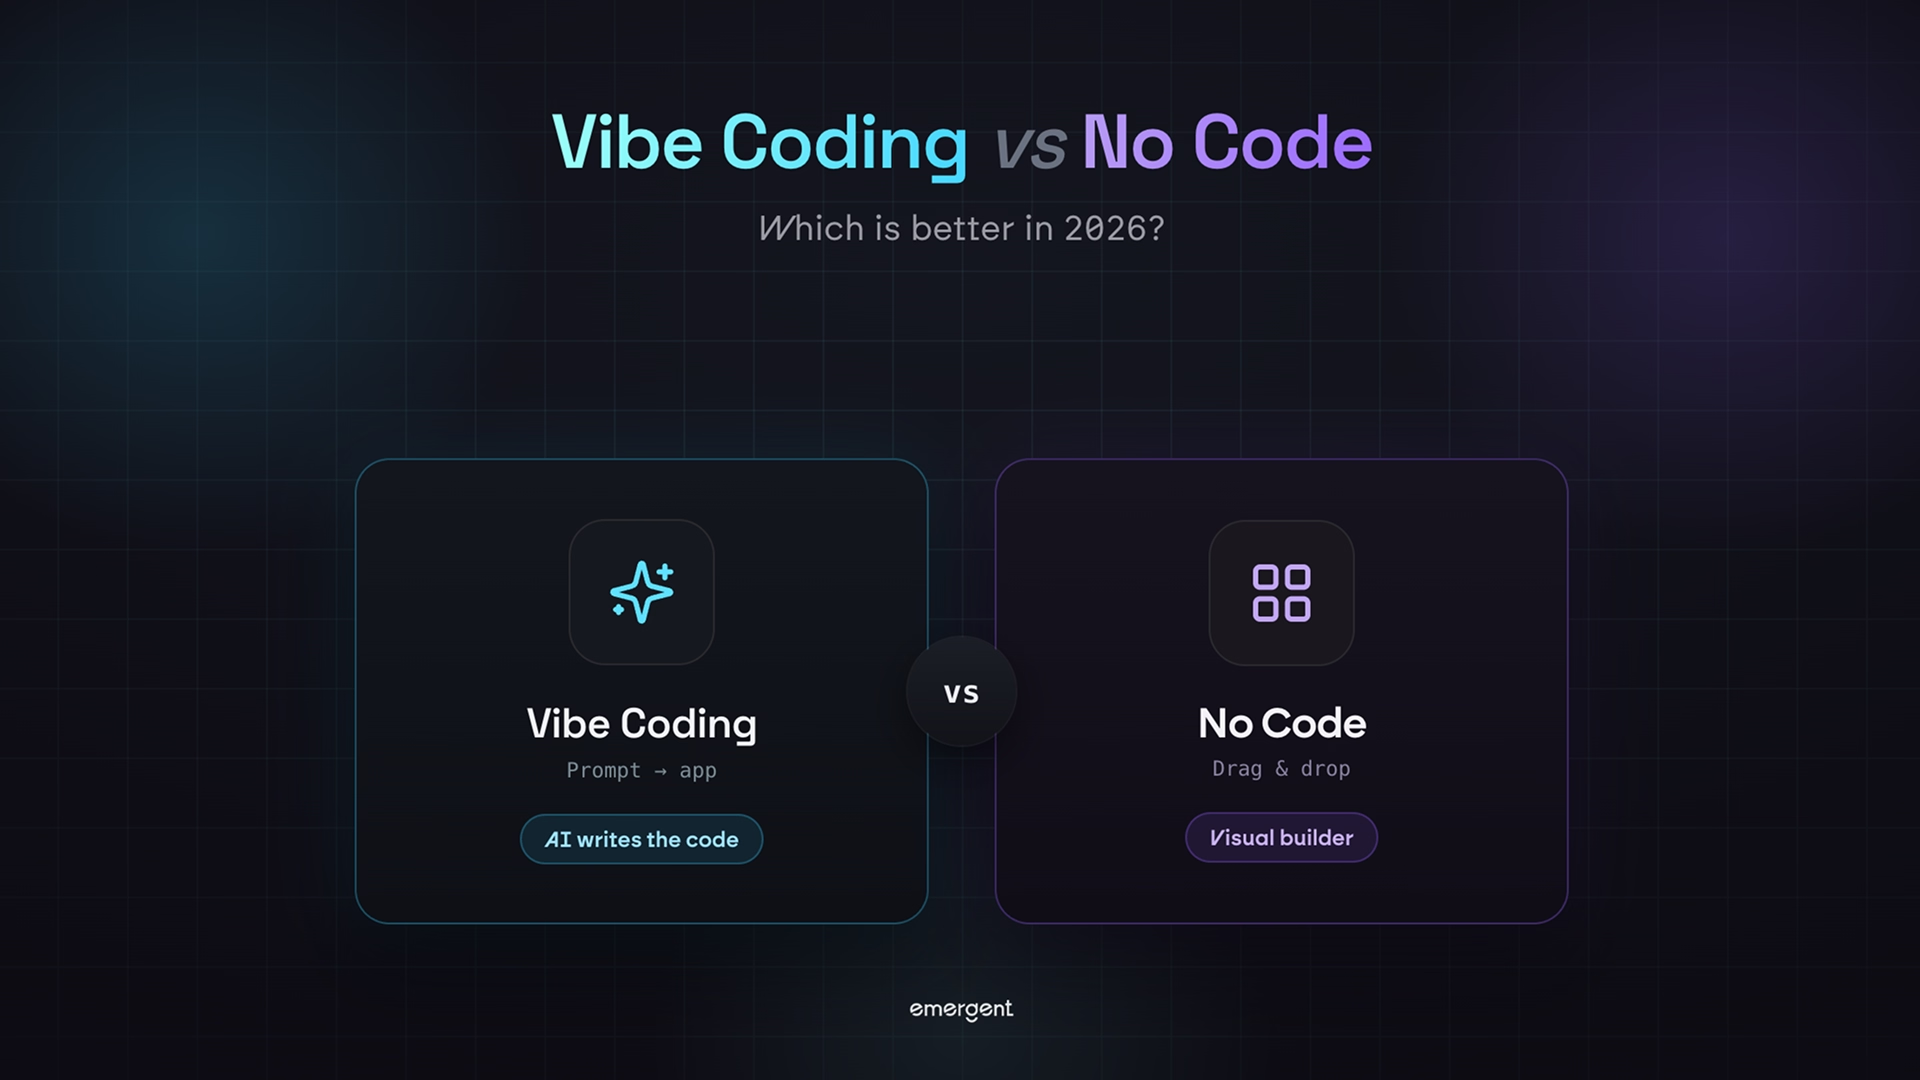
There are two broad approaches in 2026, and the right one depends on whether you want to touch code. Both start with you describing the app in plain English, but they hand you very different things at the end.
These are your two options:
- Prompt-first app builders: You describe the app, and a platform like Emergent builds a cross-platform app that runs on Android (and iPhone) without you opening the code. This is the path this guide follows.
- Code-first native tools: You prompt an assistant like Gemini in Android Studio, and it writes native Kotlin code that you review and edit yourself. This suits people who already write code and want a native Android project to keep working on.
I went with the prompt-first path because I wanted a phone app I could test the same day.
Emergent is an AI app-building platform that turns a description into a working app, and its mobile builds run on React Native and Expo, the standard tools for shipping one app to both Android and iPhone.
What You'll Need Before You Start
You don't need much to get started, and none of it involves code. Here's what to have ready:
- An Emergent account: Signup is free and comes with 10 credits, but for a full app build I'd start on a paid plan so you don't run out of credits partway through.
- A clear idea of the core features: Write down who uses the app, the main thing they do in it, and the data it needs to save before you prompt anything.
- A phone with Expo Go installed: This free app lets you open and test your build on your own device before you publish it anywhere.
- A Google Play developer account (optional): You only need this when you're ready to publish to the Play Store, and it carries a one-time registration fee.
Time required: Plan for an afternoon to go from a first prompt to a working build you can test on your phone. Publishing to Google Play adds the store's own review time on top.
How to Build an Android App With AI Using Emergent
I built a habit tracker as my example, since it's the kind of small, useful app most people actually use. Here's the full process, step by step. Emergent walks through similar mobile builds in its tutorials if you want another example to follow along with.
Step 1: Sign In and Choose Your Plan
Go to emergent.sh and sign in. The free plan gives you 10 credits, which is enough to poke around but not enough to build and publish a complete app, so I recommend starting on a paid plan.
For this build, I used the Pro plan ($200/month, or $167/month billed annually, with 750 credits), which you can compare on the pricing page. The initial build, your follow-up changes, and publishing all pull from the same credit pool, and the credits go fast.
Pro's 750 credits give you room to finish without hitting a wall mid-build, plus a larger project context window and Maxx (a deeper-reasoning mode for bigger builds). If you're testing the waters first, Standard ($20/month, 100 credits) is the entry paid tier.
Pro Tip
Write your feature list before you spend a single credit. A detailed first prompt does most of the work, while vague prompts burn credits on back-and-forth.
Step 2: Switch to the Mobile App Build and Pick Your Model
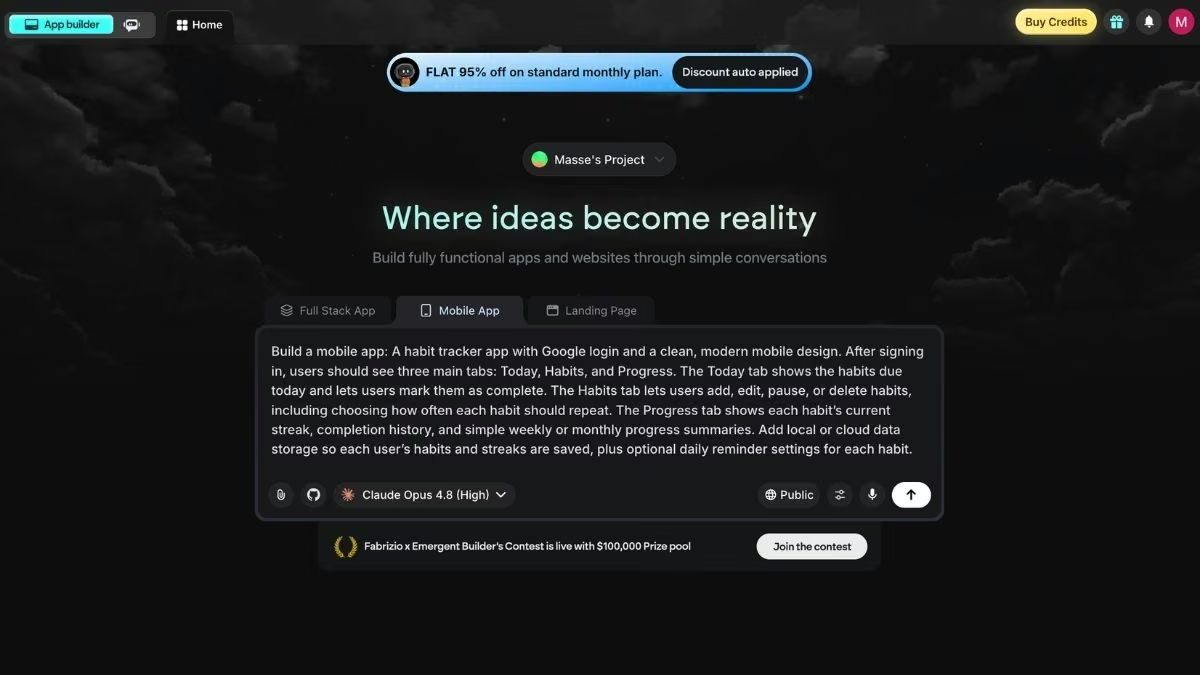
Emergent offers a few build types, and each one points the AI at a different kind of project. Since we're building a phone app, switch to the Mobile App build in the prompt box, then open the model dropdown and select Claude Opus 4.8.
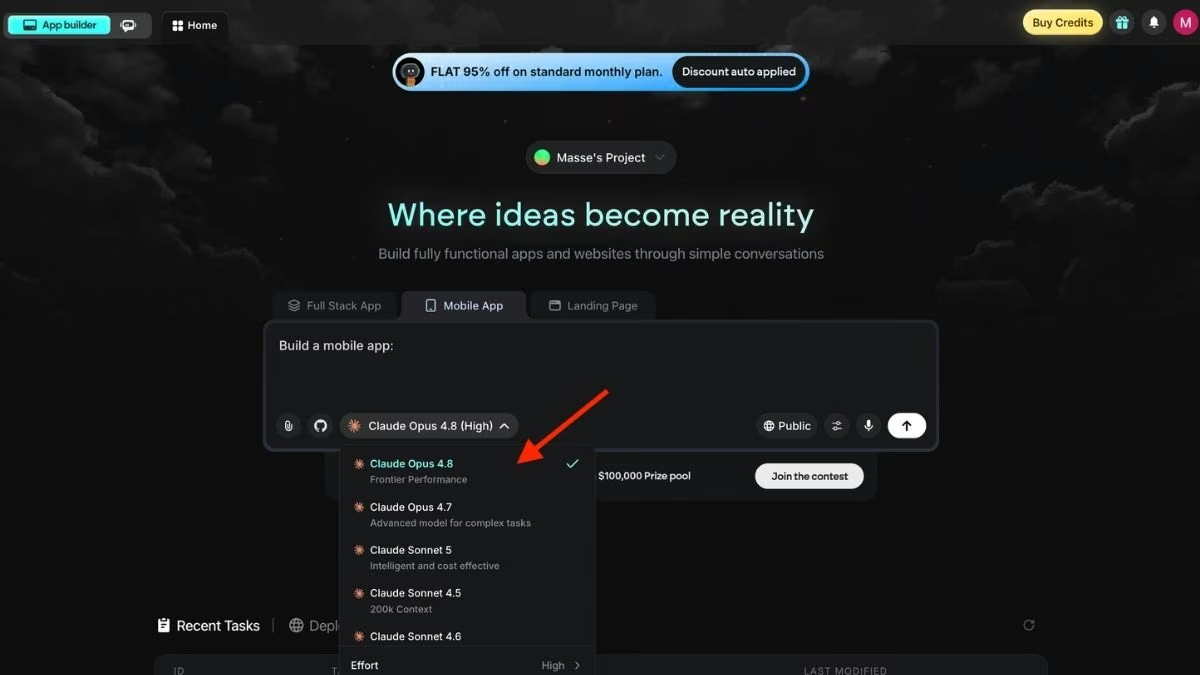
Why this matters: The Mobile App build tells Emergent to generate a React Native and Expo project, which is what lets you preview the app on your own phone and later publish it to Google Play.
Step 3: Write Your First Prompt
A good first prompt names four things: who uses the app, what they do, the data it saves, and the must-have features. This is the exact prompt I pasted in:
A habit tracker app with Google login and a clean, modern mobile design. After signing in, users should see three main tabs: Today, Habits, and Progress. The Today tab shows the habits due today and lets users mark them as complete. The Habits tab lets users add, edit, pause, or delete habits, including choosing how often each habit should repeat. The Progress tab shows each habit's current streak, completion history, and simple weekly or monthly progress summaries. Add local or cloud data storage so each user's habits and streaks are saved, plus optional daily reminder settings for each habit.
Notice how specific that is. Instead of "build me a habit app," it spells out the three tabs, what each one does, and how habits and streaks get saved. That detail is what gets you a usable app on the first pass.
Step 4: Answer the Agent's Clarifying Questions
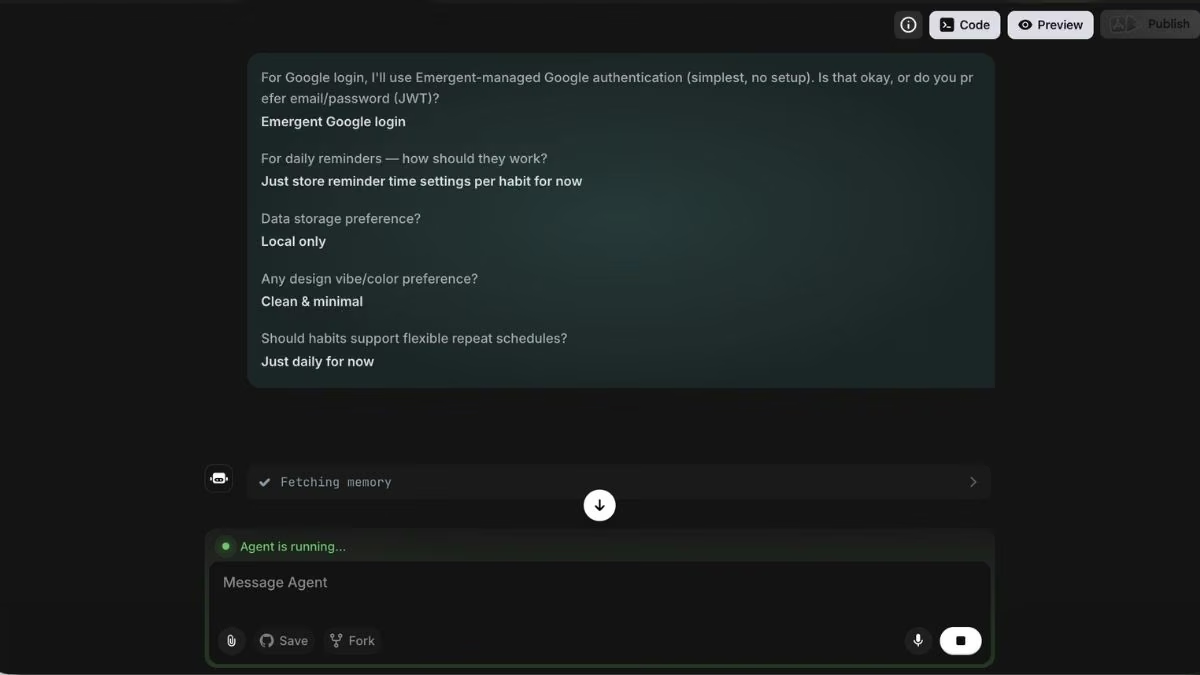
Emergent doesn't jump straight to building. It first asks a few clarifying questions, so it builds the version you actually want. Here are the questions it asked, and my answers:
- Google login setup: "For Google login, I'll use Emergent-managed Google authentication (simplest, no setup). Is that okay, or do you prefer email/password?" I chose Emergent-managed Google login, since it's the fastest way to add a sign-in that works.
- Daily reminders: "For daily reminders, how should they work?" I asked it to just store a reminder time setting per habit for now, rather than wiring up push notifications.
- Data storage: "Data storage preference?" I picked local only, so each user's habits and streaks save on their own device.
- Design vibe: "Any design vibe or color preference?" I answered clean and minimal.
- Repeat schedules: "Should habits support flexible repeat schedules?" I kept it to daily only for the first version, to keep the build simple.
Answering these carefully is where you steer the app. Each choice trims scope so the first build stays focused, and you can always add flexible schedules or push reminders later.
Step 5: Review the Build and Test It on Your Phone
Once you answer the questions, a team of specialized agents handles the planning, design, code, and testing behind the scenes. When it finishes, you get a live preview in the browser.

Don't stop at the preview. Open Expo Go on your phone, scan the code Emergent shows you, and the app loads on your device. Here's what the finished build looked like, walking through it screen by screen.
Getting into the app. The first screens cover sign-in. The app opens on a branded welcome screen ("Small habits, big changes."), moves to a login screen that reads "secured by emergent," and drops you on an empty Today tab once you continue with Google.
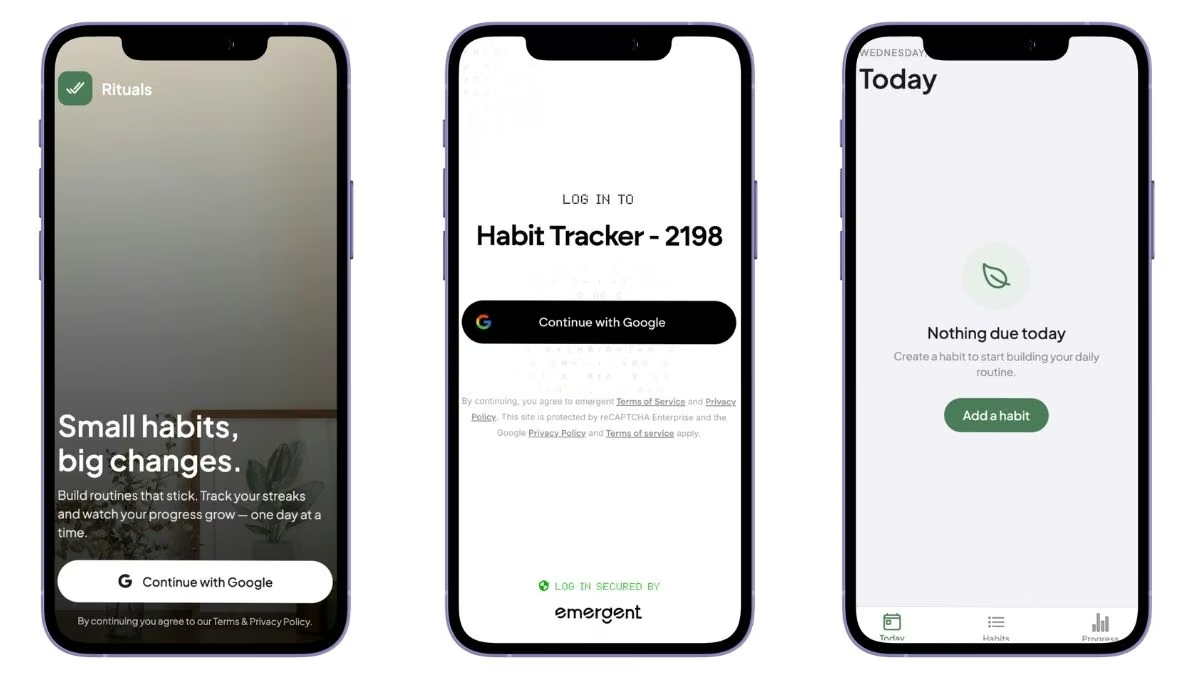
That "secured by emergent" line is the Emergent-managed Google login I picked in Step 4, doing its job, with no sign-in setup on my end. The empty Today tab nudges you to add your first habit, which is where the next set starts.
Creating and checking off habits. The core loop is to add a habit, check it off, and see your list. Tapping Add a habit opens a New Habit sheet where you set the name, pick an icon and a color, and flip on a daily reminder, so each habit's reminder time is stored right here.
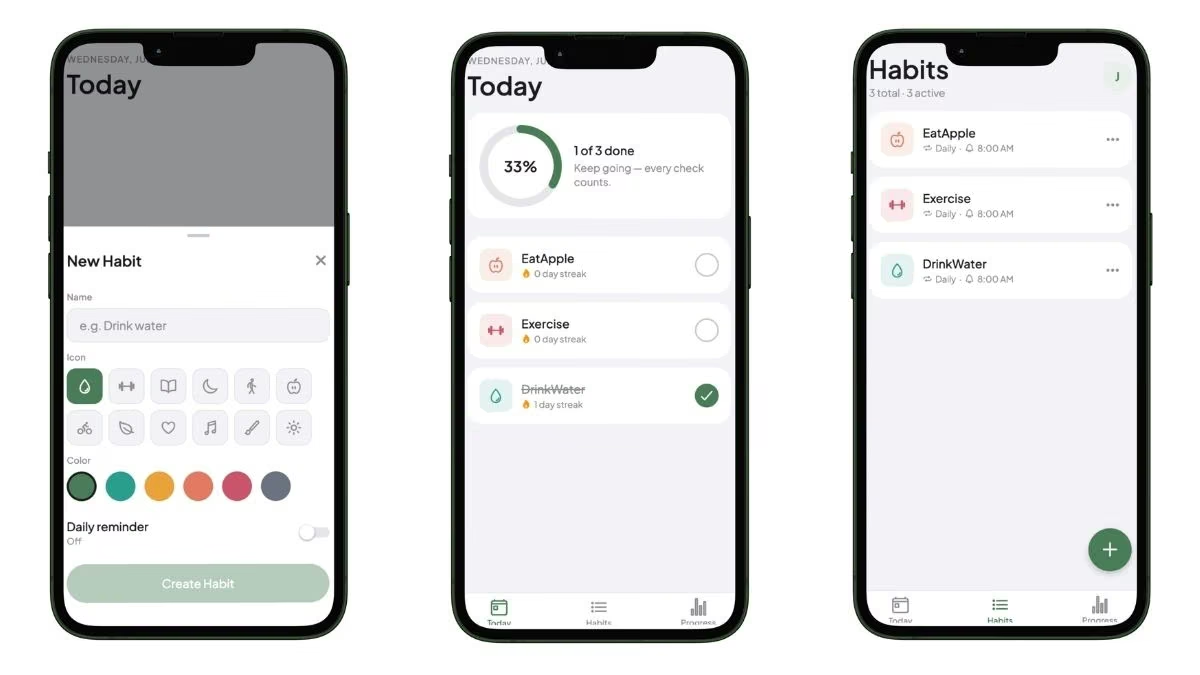
Back on Today, the habits I added (EatApple, Exercise, and DrinkWater) sit under a completion ring that reads "1 of 3 done." Each row shows a streak count and a check circle, and tapping the circle marks the habit complete, which is what moved DrinkWater to a one-day streak.
The Habits tab then lists all three with their daily reminder times and a menu for changes.
Tracking and managing. The last screens are the Progress tab and the habit menu. Progress rolls up your best streak, weekly completions, and a seven-day completion rate, with a bar chart for the week and a per-habit history underneath.
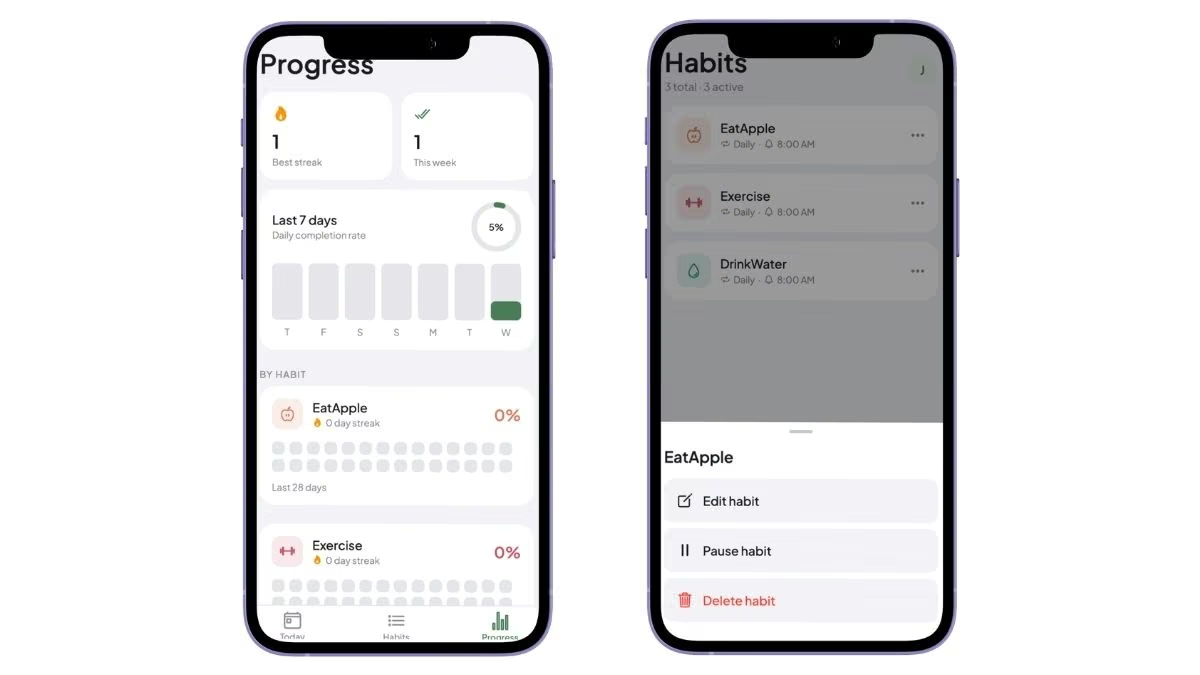
Managing a habit is one tap away. Opening a habit's menu brings up Edit, Pause, and Delete, which covers the add, edit, pause, and delete features from the original prompt.
What to check first: Sign in with Google, add a habit, mark it done, and confirm the streak and the completion ring both move. If a screen looks off, the fix is almost always a clearer follow-up prompt rather than editing any code.
Step 6: Refine and Add Features With Follow-Up Prompts
Your first build won't be perfect, and that's fine. You improve it by describing the change in plain English, one scoped request at a time. A few follow-ups I used:
- Tighten the design: "Make the Today tab cards larger and add a small progress ring next to each habit."
- Add the reminder setting: "On each habit's edit screen, add a time picker so users can set a daily reminder time."
- Fix a rough spot: "The streak resets when I reopen the app. Keep the streak saved between sessions."
Once the basics feel right, the same approach adds bigger features. Since I deliberately kept the first build simple, these are the two upgrades I'd reach for next:
- Real daily reminder notifications: "Turn the stored reminder time into an actual push notification that fires at that time each day, and ask the user for notification permission on first launch." This moves reminders from a saved setting to a notification that pings the phone.
- Flexible repeat schedules: "Let each habit repeat on specific weekdays (like Mon, Wed, Fri) or a set number of times per week, instead of daily only, and update the Today tab to show only what's due." This is the jump from a daily-only tracker to one that fits a weekly routine.
Keep each request small and specific. Asking for one clear change at a time gets cleaner results than dropping a list of 10 fixes into a single prompt.
Step 7: Publish Your App to Google Play
Publishing is a step you start yourself. A mobile app doesn't get a web address the way a website does, so instead of deploying to a browser link, you take the tested build and push it to the Play Store.
Emergent says you can build and submit the app to Google Play through Expo's build service, with no Mac or special software needed on your end.
You'll need a Google Play developer account, which carries a one-time $25 registration fee, and the Play Store runs its own review before your app goes public.
Keep your code: From the Standard plan up, every build syncs to a GitHub repository under your account, so you own what you built and can move it elsewhere.
Common Mistakes to Avoid
Most first-build frustration comes from a handful of avoidable habits. Here are the ones to watch for:
- Writing vague first prompts: "Build me a habit app" gets you a generic shell. Spell out the screens, the core action, and the data it saves, the way the prompt in Step 3 does.
- Treating one prompt as the finish line: The first build is a starting point. Plan to refine it with a few follow-ups before it feels right.
- Skipping the phone test: A screen can look fine in the browser preview and behave differently on a phone. Test in Expo Go before you publish.
- Building on the free plan: With 10 credits, you can run out mid-build. Start on a paid plan if you intend to finish and publish.
My Final Thoughts
Building an Android app with AI is now a legitimate way to ship a phone app in an afternoon, as long as you're building a useful utility and not a graphics-heavy game.
The habit tracker I described in one paragraph came back as something I could sign into, tap through, and test on my own phone the same day.
Before you spend the credits, know the two main limits. Emergent builds a cross-platform app that runs on Android and iPhone from one project, so it isn't a hand-tuned native Kotlin build.
If you're a developer who wants to write and edit native code yourself, a code-first path like Android Studio with Gemini (or a coding assistant like Claude Code) fits better. It also can't publish Apple Watch or iPad apps yet, though it can write the code for them.
For everyone else, the trade is easy: describe the app clearly, answer a few questions, and you get working software instead of a slide-deck idea. That's the part that still surprises me every time.
Ready to Build Your First Android App With Emergent?
If the steps above made this feel doable, this is what Emergent brings to it:
- Skip the code entirely: Describe your app in plain English, and Emergent builds a functioning cross-platform version with the data and logic layer wired up, ready to refine into something you can ship.
- Let a team of agents do the heavy work: Planning, design, coding, and testing run in the background, so one clear prompt produces a full build without extra setup on your end.
- Test on your own phone before you publish: Mobile builds run on React Native and Expo, so you preview the app in Expo Go on your device and fix issues before anyone else sees it.
- Own the code you build: From the Standard plan up, every build syncs to a GitHub repository under your account, so you can export it and move it anytime.
- Take it all the way to Google Play: Emergent can build and submit your app to the Play Store through Expo, so your afternoon build has a path to actual users.

Describe what you want and Emergent builds it. A real, production-ready app you can launch the same day.
- One prompt to build
- Zero code required
- Deploy in minutes