The Emergent MCP Connector lets you build working software directly from ChatGPT. No new platform to learn, no code to write. You describe what your business needs in plain language, and Emergent builds it in the background while you stay in the conversation.
In this tutorial, we'll connect the Emergent MCP Connector to ChatGPT and build a full ecommerce store for a high-end fashion brand from a single chat prompt. If you want the video walkthrough, check it out below!
Essentials to get started
Here are the key things to know before you begin:
- You need a ChatGPT account. The connector works with accounts that have access to the Apps settings.
- You need an Emergent account. If you don't have one, you can create it during the connection process.
- ChatGPT's setup requires enabling Developer mode in the Apps settings. Despite the name, this is a single toggle. You are not writing code or configuring anything technical.
Good to know
- The connector handles building and previewing. For deployment and publishing, you move to the Emergent platform directly.
- The build in this tutorial produced a complete ecommerce store with authentication and payments.
Step 1: Open ChatGPT Settings
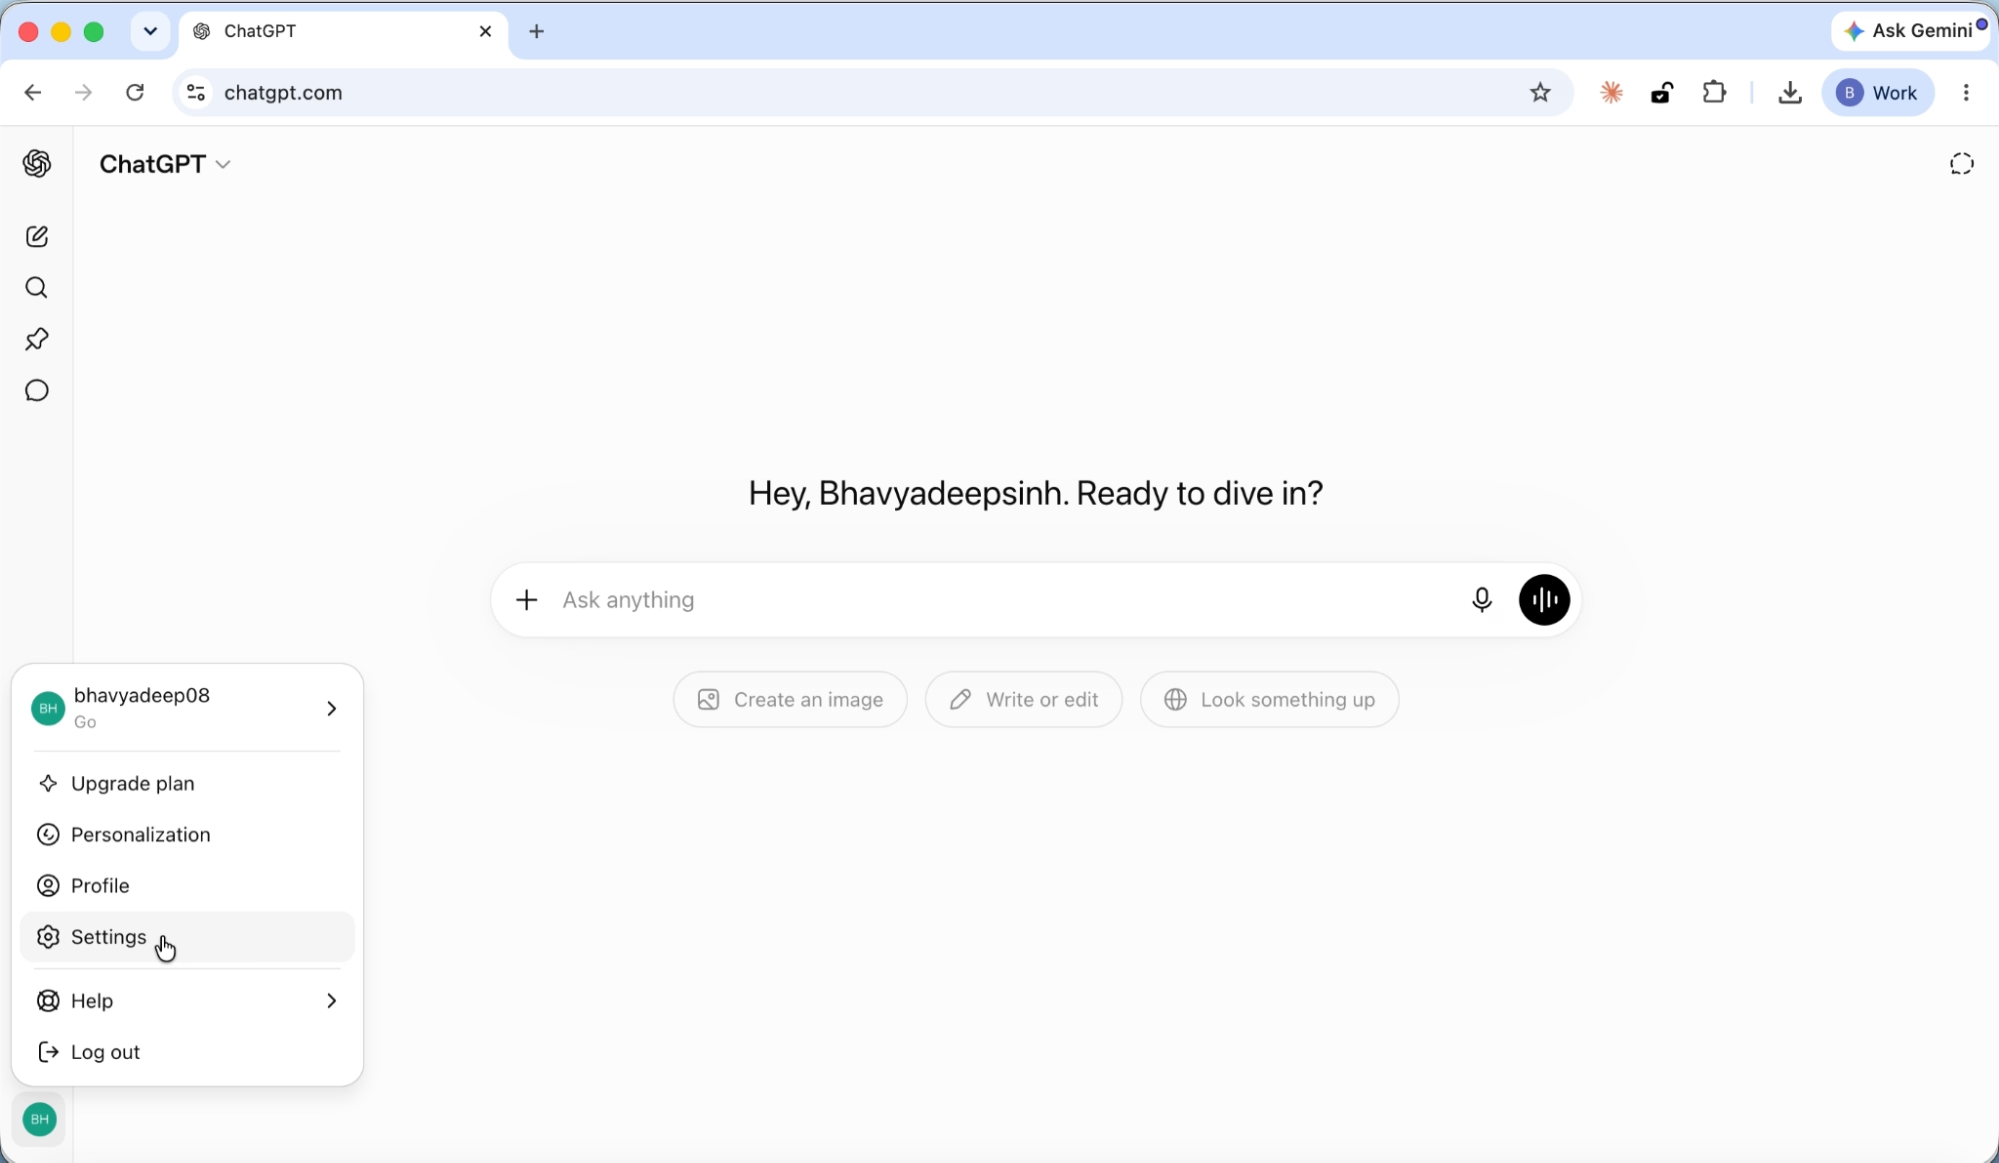
Navigate to chatgpt.com and sign in. Click your profile icon in the bottom-left corner and select Settings.
Step 2: Navigate to Apps
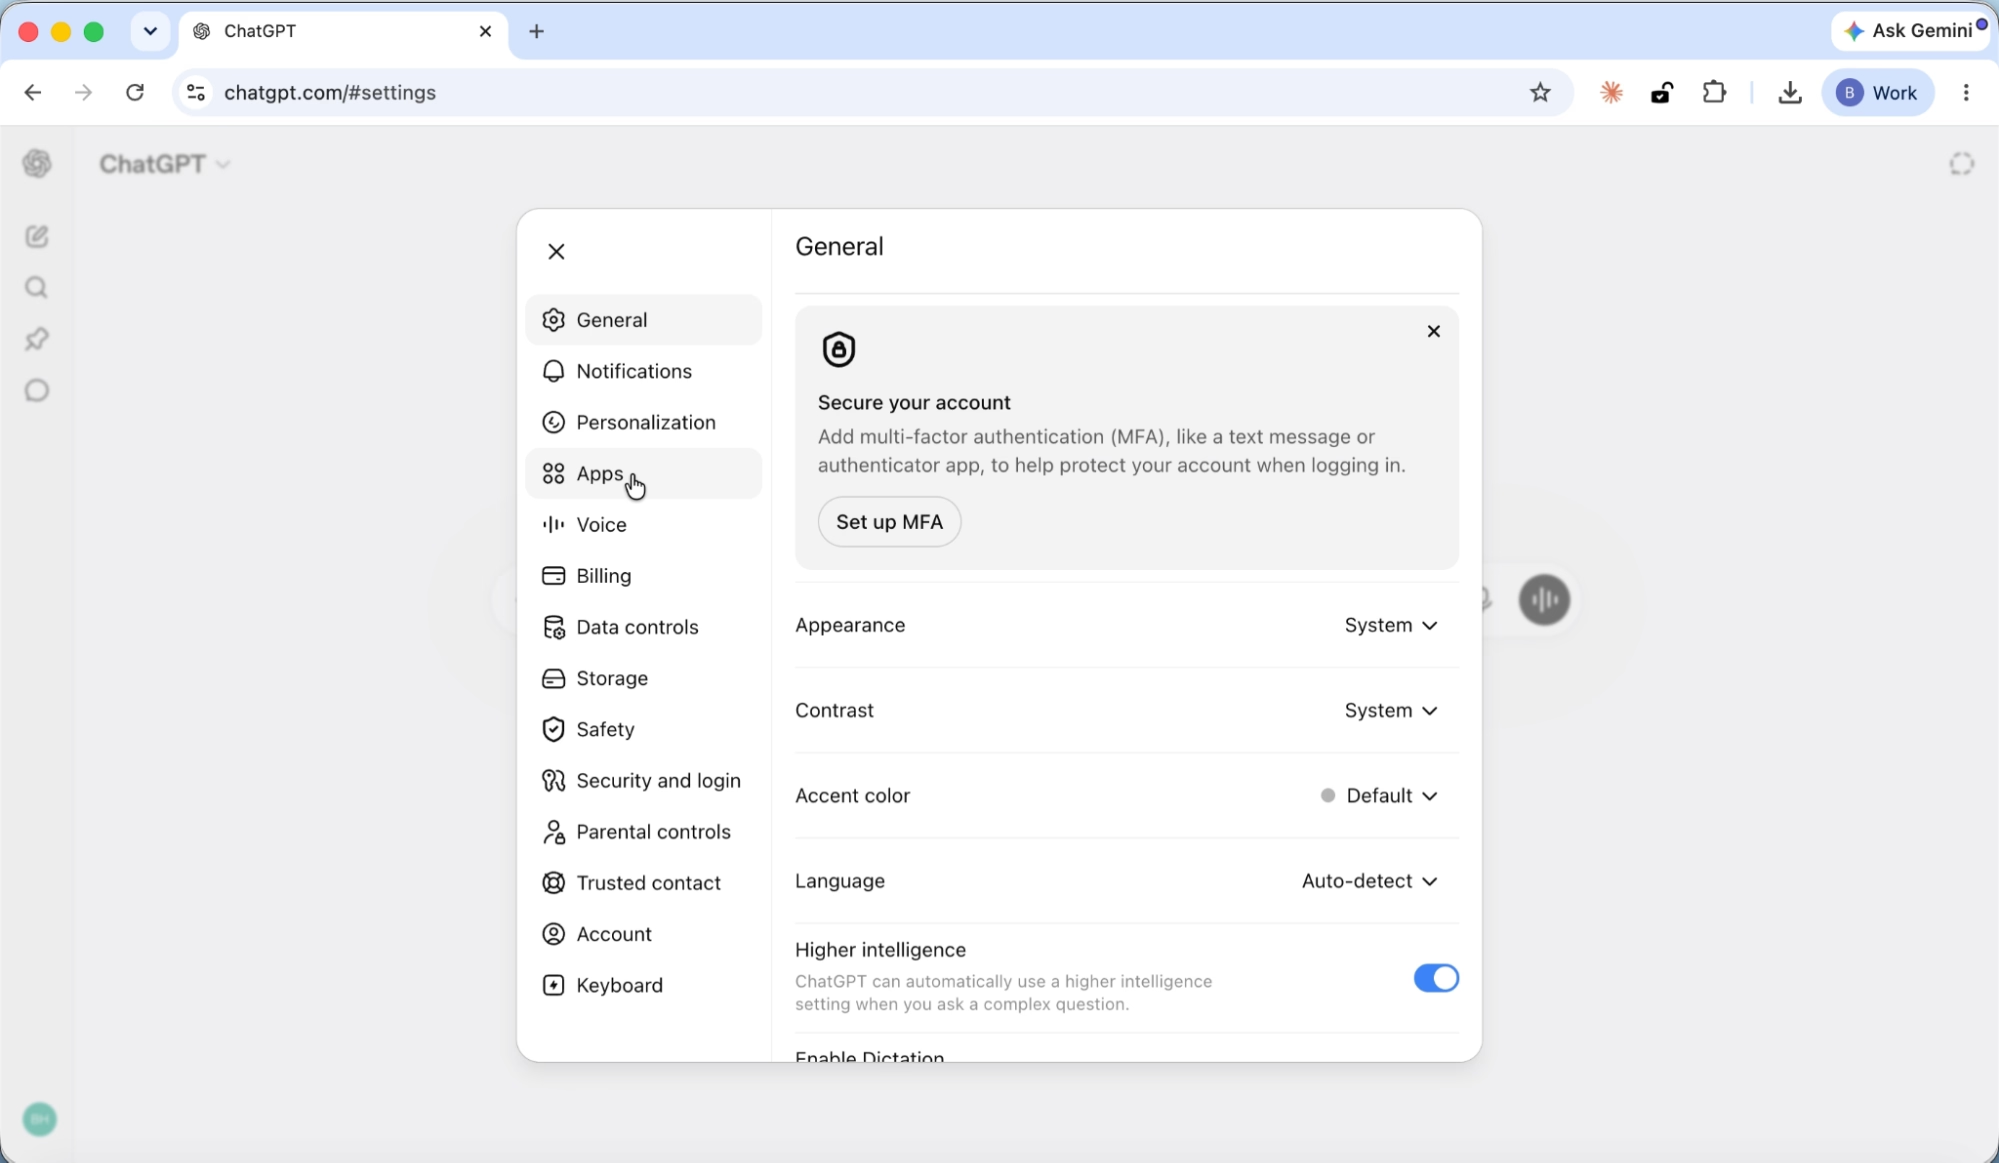
In the Settings sidebar, click Apps. You will see the Apps management page with an Explore apps button and an Advanced settings option at the bottom.
Step 3: Enable Developer mode
Click Advanced settings. You will see a Developer mode toggle with an ELEVATED RISK label.
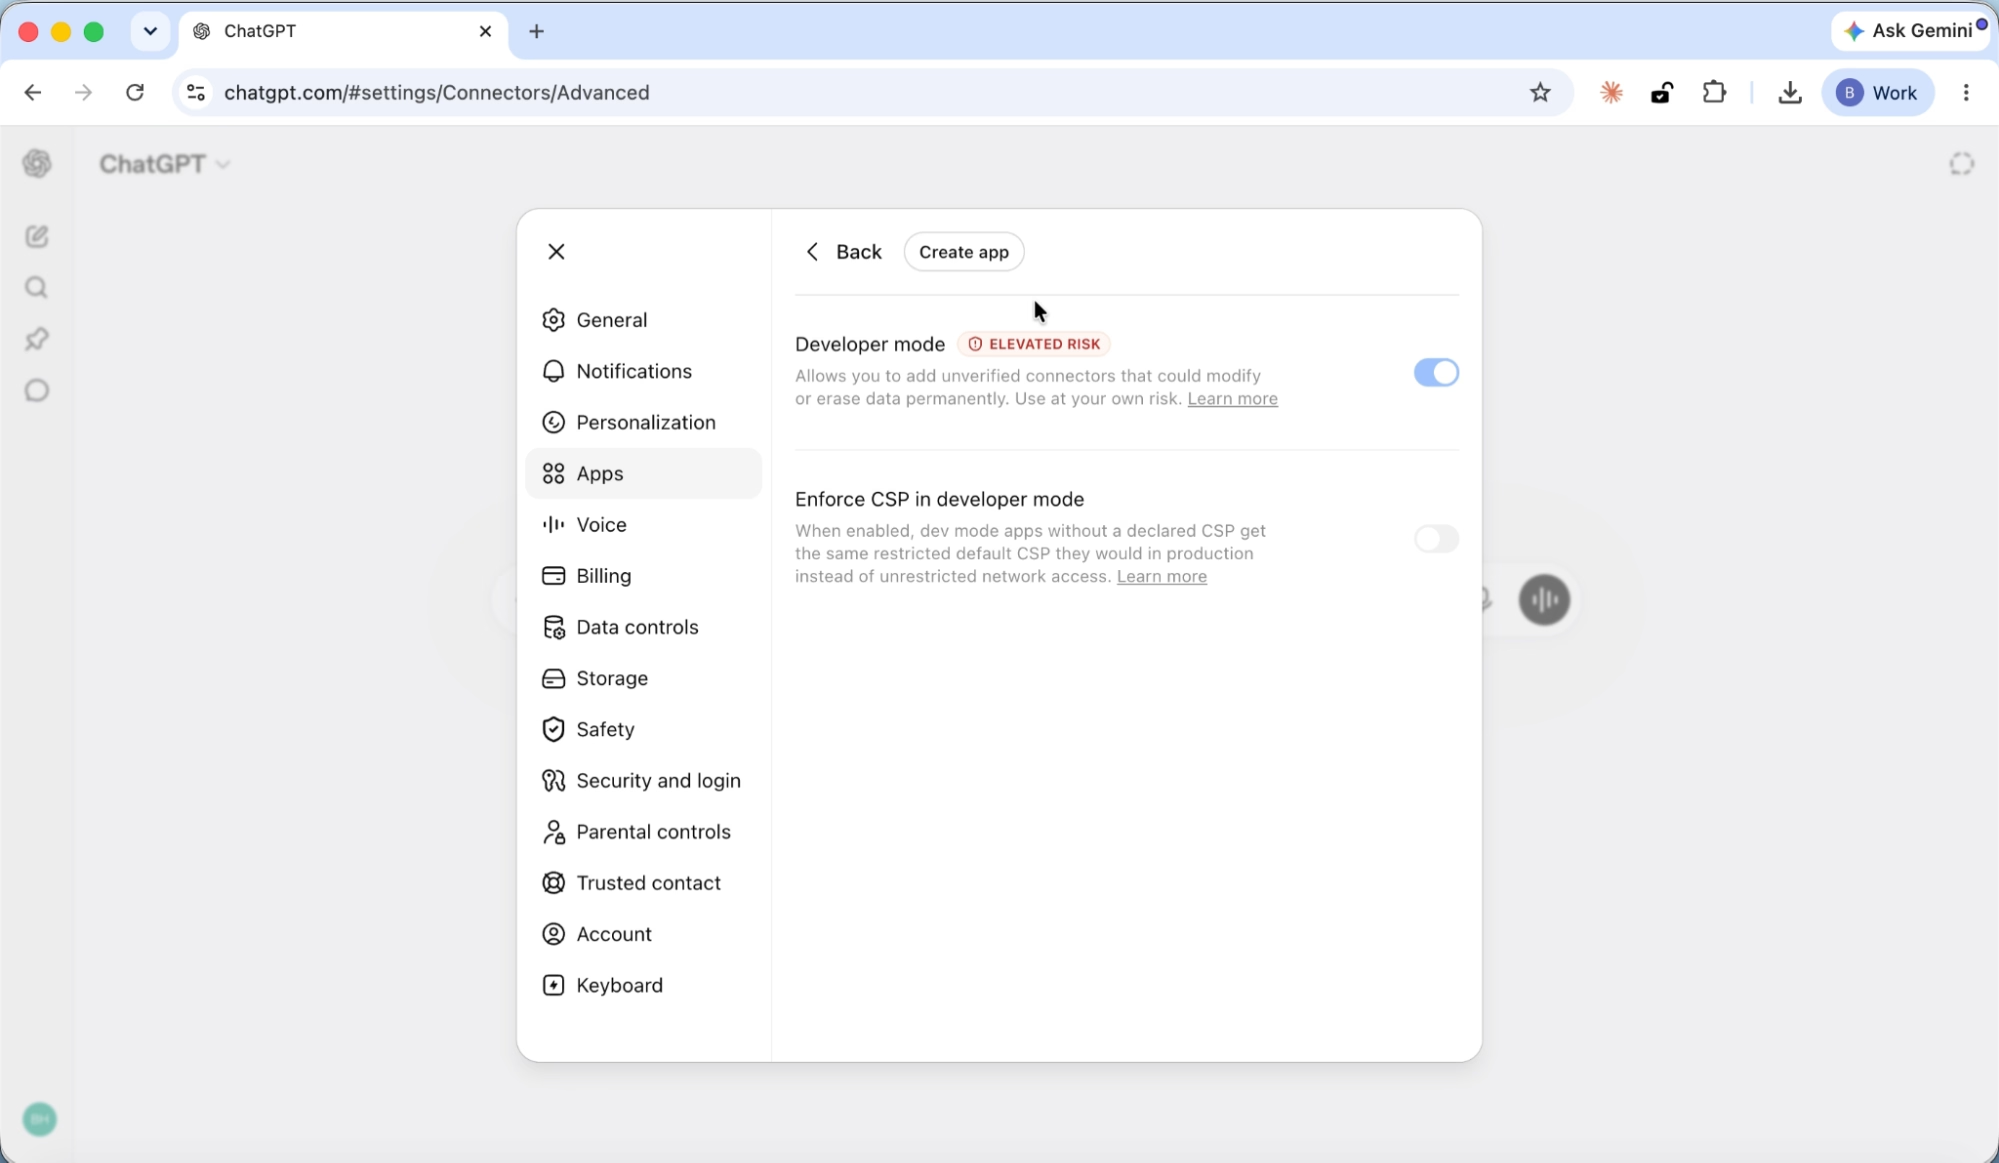
Toggle Developer mode on. The warning label is normal. It simply means you are enabling the ability to add custom connectors like Emergent. This is not a security concern for your account.
Once Developer mode is on, a Create app button appears at the top of the page.
Step 4: Create the Emergent connector
Click Create app. A form appears with the following fields:
- Name: Enter Emergent
- Connection: Select Server URL, then paste https://mcp.emergent.sh/
- Authentication: Select OAuth from the dropdown
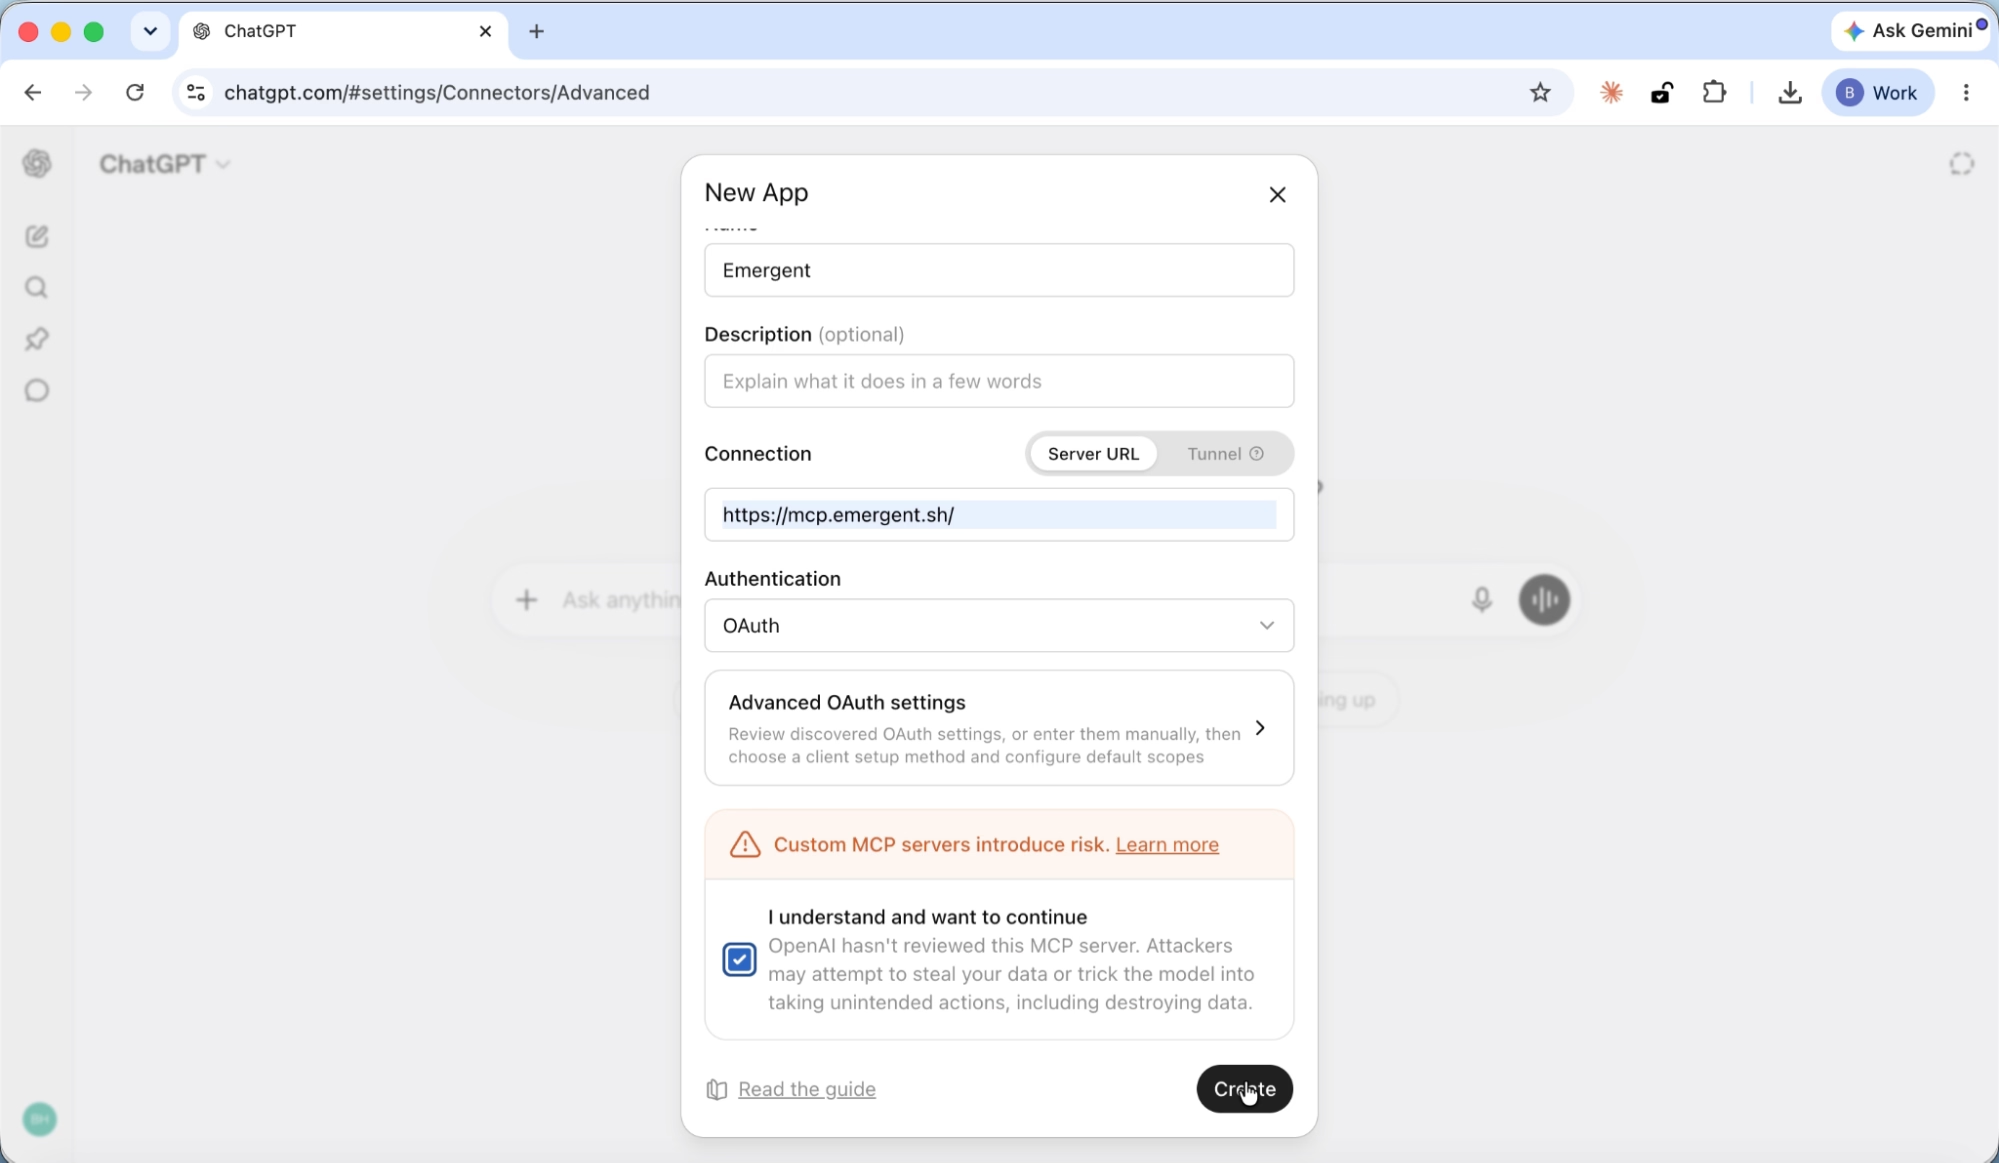
You will see a consent checkbox at the bottom about custom MCP servers. Check the box and click Create.
Step 5: Sign in and approve permissions
An "Add Emergent to ChatGPT" screen appears. Click Sign in with Emergent.
Your browser opens the Emergent sign-in page. Log in, then approve the permissions on the consent screen.

Emergent asks for two permissions:
- View projects and jobs: So your assistant can check build status and list your projects.
- Create and manage jobs: So your assistant can start builds and send follow-up instructions.
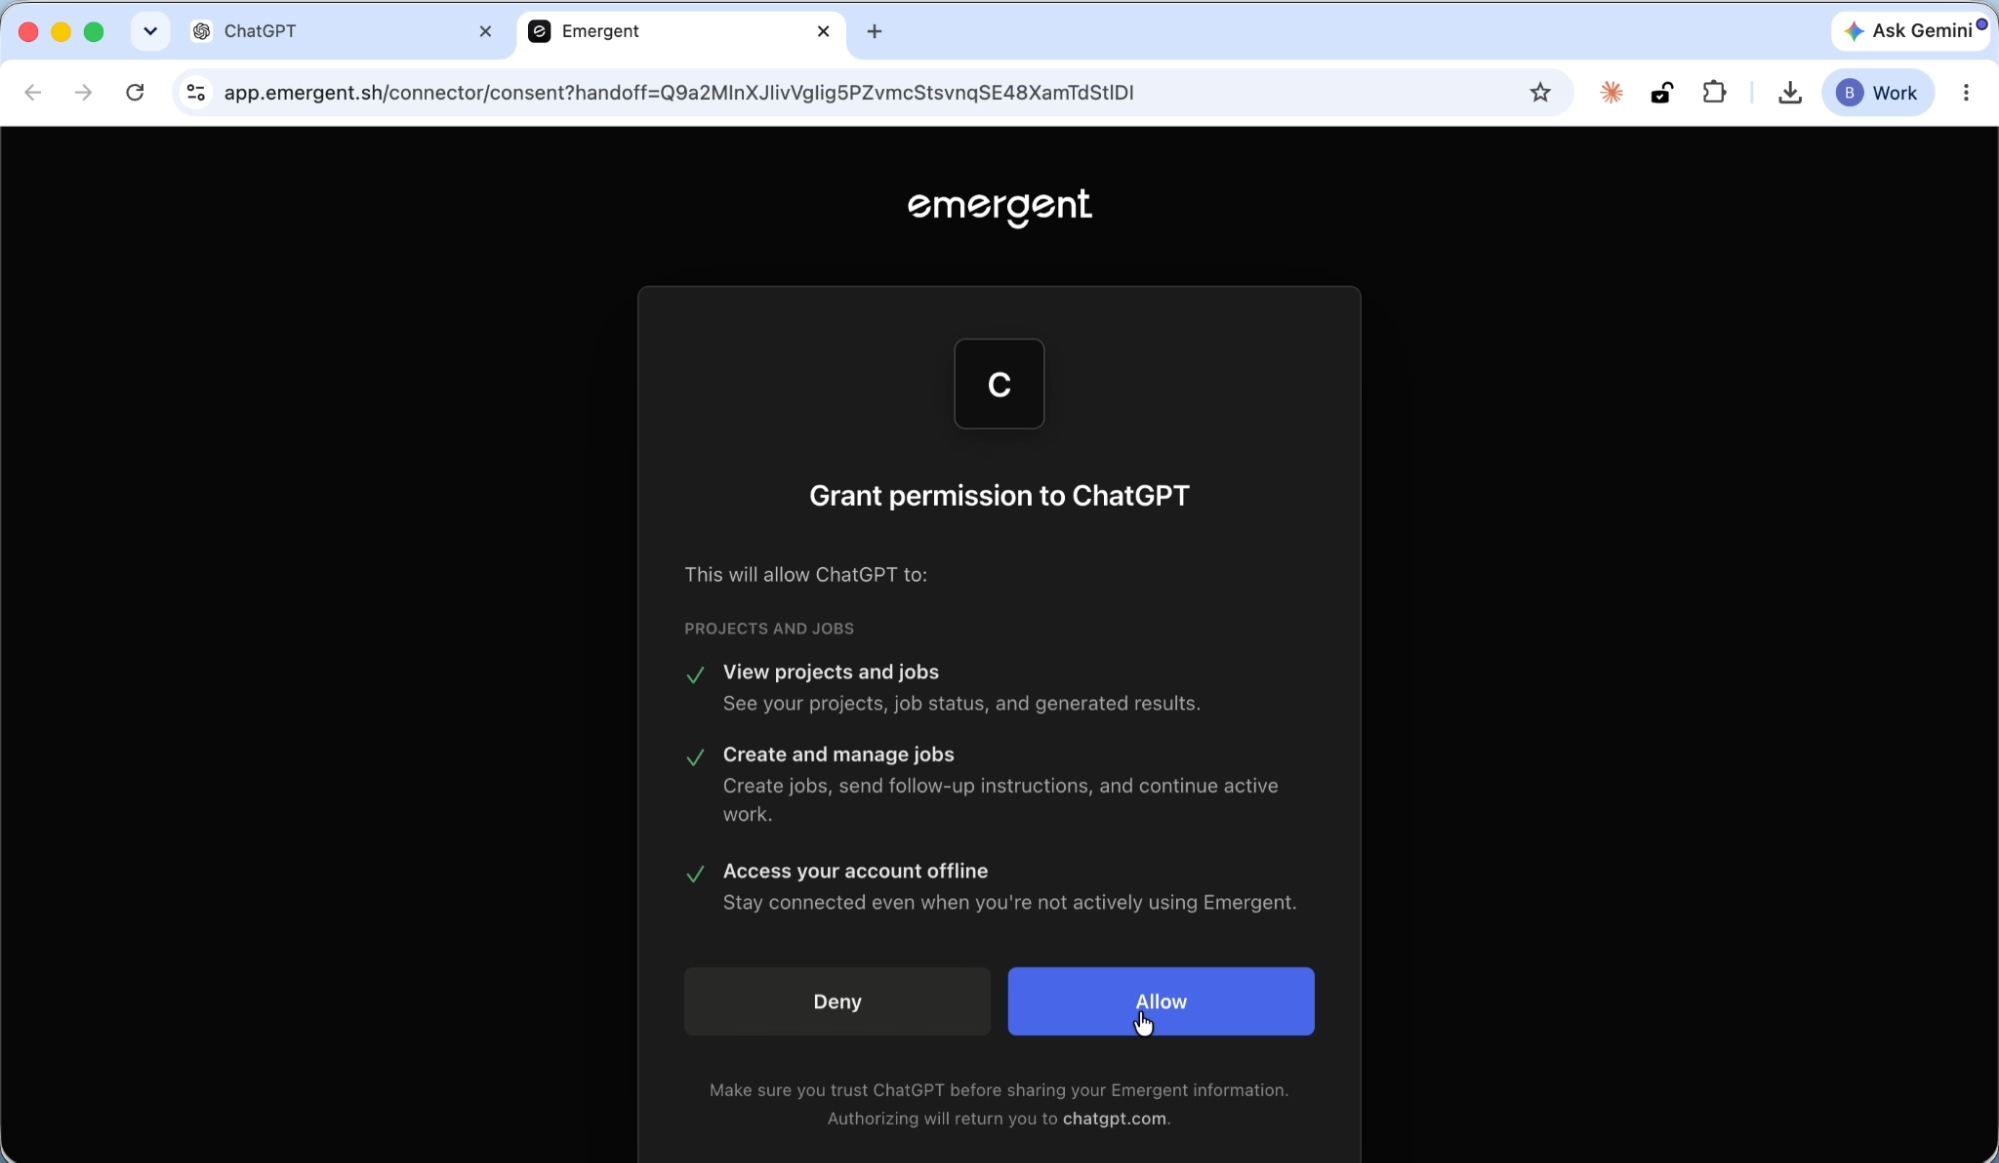
Click Allow.
Step 6: Confirm the connection
You are redirected back to ChatGPT, and a green banner confirms "Emergent is installed."
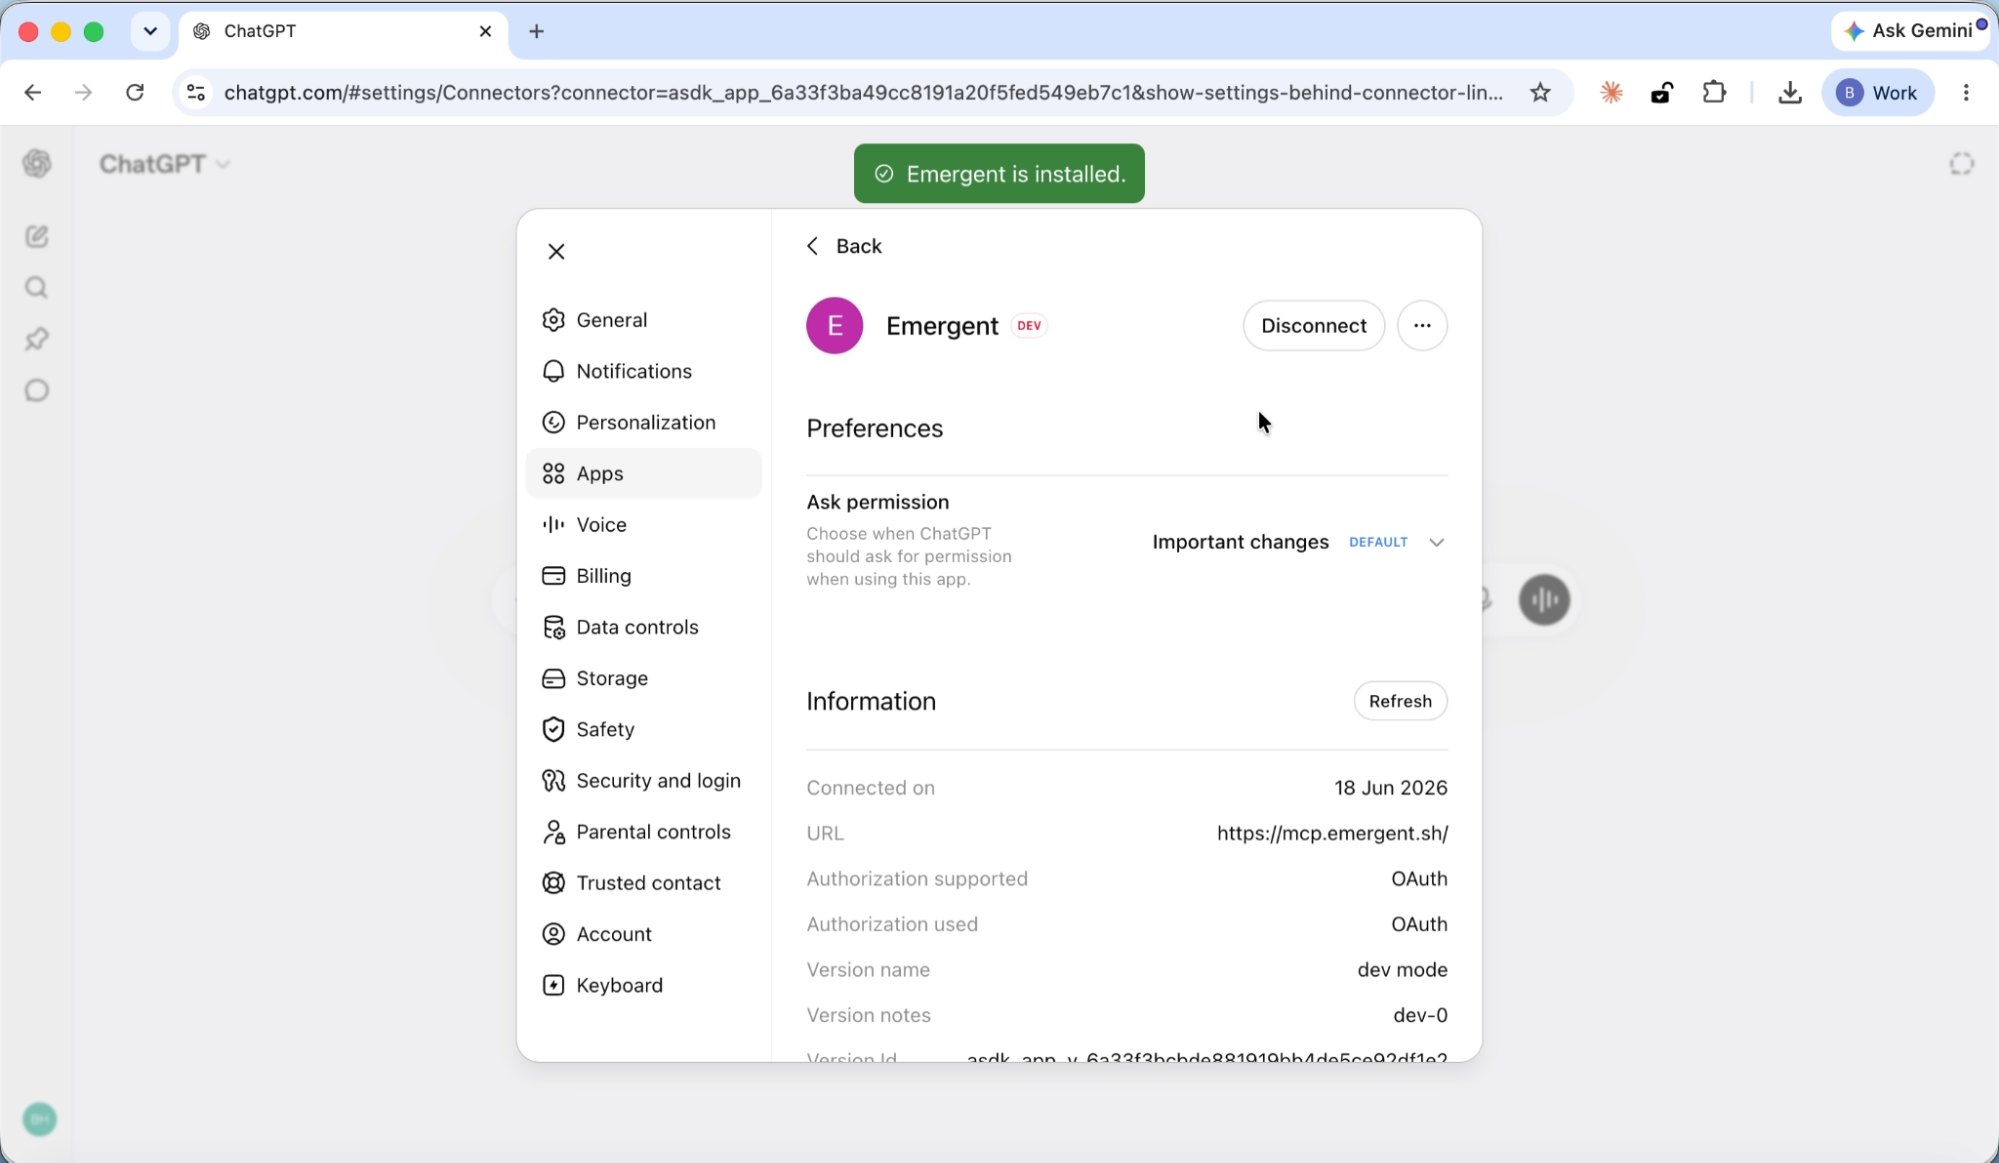
The connector details page shows the connection date, the MCP URL, OAuth authorization, and a Disconnect button if you ever need to remove it.
Step 7: Enter your build prompt
Open a new chat in ChatGPT. Click the + icon in the message box, select More, and click Emergent to enable it for this conversation.
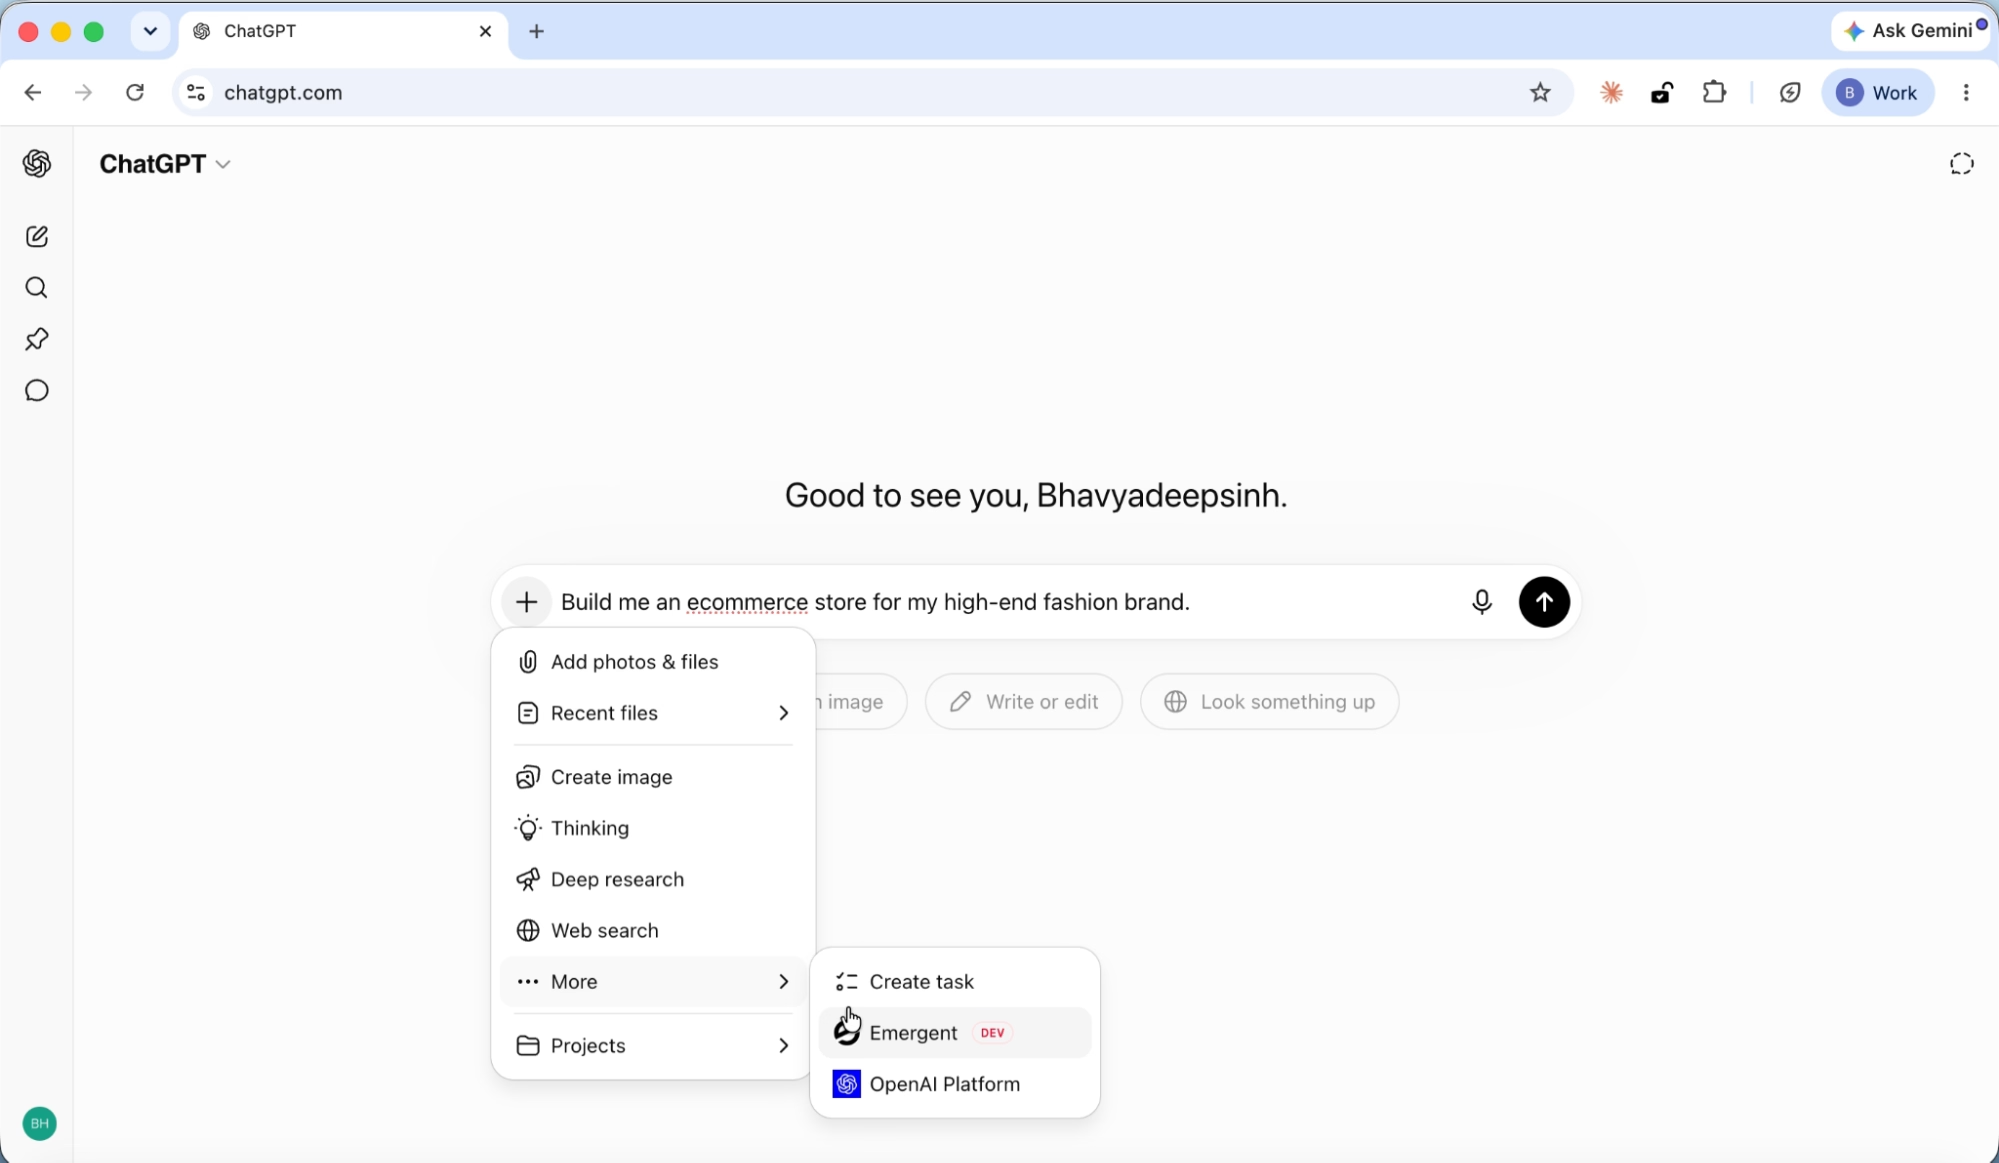
Type your prompt. For this tutorial, we entered:
"Build me an ecommerce store for my high-end fashion brand."
Press Enter.
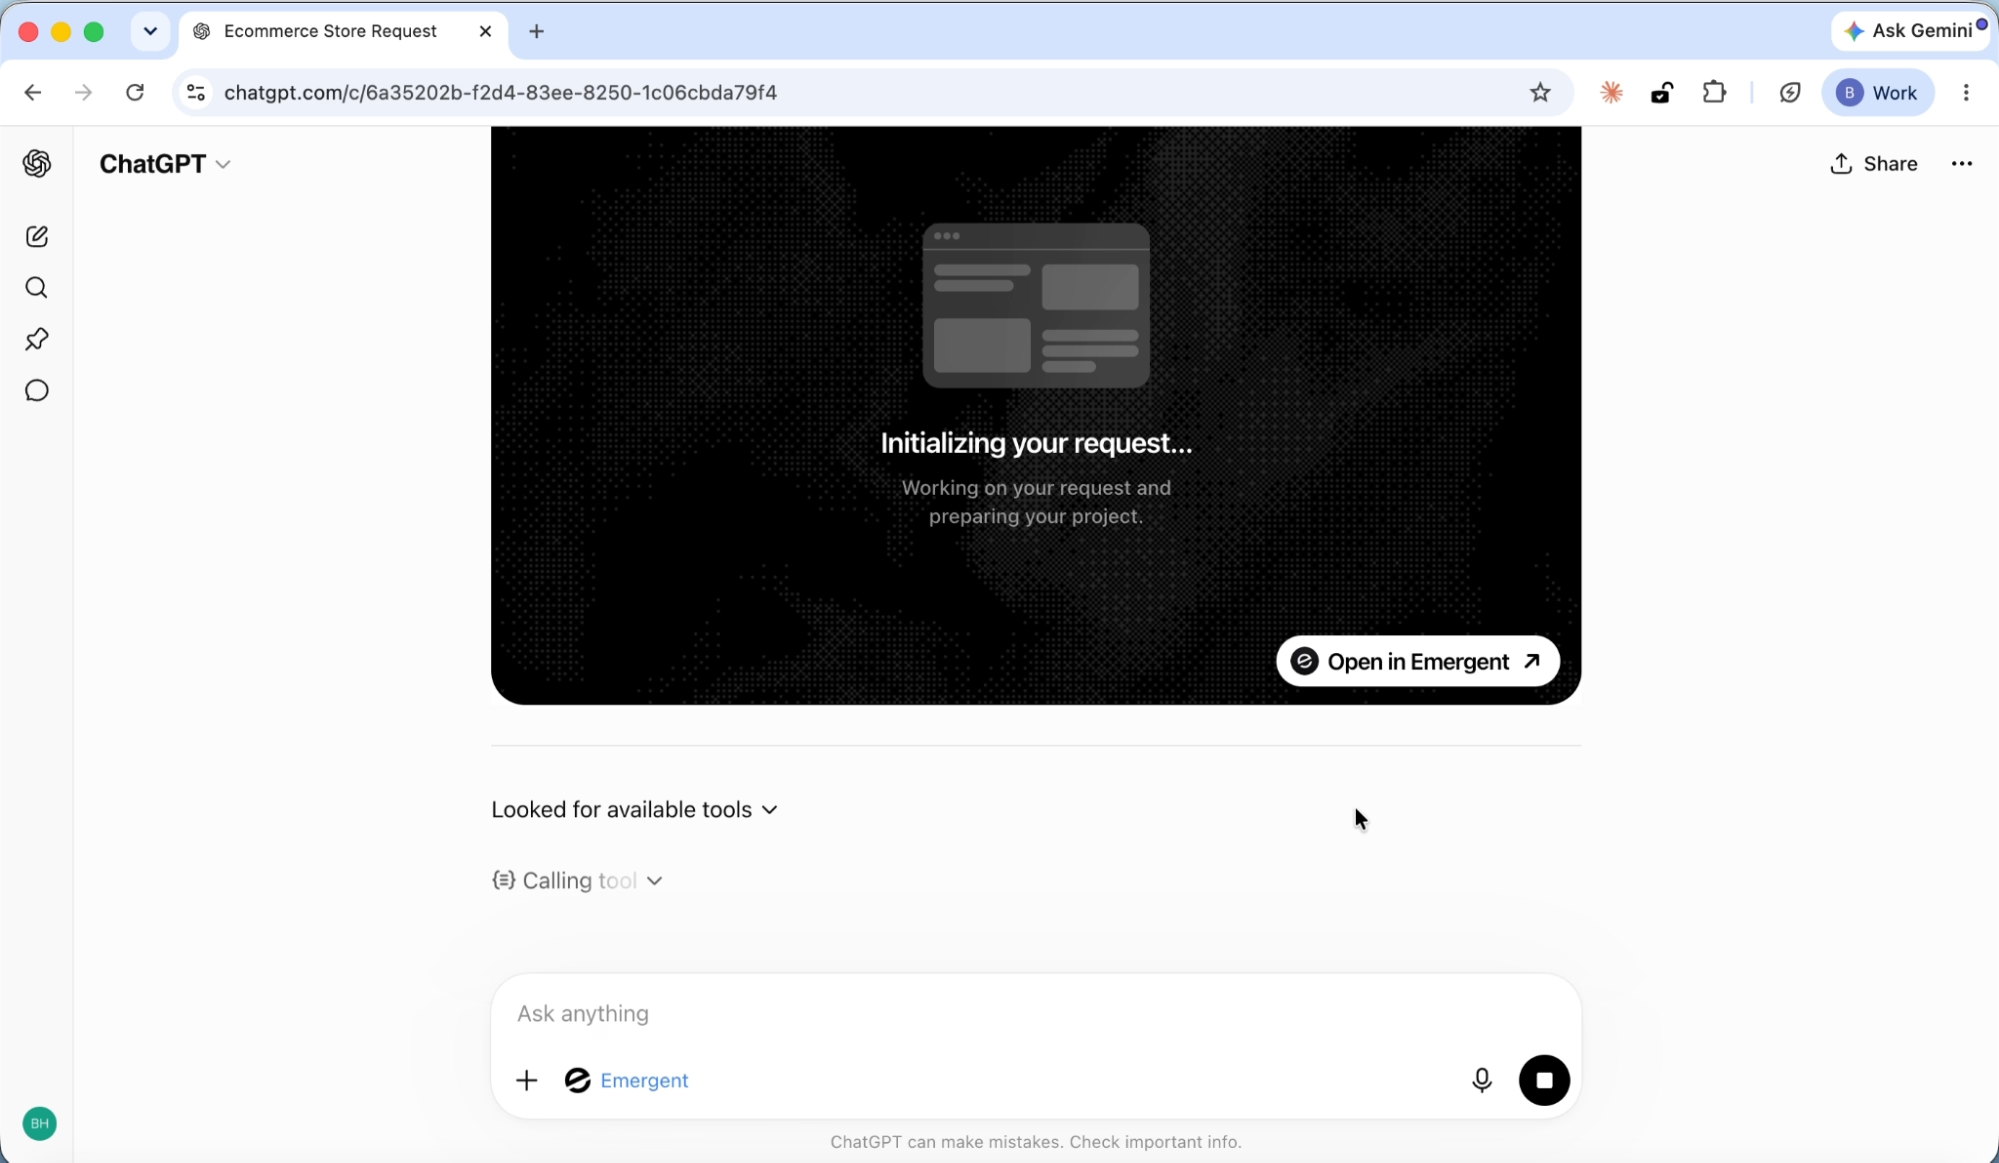
ChatGPT calls Emergent and the build starts. A live card appears showing "Initializing your request..." with an "Open in Emergent" button to view the full project.
Step 8: Answer clarifying questions
Before building, the Emergent agent asks a few clarifying questions through ChatGPT to scope the project correctly.
The first question covers Payment Integration:
- Stripe
- PayPal
- Razorpay
- Multiple payment options
The second question covers Brand Style:
- Minimalist monochrome (black, white, neutrals)
- Elegant luxury (gold/champagne accents)
- Modern bold colors
- No preference (the builder will choose a premium luxury look)
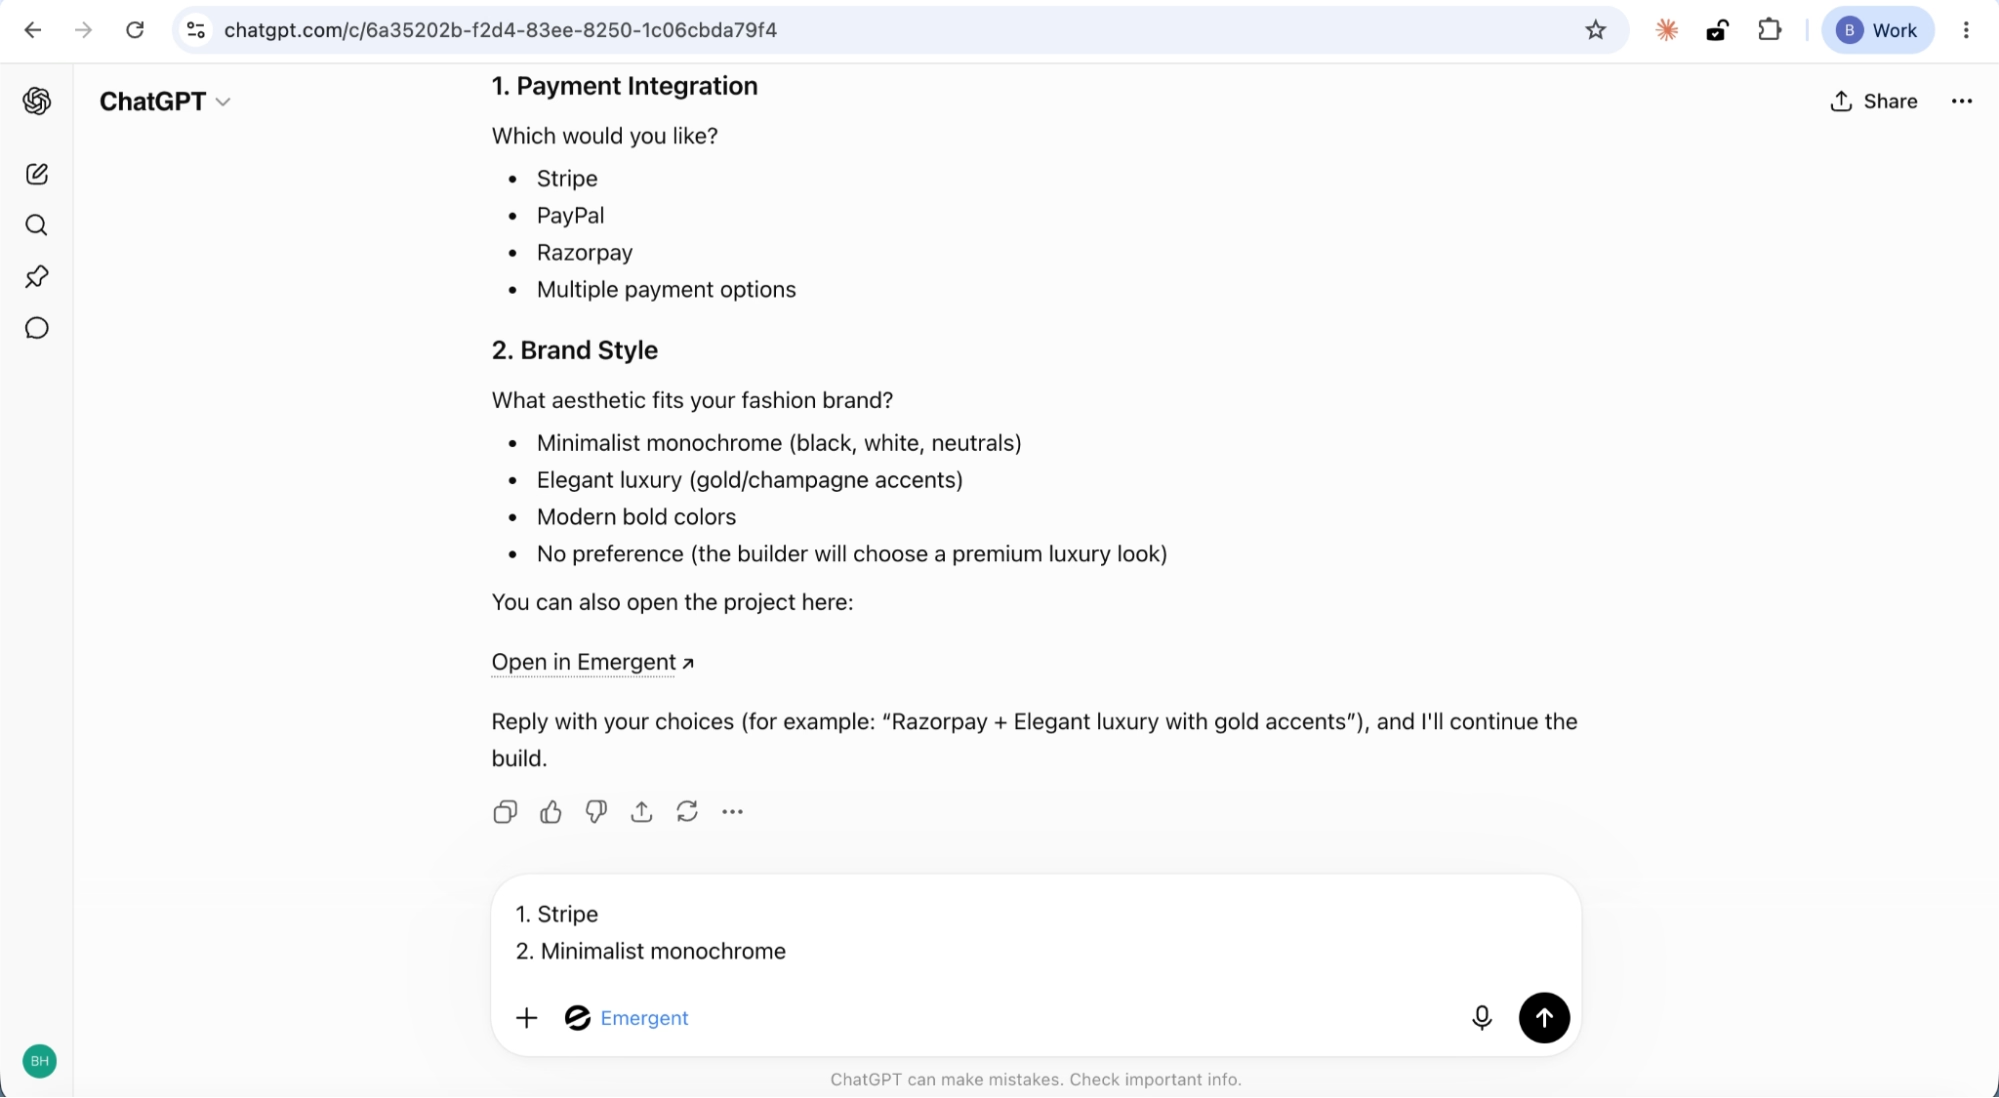
For this tutorial, we answered Stripe and Minimalist monochrome.
Once you reply with your choices, the build continues.
Step 9: Check build status
The build takes a few minutes. When you want an update, ask ChatGPT something like "What's the status of the build?"
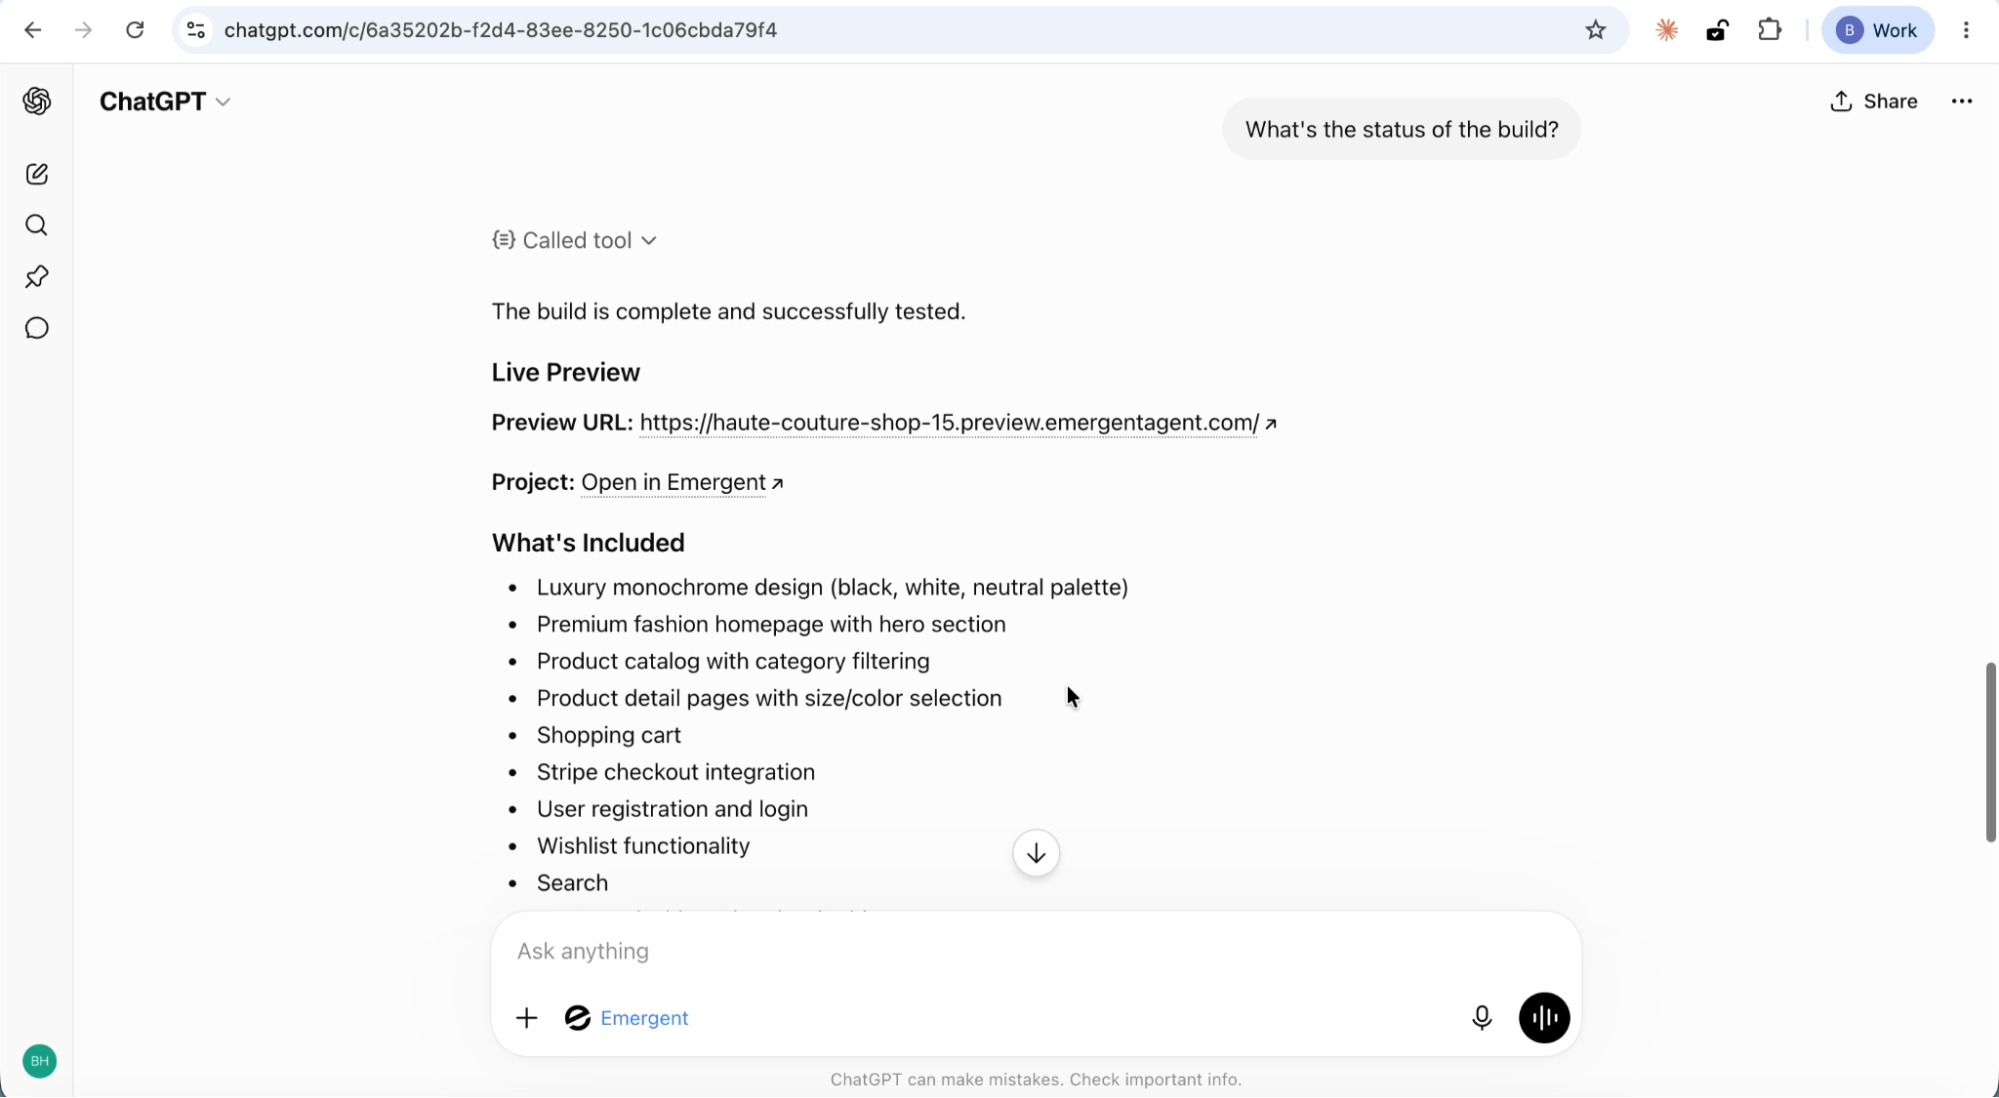
ChatGPT checks with Emergent and confirms the build is complete and successfully tested. It provides:
- A live preview URL for the working app
- A link to open the project in Emergent
- A full list of what was included in the build
- Testing results showing all features verified
The testing results confirm that the complete flow works: registration, browsing, add to cart, checkout, wishlist functionality, product search and filtering.
Step 10: Preview the application
Click the preview URL. This opens a live, interactive preview of your application in a new tab.
The store is called Haute Couture and features a luxury monochrome design with a black, white, and neutral color palette.
Homepage
The homepage opens with a full-width hero banner featuring a fashion model and the tagline "Timeless Elegance, Modern Luxury." Below the fold is an Explore Collection button and a Featured Collection section showcasing top products with images and pricing.

The navigation bar includes links to Shop, Lookbook, Our Story, a search icon, and Login.
Shop page
Click into Shop and you get a full catalog page with a Shop Collection header, a product search bar, and category filter tabs: All, Women's, Men's, Accessories, and Shoes.

The product grid shows items with images, category labels, names, and pricing.
Click any category tab and the grid filters instantly.
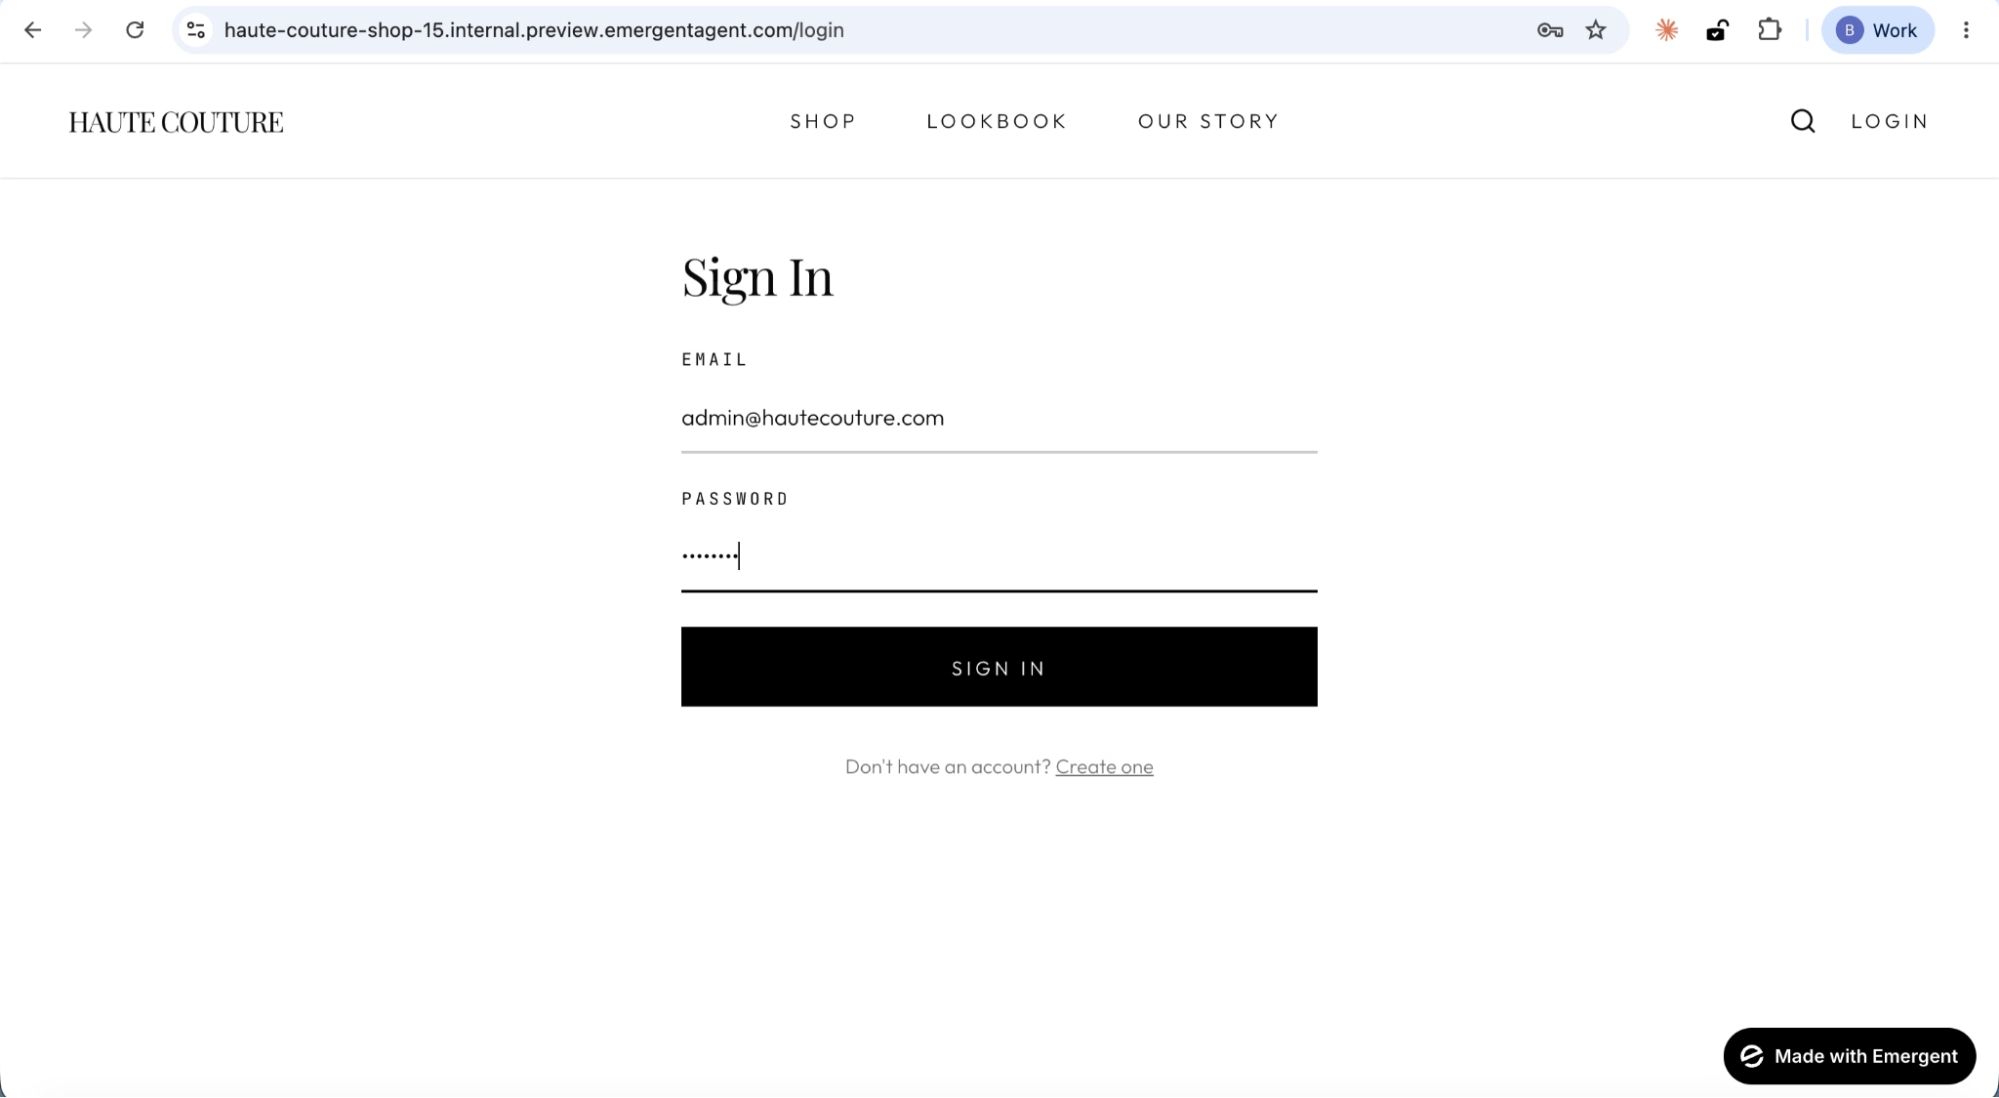
User registration and login
Click Login and you get a full authentication flow. Users can register a new account or sign in with existing credentials.
Once logged in, the navigation updates to show a user icon, a wishlist heart icon, and a shopping cart icon.
Account dashboard
The My Account page displays the user's name, email, and order count. Below that is a Wishlist button and an Order History section.
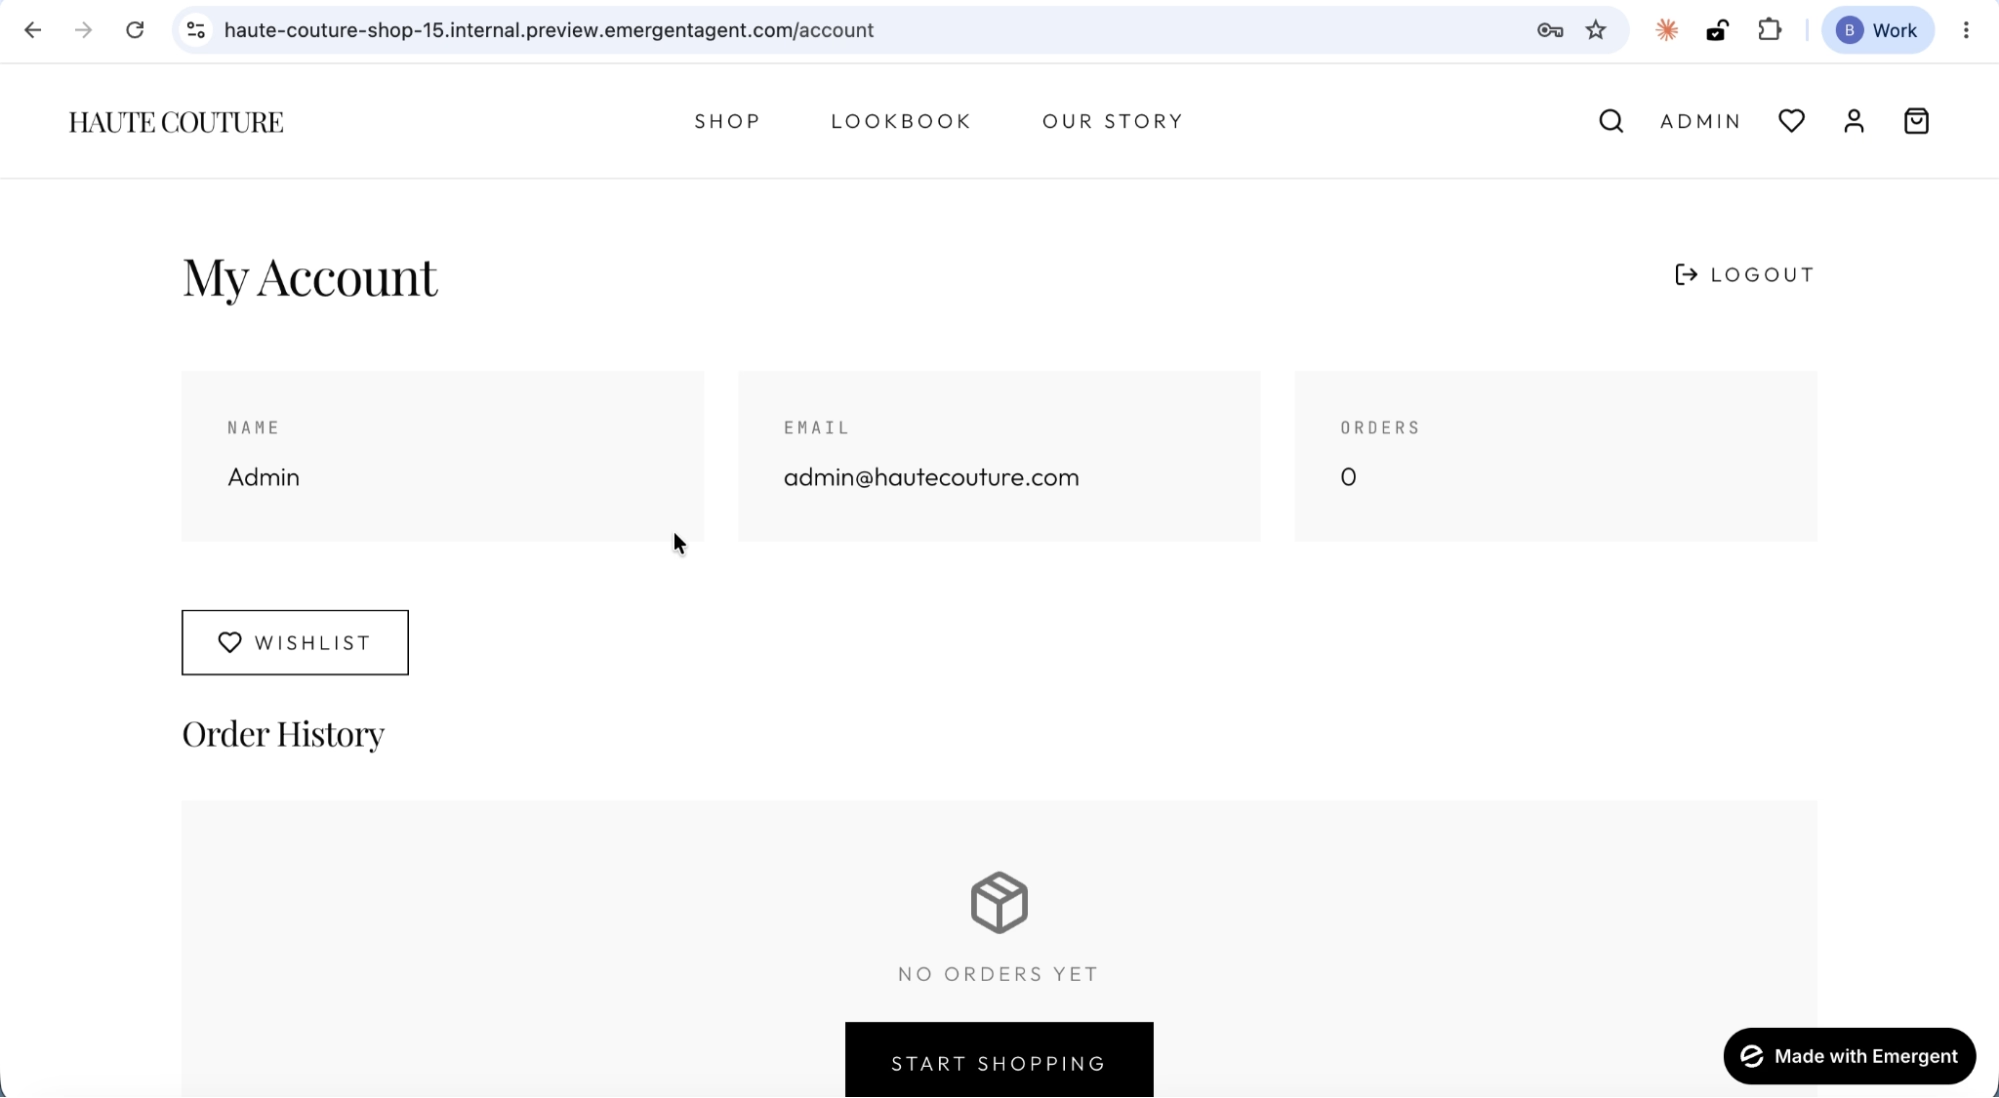
New accounts show "No Orders Yet" with a Start Shopping call-to-action.
Step 11: Explore what was built
The ecommerce store that Emergent built is not a mockup. It is a working application with real infrastructure. Here is what you can do with it:
Browse and shop a full product catalog
The store includes 12 products across four categories (Women's, Men's, Accessories, Shoes), each with product images, descriptions, pricing, and size/color options. Search and filter by category to find products quickly.
Register, log in, and manage your account
Full user authentication with JWT. Create an account, sign in, view your profile, track order history, and manage a personal wishlist.
Add to cart and check out with Stripe
A working shopping cart with Stripe checkout integration. Add products, review your cart, and complete a purchase through a real payment flow.
Save favorites to a wishlist
Logged-in users can save products to a wishlist and access them from the account page.
Search across the entire catalog
A search bar on the shop page lets you find products by name or keyword across the full inventory.
Responsive design
The entire store is mobile-responsive, adapting the layout for phones and tablets without losing functionality.
Stack and infrastructure
The application runs on a complete stack:
- Frontend: React with responsive design
- Backend: Full API with authentication
- Database: MongoDB for persistent data storage
- Authentication: JWT-based user login
- Payments: Stripe Checkout integration
Step 12: Deploy for persistence
To make your store accessible outside of the Emergent preview, head to the Emergent platform and click the Deploy button.
You will see the full deployment pipeline run through:
- Environment Ready — infrastructure provisioned
- Building Package — compiling the application
- Migrate Database — setting up the production database
- Export Secrets — configuring environment variables
- Deploy — pushing to production
- Run Health Check — verifying the deployment
Once everything turns green, your store is live on a real URL.
[SCREENSHOT: Emergent platform showing the deployment pipeline with steps progressing from Environment Ready through Health Checks]
Step 13: Iterate and customize
The store is fully functional, but you can keep talking to ChatGPT to add features or make changes. Example prompts for next steps:
- "Add a dark mode toggle to the fashion store."
- "Replace the stock products with my actual collection."
- "Connect my own Stripe account for real payments."
- "Add high-resolution editorial photography and lookbooks."
- "Add inventory management and order fulfillment workflows."
- "Add SEO-focused collection pages and product schema."
Each request builds on the existing application. The agent preserves everything already working.
Recap
In this tutorial, you:
- Connected the Emergent MCP Connector to ChatGPT by enabling Developer mode and creating a custom app
- Typed a single build prompt for an ecommerce store
- Watched the agent build and test the full application
- Previewed a working fashion store with a product catalog, category filtering, user authentication, Stripe checkout, and wishlists
- Deployed the app to a live URL through the Emergent platform
The entire process required zero code and produced a production-ready ecommerce store from a single conversation on ChatGPT.
Ready to build from your next conversation? Start Building on Emergent.
Emergent turns your idea into a full-stack web or mobile app, no coding required.
 No coding required
- Web & mobile apps
- Deploys instantly


on emergent today