



TL;DR
- Plan before you prompt. Turn every feature into a mini spec before the AI writes a line of code.
- Manage your context on purpose. Stale context is behind most of the AI's confident-but-wrong output.
- Write scoped, specific prompts. Name the goal, the files in play, and what not to touch.
- Build one piece at a time. Screens first, then data, then login.
- Give the AI a style reference. One example file beats a paragraph of style rules.
- Save your work so you can undo it. Commit or save a restore point before any real change.
- Review every diff like a pull request. Check deletions, renamed functions, and new dependencies before accepting.
- Test after every accepted change. Don't stack unverified changes on top of each other.
- Start a fresh chat to diagnose a stuck bug. Ask it to explain the cause before asking for another fix.
- Run a security checklist on every build. Auth, input validation, and secrets need a second pass.
- Save your best prompts as reusable templates. Stop rewriting the same instructions every session.
Most vibe coding sessions eventually hit the same wall. The AI insists a bug is fixed, then the next prompt breaks something else, and the builder is left wondering whether the tool or the approach is the problem.
The builders who avoid this loop run eleven specific vibe coding best practices, covering planning, prompting, and reviewing, each one covered below.
I also ran these practices against a build, GroomRewards, a loyalty app for a dog groomer built from start to finish in 14 minutes, so you can see exactly how they play out in practice.
Why Vibe Coding Best Practices Matter
AI agents build fast, but they lose track of what they're building, and small unreviewed mistakes turn into rewrites, bugs, and security gaps.
Vibe coding means describing the app you want in plain language and letting an AI agent write, test, and revise the code for you.
It’s a term AI researcher Andrej Karpathy coined in a February 2, 2025 post about accepting AI suggestions without reading the diffs.
Accepting all suggestions from your LLM works fine for a weekend project, but it falls apart the moment an app has paying customers, stored data, or a launch date attached to it.
AI output that looks confident but isn't quite right is a documented, industry-wide pattern.
Stack Overflow's 2025 developer survey of more than 49,000 developers found that 45% named AI output that's "almost right, but not quite" their number-one frustration, and 66% now spend more time fixing that almost-right code.
That feeling traces back to a specific cause. AI agents can update one (usually superficial) layer of an app cleanly while leaving other layers out of sync.
An app is made up of three connected layers, and losing track of how they connect is what causes that gap.
The three layers are:
- A data layer, where information gets stored
- A logic layer, which decides what happens to that data
- An interface layer, which shows the result to the user
A simple UI tweak usually stays contained to the interface layer, so an AI agent handles it cleanly.
Asking it to change how something gets sorted or filtered is different, since that touches the data and logic layers too, and a change that doesn't fully carry through both can sit unnoticed until it breaks something else entirely.
The practices below exist to catch that kind of mismatch before it turns into a rewrite.
The 11 Vibe Coding Best Practices to Build Into Every Session
The practices below follow the shape of a real session: how you set it up, how you prompt inside it, how you verify what comes back, and how you carry what works into the next build.
They show up in the order they happened during the build, not in the order they're numbered above. Some practices happen before the others.
1. Plan Before You Prompt
Skipping straight to code is the single biggest reason vibe coding sessions go sideways. Without a plan, the AI makes architectural decisions mid-build, renames parts of the app you didn't ask it to rename, and creates files you'll have to clean up later.
Before writing a feature, ask the AI to outline what it intends to build first. Have it list the files it will touch, the approach it will take, and any assumptions it's making, then review that plan before it writes a single line of code.
What to include before any code gets written:
- The goal, stated as a single sentence
- What the AI should build or change to reach it
- What it should explicitly leave alone
- How you'll know the change worked
Example: Let’s say you’re adding password reset to a login flow
- Goal: Users who forget their password can reset it by email.
- Build: A reset request form, a token-based reset link, and a new-password form.
- Leave alone: The existing login form and session handling.
- Know it worked: A user can request a reset, click the emailed link, and log in with the new password.
Turned into a prompt, that plan could read like this.
"Add password reset to the login flow, covering a request form, a token-based reset link, and a new-password form. Don't touch the existing login form or session handling. I'll know it works when I can request a reset, click the link, and log in with the new password."
A clear engineering ticket follows this same discipline. Context explains the why, a to-do list scopes the work, and a plain description of what counts as finished closes it out. Give an AI agent that same structure, and there's a lot less room for it to fill gaps with the wrong guess.
2. Manage Your Context on Purpose
AI coding agents don't remember your last conversation once it's over, and within a single long session, they can lose track of earlier instructions as the conversation fills up.
Claude Code addresses part of this with a persistent CLAUDE.md file that Claude reads at the start of every session.
Other coding agents use a similar idea. GitHub Copilot automatically reads a repository-wide instructions file, and OpenAI's Codex reads an AGENTS.md file that's become an open, cross-tool standard rather than a Codex-only convention.
Plain ChatGPT, outside of Codex, keeps its version in account settings instead of your repo. Custom instructions apply across every chat, and project instructions apply inside one project, but neither lives in the codebase where your team can review or version it.
What you put in that file, and what you do at the start and end of each session, is what makes it useful.
Three habits keep context from working against you:
- New feature, new session: Carrying an old conversation into a new, unrelated feature means the AI drags old assumptions and file references into work where they don't belong.
- Lean config file: Your tech stack, coding conventions, and mistakes the AI keeps repeating are worth keeping. Play-by-play notes from a bug you fixed three sessions ago are worth cutting.
- Context handoff: Ask something like "Summarize what we built this session, what's still in progress, and anything I should watch out for next time." Paste that summary to open your next session, and you get continuity without dragging in a session's worth of stale back-and-forth.
3. Write Scoped, Specific Prompts
A vague prompt leaves the AI to fill in every gap itself, deciding which files to touch, what counts as finished, and where the task's edges are. A scoped vibe coding prompt settles those questions upfront.
For instance, "Add error handling to my app" sounds simple, but it hands the AI a blank check to touch files you never meant for it to open.
A scoped prompt does three specific jobs:
- Names the specific outcome, not the general area
- Names the exact files or components in play
- States what's off-limits and any edge case the AI should handle
Example 1, a frontend fix:
Vague: "Make the signup form better."
Scoped: "Add inline validation to the email and password fields in the signup form. Only modify the SignupForm component. Don't touch the submit handler or the backend route."
Example 2, a backend fix:
Vague: "Add an endpoint for user data."
Scoped: "Add a GET /api/users/:id endpoint in the users router that returns id, name, and email. Return a 404 if the user doesn't exist. Don't add authentication to this route; that's a separate task."
Both scoped versions give the AI a target it can verify against directly. When something goes wrong, you also know where to look, instead of scanning through every change across the whole codebase.
4. Build One Piece at a Time
Asking the AI to build a whole app in one prompt means the layout, the data, and the login all have to come out right at the same time. When something's wrong, you won't know which of the three caused it.
Building in a fixed order instead keeps each piece small enough to check before the next one starts.
A build order that keeps each piece checkable:
- The screens and layout first, with placeholder content standing in for real data
- The data connections next, once the layout is right
- Login last, so it only gets added once everything it protects already works
Say you're building a customer dashboard with order history and a profile page. The first prompt covers only the layout:
"Build the dashboard layout with order history and profile sections, using placeholder content for now."
Once that looks right, the second prompt connects real data:
"Connect the order history and profile sections to the actual data."
Once that works, the third prompt adds login:
"Add email and password login, and require it before the dashboard loads."
Each prompt produces a diff small enough to check on its own. One prompt covering all three gives you one diff where a mistake in any part is easy to miss.
5. Give the AI a Style Reference
Telling the AI what your coding style looks like in words rarely gets you code that matches it. Pointing it at a file already in your project works better, because the agent can see the real structure.
Agentic coding tools like Claude Code, Cursor, and Emergent can already open any file in your project once it exists there.
A few examples of what to point at:
- An existing component or screen, when a new feature should look and feel consistent with what's already built.
- A specific function or handler, when you want the same error handling, validation, or logic pattern reused elsewhere.
- A naming or file structure convention, when new files should follow how the rest of the project is organized.
Instead of "always use consistent error handling," point at a file that already does it right.
"Before building this, look at how the checkout component handles errors. Match that same pattern here."
The same idea works for layout instead of describing spacing and colors in words.
"Match the layout and spacing of the settings page for this new screen."
One reference file carries more signal than several sentences of stylistic rules, and it holds up better as the codebase grows.
6. Save Your Work So You Can Undo It
Every prompt that changes your code is a bet that the change works. Without something saved beforehand, a bad result means untangling the code by hand to figure out what changed and reverse it yourself.
Two habits make that bet safe to take:
- Commit to GitHub, or save a restore point in your tool, before any change bigger than a small tweak
- Confirm the restore point actually opens before you need it, not during a crisis
Save the restore point first, then make the change. Skipping that order is what turns a bad prompt into an afternoon of manual cleanup instead of a ten-second rollback.
7. Review Every Diff Like a Pull Request
A diff is the exact set of lines an AI agent added, changed, or deleted in your project. A pull request is the process professional teams use to have someone review that diff before it becomes part of the real codebase.
Most vibe coding tools show you this automatically, often as an expandable entry in the build chat that you can click to see what changed.
Treating your own review the same way means reading the highlighted lines yourself before accepting them, instead of only checking whether the app still loads.
A quick way to review any diff:
- Scan the red lines first. Anything deleted is a bigger risk than anything added.
- Check the list of changed files. A change that touches more files than you expected is worth a second look.
- Compare what changed against what you asked for in your prompt.
- Only after that, open the app itself and confirm the feature works.
Some changes look harmless in a diff even when they aren't.
Watch for these every time:
- Deleted files. The AI might decide a file looks redundant and remove it, even if something outside its view still depends on it.
- Renamed functions. If the AI renames something another part of the app still calls by its old name, that call breaks.
- New dependencies. Check what got added to your package file, and watch for hardcoded keys or credentials slipping into source code.
- Data structure changes. Any edit to how your data is stored or organized needs a second look before it touches real records.
Once you've gone through all of that, use one more prompt to catch whatever your manual scan missed.
"Summarize what changed, list any files you deleted, and flag anything that could break functionality I haven't tested yet."
8. Test After Every Accepted Change
A feature can look finished in the app's preview and still be broken underneath. Always test the app by clicking through it yourself, the way a real user would.
What to do in your test:
- Try the feature with normal input first, then with something odd, like an empty field, a search with no results, or an unusually long entry.
- Check it on both desktop and mobile if your app needs to work on both.
- Refresh the page or reopen the app and confirm the change is still there.
- Test the feature alongside the ones near it, since a change in one spot can quietly break another.
Clicking through the app catches most problems, but not everything shows up on screen.
Type checks catch mismatched data before it causes a crash, and a linter catches messy or risky code. Many coding agents run both for you as part of the build, so you don't need to know how to use them yourself.
Whichever kind of check you're running, don't wait too long to do it. Three changes stacked up before you notice something's wrong means you won't know which one caused it, and a five-minute fix can turn into an afternoon of untangling.
9. Start a Fresh Chat to Diagnose a Stuck Bug
A bug that survives two or three fix attempts in the same chat usually gets worse, not better. The AI ends up patching its own patches, and the conversation fills with dead ends that make the next attempt less reliable than the last.
This is different from the context handoff in Practice 2. That handoff is for continuing work smoothly. Here, the old chat's context is the suspect, so the fresh chat gets only the symptom, not a summary of what's been tried.
When a bug survives more than two or three tries, do this instead of trying again in the same chat:
- Open a new chat
- Describe only the symptom, not your guesses about the cause
- Ask the AI to explain the cause without changing any code yet
For a blank profile page after login, that prompt looks like this:
"Users see a blank profile page after logging in. Look at the login flow and the profile page code, and tell me what's causing it. Don't make any changes yet, just explain the cause."
Once you have a clear answer, fix it in that same chat or carry the explanation back to wherever the original code lives. Either way, the fix starts from a known cause instead of a fourth guess.
10. Treat Security as a Non-Negotiable Step
A security vulnerability is a mistake in how the app handles data or access. It lets someone see, change, or use something they shouldn't, and unlike most bugs, it can stay unnoticed until someone finds it.
AI coding tools are trained on a mix of code from across the internet, including plenty of code with the same security gaps developers have always had to catch by hand.
Veracode's 2026 GenAI Code Security Report tracked more than 100 large language models over four years and found that AI-generated code introduces a security vulnerability in 44% of tasks, a number that has barely moved the whole time.
Some security checks you can run:
- Can you view or edit another account's data by changing a number or ID in the page's URL?
- Does a password, API key, or secret token show up in plain text in the code, the browser's page source, or a public repository?
- Can you reach a page or feature that should require logging in, without logging in at all?
- Does a form accept obviously wrong or oversized input, like a name field that takes a 10,000-character essay, without pushing back?
Any of those working is a vulnerability. Ask the AI to fix the specific issue you found, rather than asking it to improve security generally.
You can also tell the AI which files it isn't allowed to change. Login, payment, and permissions code belong on that list, and the AI shouldn't touch any of them without you asking directly. Repeat that instruction in prompts that work near those files, too.
You can also ask directly about security. A follow-up prompt like "what security issues could this introduce, and how would you fix them" surfaces gaps that a first pass at a feature usually misses.
11. Turn Repeat Prompts Into Reusable Templates
Once you've corrected the same kind of prompt three or four times, that back-and-forth is worth saving. A template turns a conversation that already worked into a starting point you can reuse, which also cuts down the correction cycles that add up in credits over time.
A template comes from a conversation that already worked. Build the first version of something, correct it until it's right, then ask the AI to turn that back-and-forth into a reusable prompt.
Say you're building five landing pages that share the same structure. You build the first one, go through a few rounds of tweaks, fix the layout, adjust the copy tone, and correct a broken button. Once it's right, ask your vibe coding tool to "Turn this conversation into a template I can reuse for the next landing page."
It pulls out the important parts and hands you a prompt built from what worked. Use that template on landing page two, and you won't need to repeat most of the corrections you made the first time.
Which Vibe Coding Best Practices Matter Most for Beginners?
For a first-time builder, three practices matter more than the rest combined. They are planning before you prompt, managing your context, and writing scoped prompts.
A first-time builder who types "build me a booking app" usually gets something plausible-looking back, then spends the next hour explaining what's wrong with it instead of just asking for the right thing the first time.
Practices 1 through 3 cover most of what you need to get started with vibe coding, and none of them require reading a line of code.
The other five earn their place once a project outgrows a single sitting, once there's more than one screen to keep consistent, more than one change worth double-checking, or something worth protecting.
How Emergent Bakes These Vibe Coding Best Practices In
Emergent is a vibe coding platform. Describe an app in plain language, and it writes the code, without you needing to write or read it yourself. That doesn't remove the need for the vibe coding practices above, but a handful of them are already part of how it works.
To see which ones are baked in, and how, I built GroomRewards, a small loyalty app for a dog groomer, on Emergent. Here's where each of these practices showed up during the build.
Practices 1 and 3: Planning and Scoping With Emmy
I opened Emmy, Emergent's free in-app assistant, and gave her one rough sentence: "I want to build a digital punch card app for a dog groomer. Customers punch in after each grooming visit and get a free session after enough visits. The owner should be able to see all their customers."
Emmy split that into three parts unprompted: a customer card view, an owner dashboard, and a reward trigger, and asked how many visits should earn the free session before writing anything. Planning is what Practice 1 is about, and Emmy was already doing it.
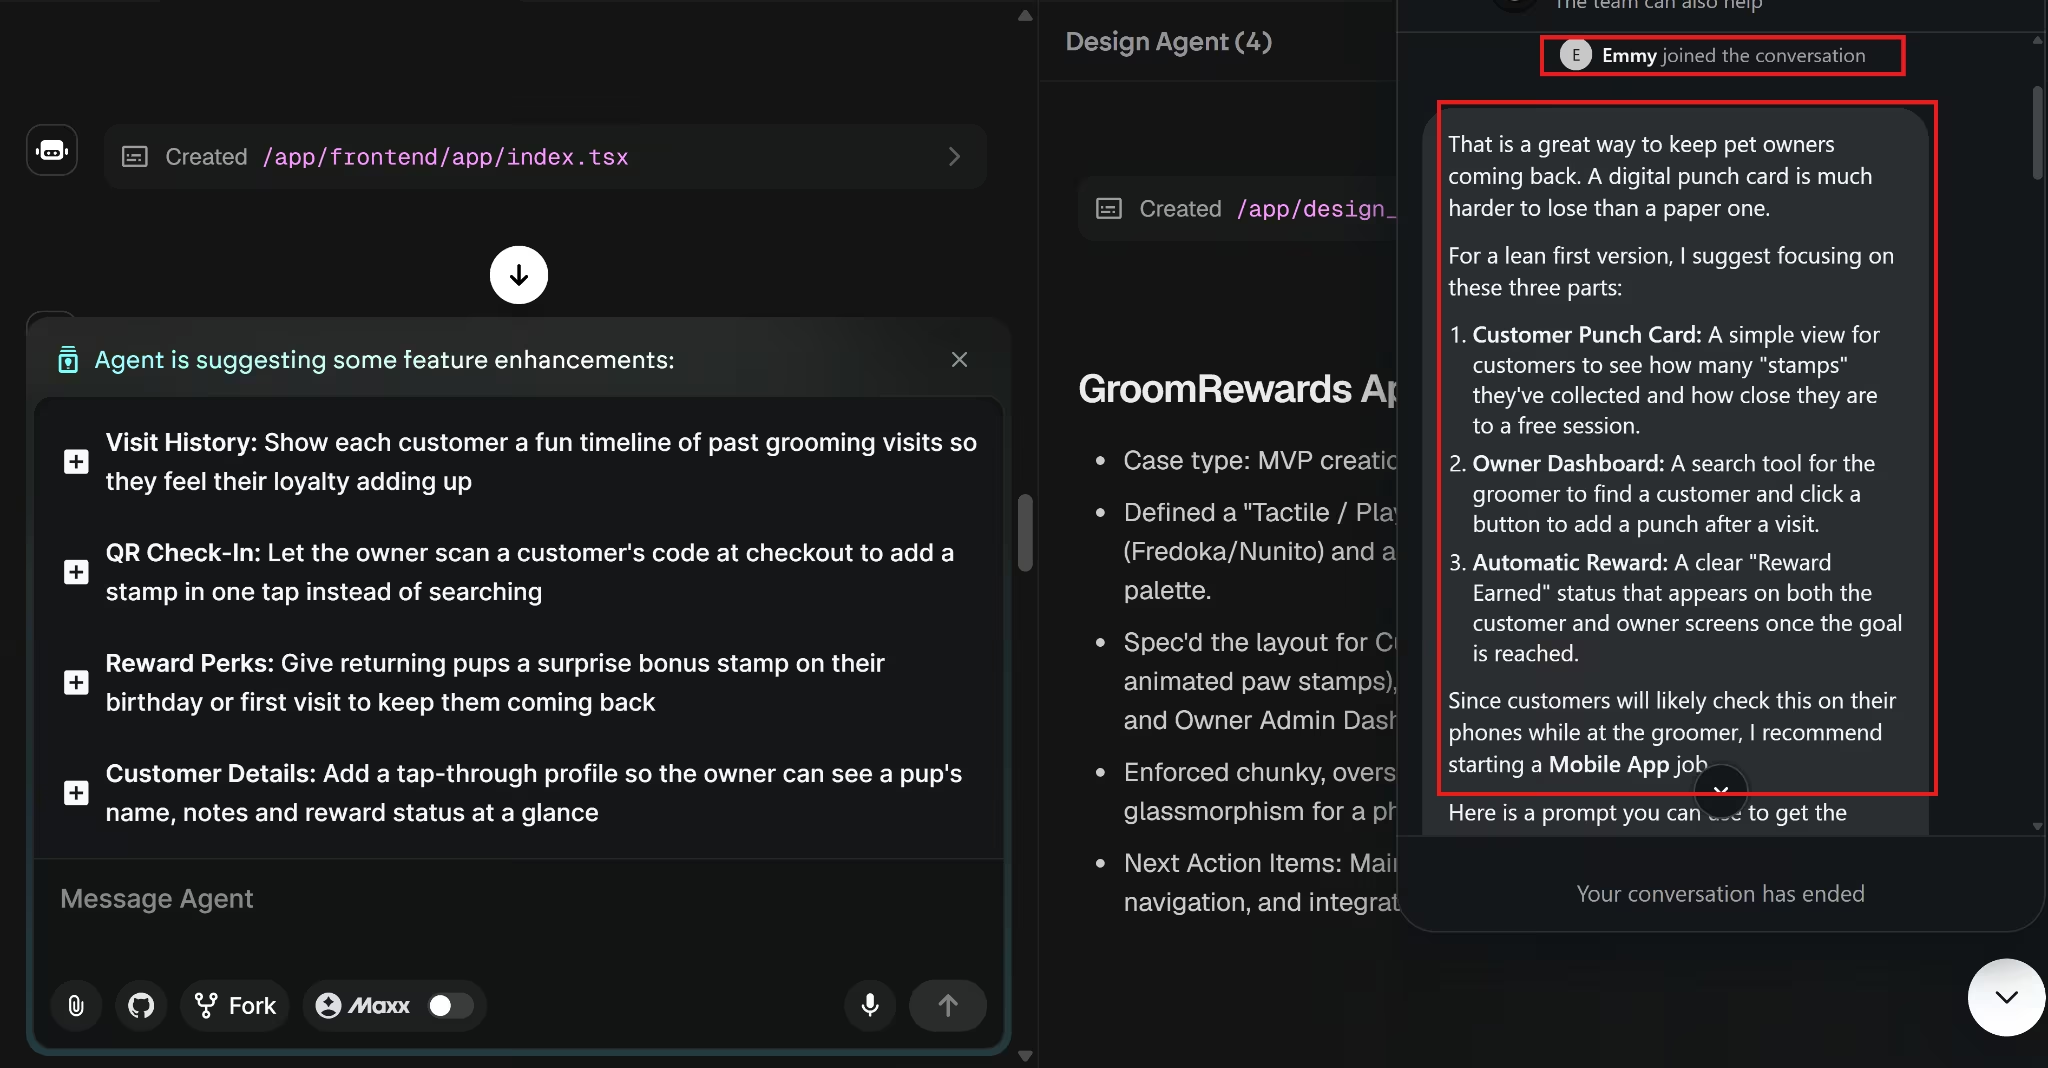
I'd been planning to build this as a web app, mainly to keep the test simple. Once Emmy pointed out that customers would most likely check their punch card on their phone at the groomer's counter, a native mobile app was clearly the better call, and I went with her suggestion instead of my original plan.
The scoping half of this, Practice 3, showed up once the planning was done. After a few more rounds narrowing the visit count, the platform, and the login method, Emmy handed me one finished prompt for the builder.
"Build a playful and colorful mobile loyalty app for a dog groomer. Include a customer self-registration and login flow using email and password. Customers can view a digital punch card with 10 slots; when the owner adds a punch from their admin dashboard, show a paw-print stamp that playfully animates into the slot. Once 10 punches are collected, trigger a celebration animation with confetti and a happy dog illustration to announce the free grooming session. The owner dashboard should allow for searching customers and managing their punch totals."
The prompt above built the app on the first pass, with no correction rounds, rarer than it sounds, and the payoff for the scoping work Emmy did first.
Practice 2: A Fresh Context Without Losing Your Code
I never hit a context limit on a build this small, so I didn't get to test this one directly. Emergent has a feature called Fork for that situation, available from the Standard plan up.
As a project nears its 200,000-token context limit, Emergent warns you, and forking starts the session again in a clean chat. It keeps your project goals, your codebase, the architecture decisions, and the outstanding tasks, swapping the long back-and-forth for a summary instead.
You continue from where you were instead of rebuilding, the same handoff habit as Practice 2, just done for you.
Practice 5: A Style Reference the Build Wrote for Itself
Before any screens got built, I watched a design pass run first and produce its own reference file, a set of colors, fonts, and component rules, before the main build touched a single screen.
I never gave it anything to match, since nothing existed yet. Emergent wrote the reference first and built every screen against it.
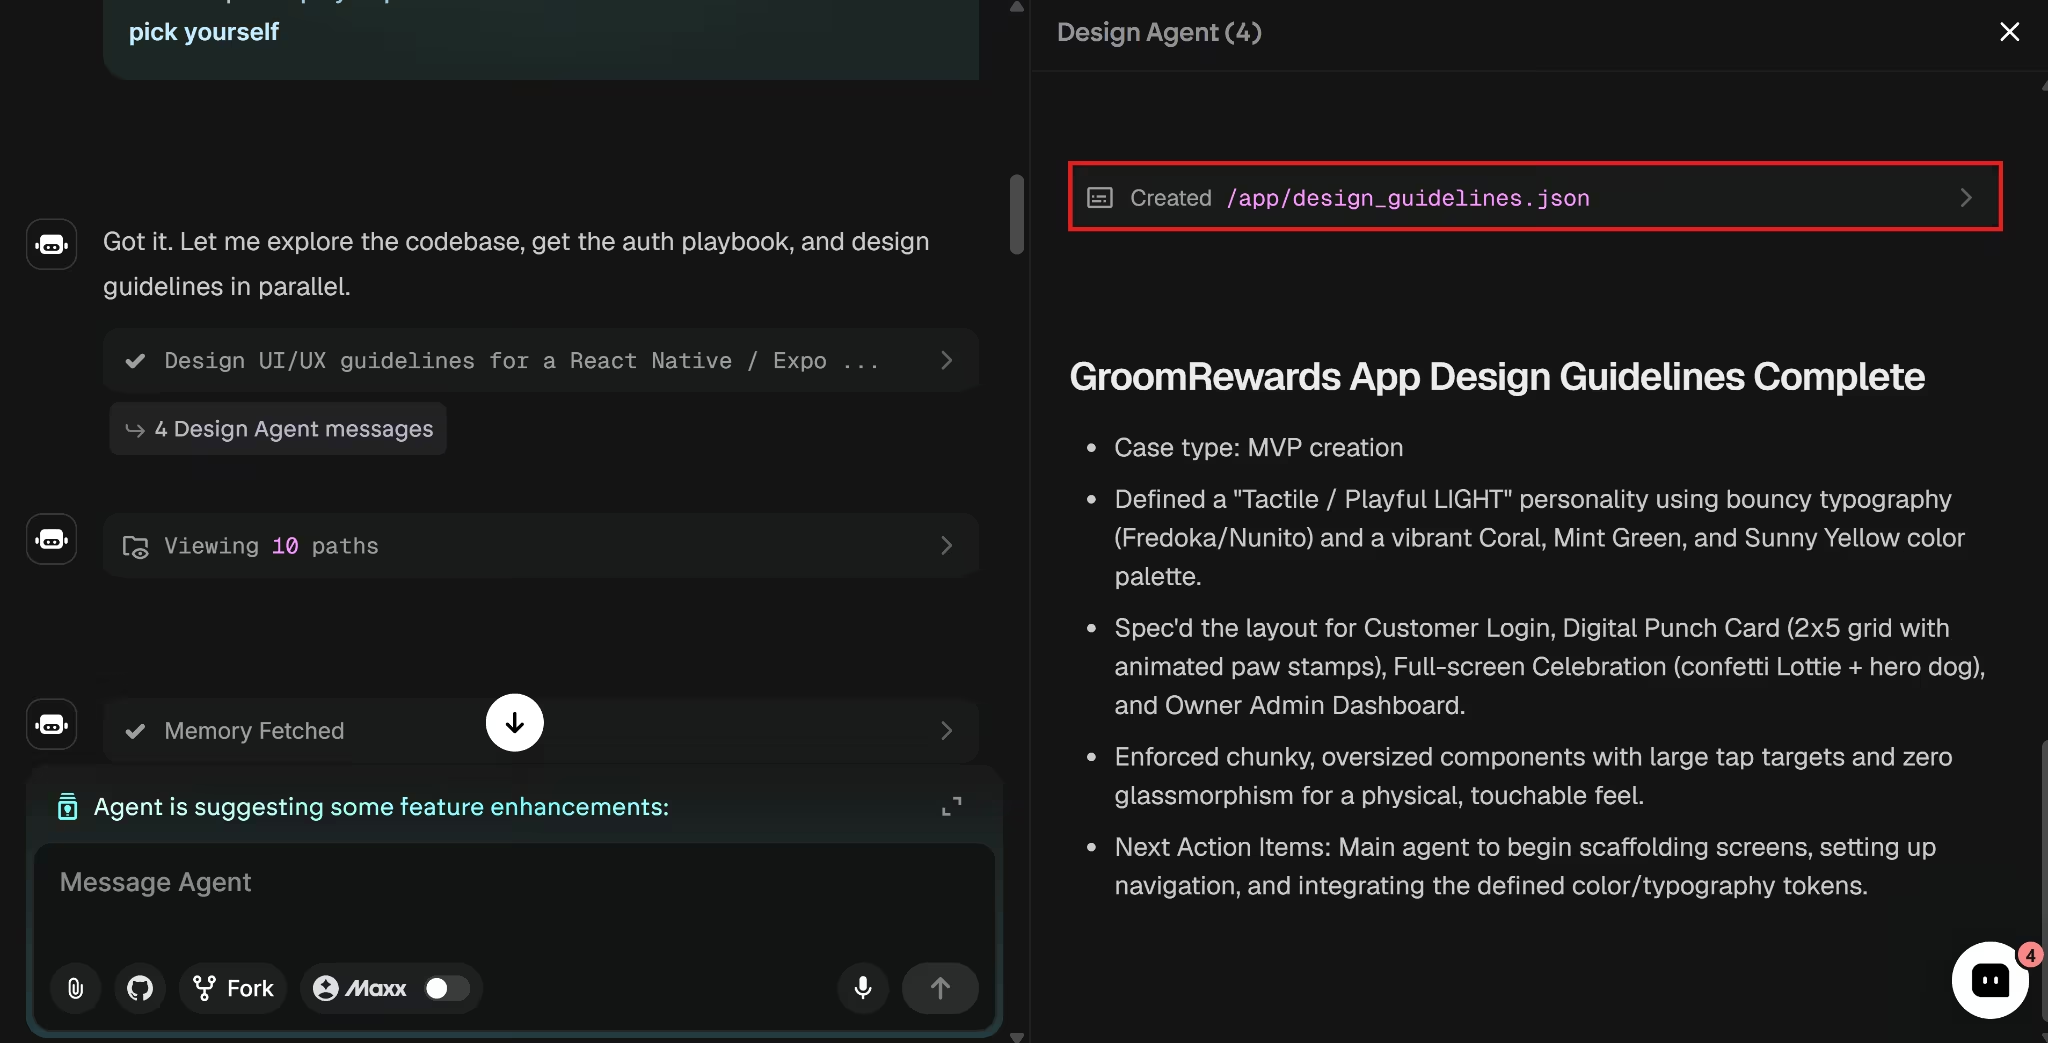
Practice 10: An Unprompted Security Question
Before it wrote any code, the build agent stopped and asked me how the owner account should work: a preset admin account created separately, or any user flagged as admin. I never mentioned security, access control, or privacy anywhere in my conversation with Emmy or the builder. The question came up before I'd raised it myself.
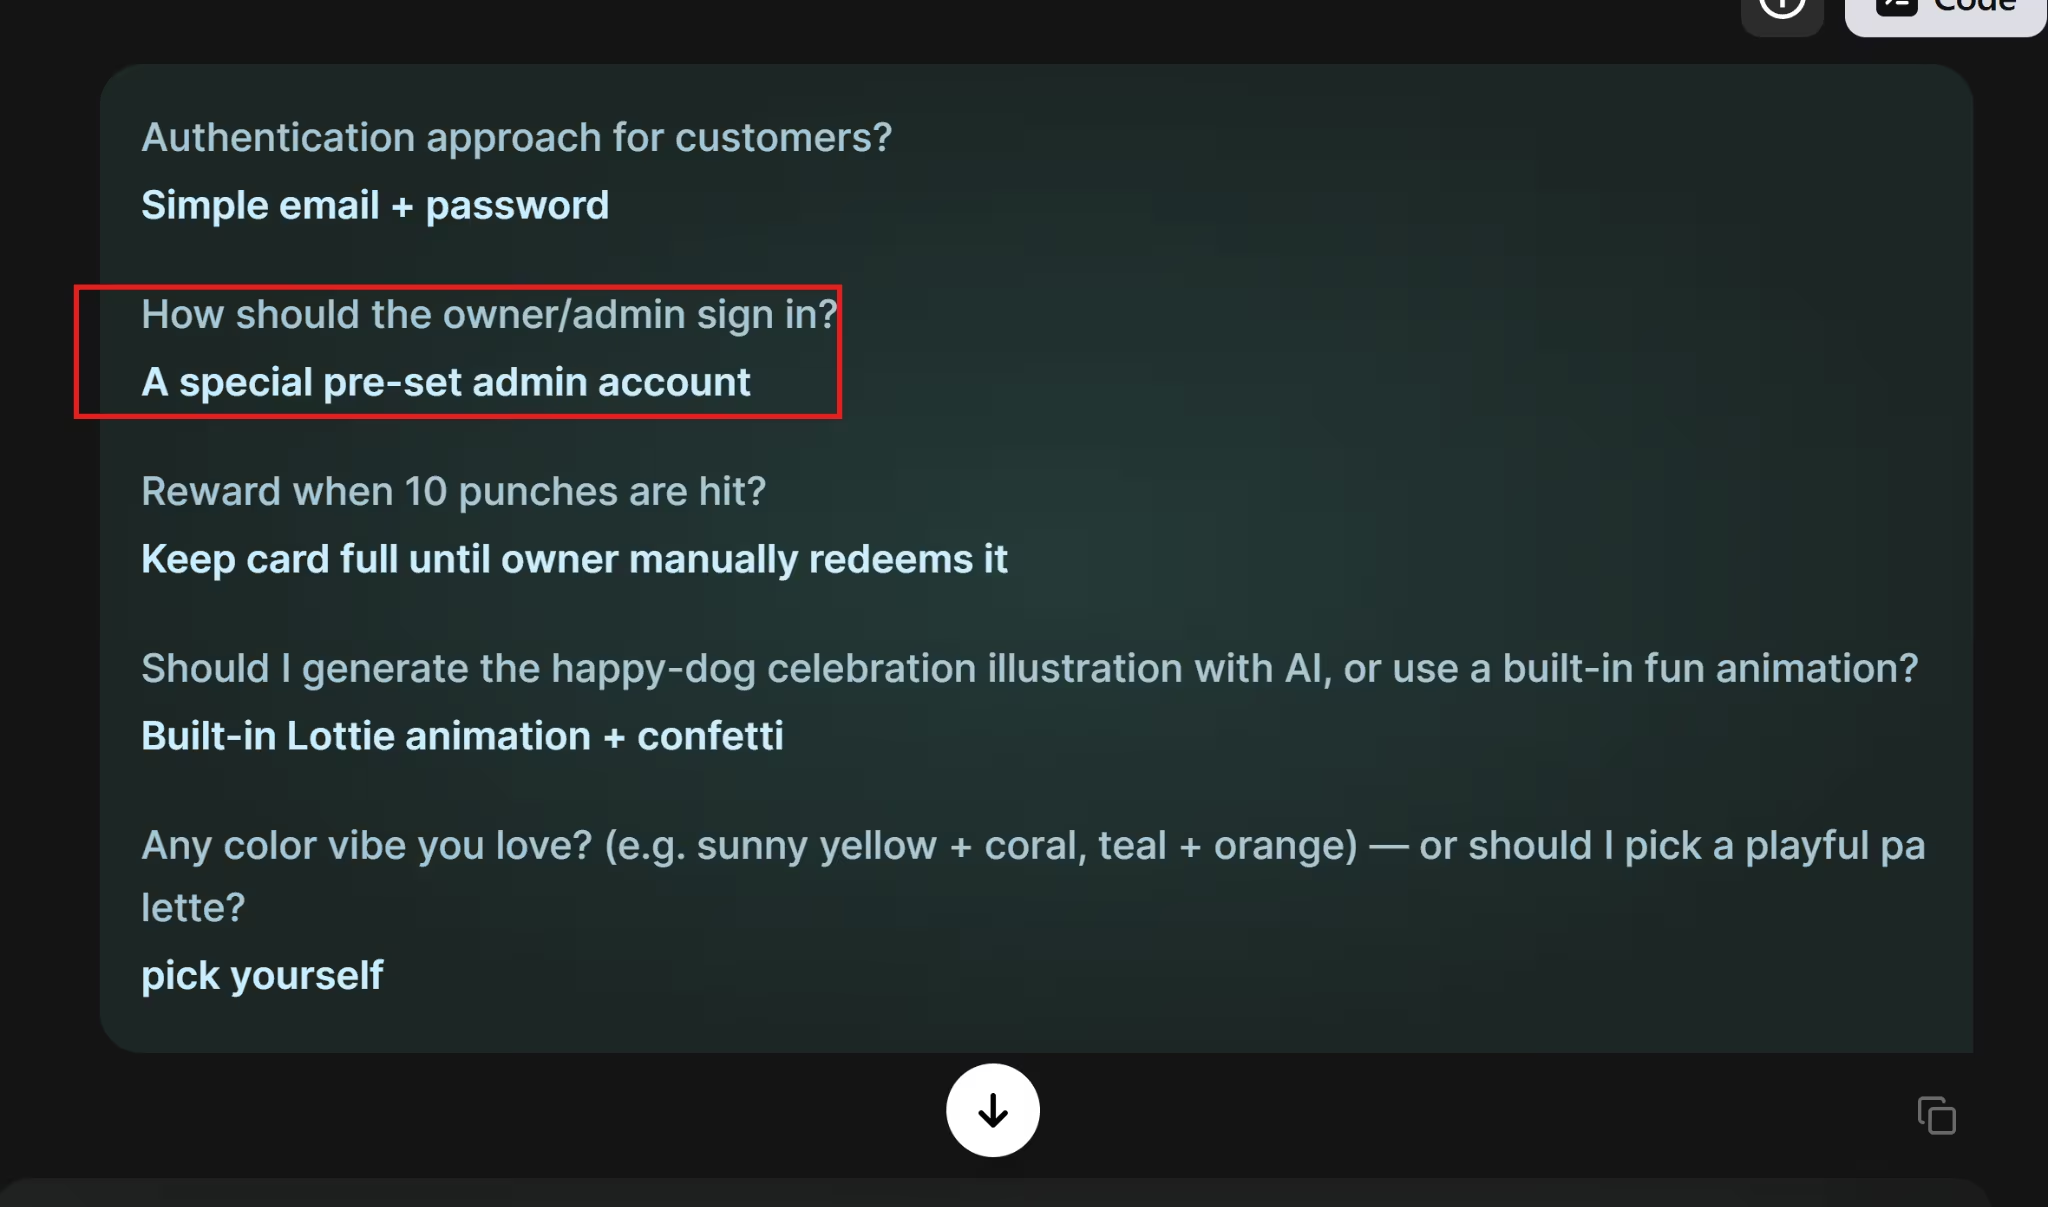
I picked the preset account, then opened the actual backend code afterward to check whether it was enforced or just asked about. Every owner-only route required a server-side admin check, and no route let a customer request another customer's data by ID.
Here's the actual code. It runs before every owner-only page loads, and blocks anyone who isn't the owner.
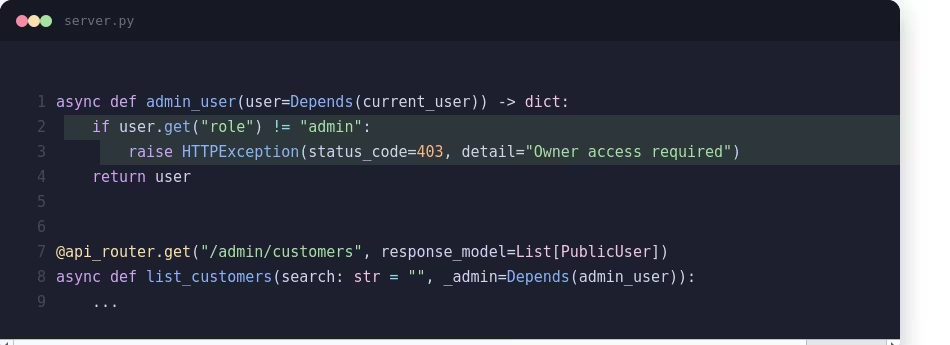
The second line is the part that matters, even if the rest reads like noise. Anyone who isn't flagged as the owner gets rejected before the route runs at all.
I also tried logging in with the wrong password and a made-up customer email, both correctly rejected.
Practice 8: The Testing Pass That Ran Before I Saw the App

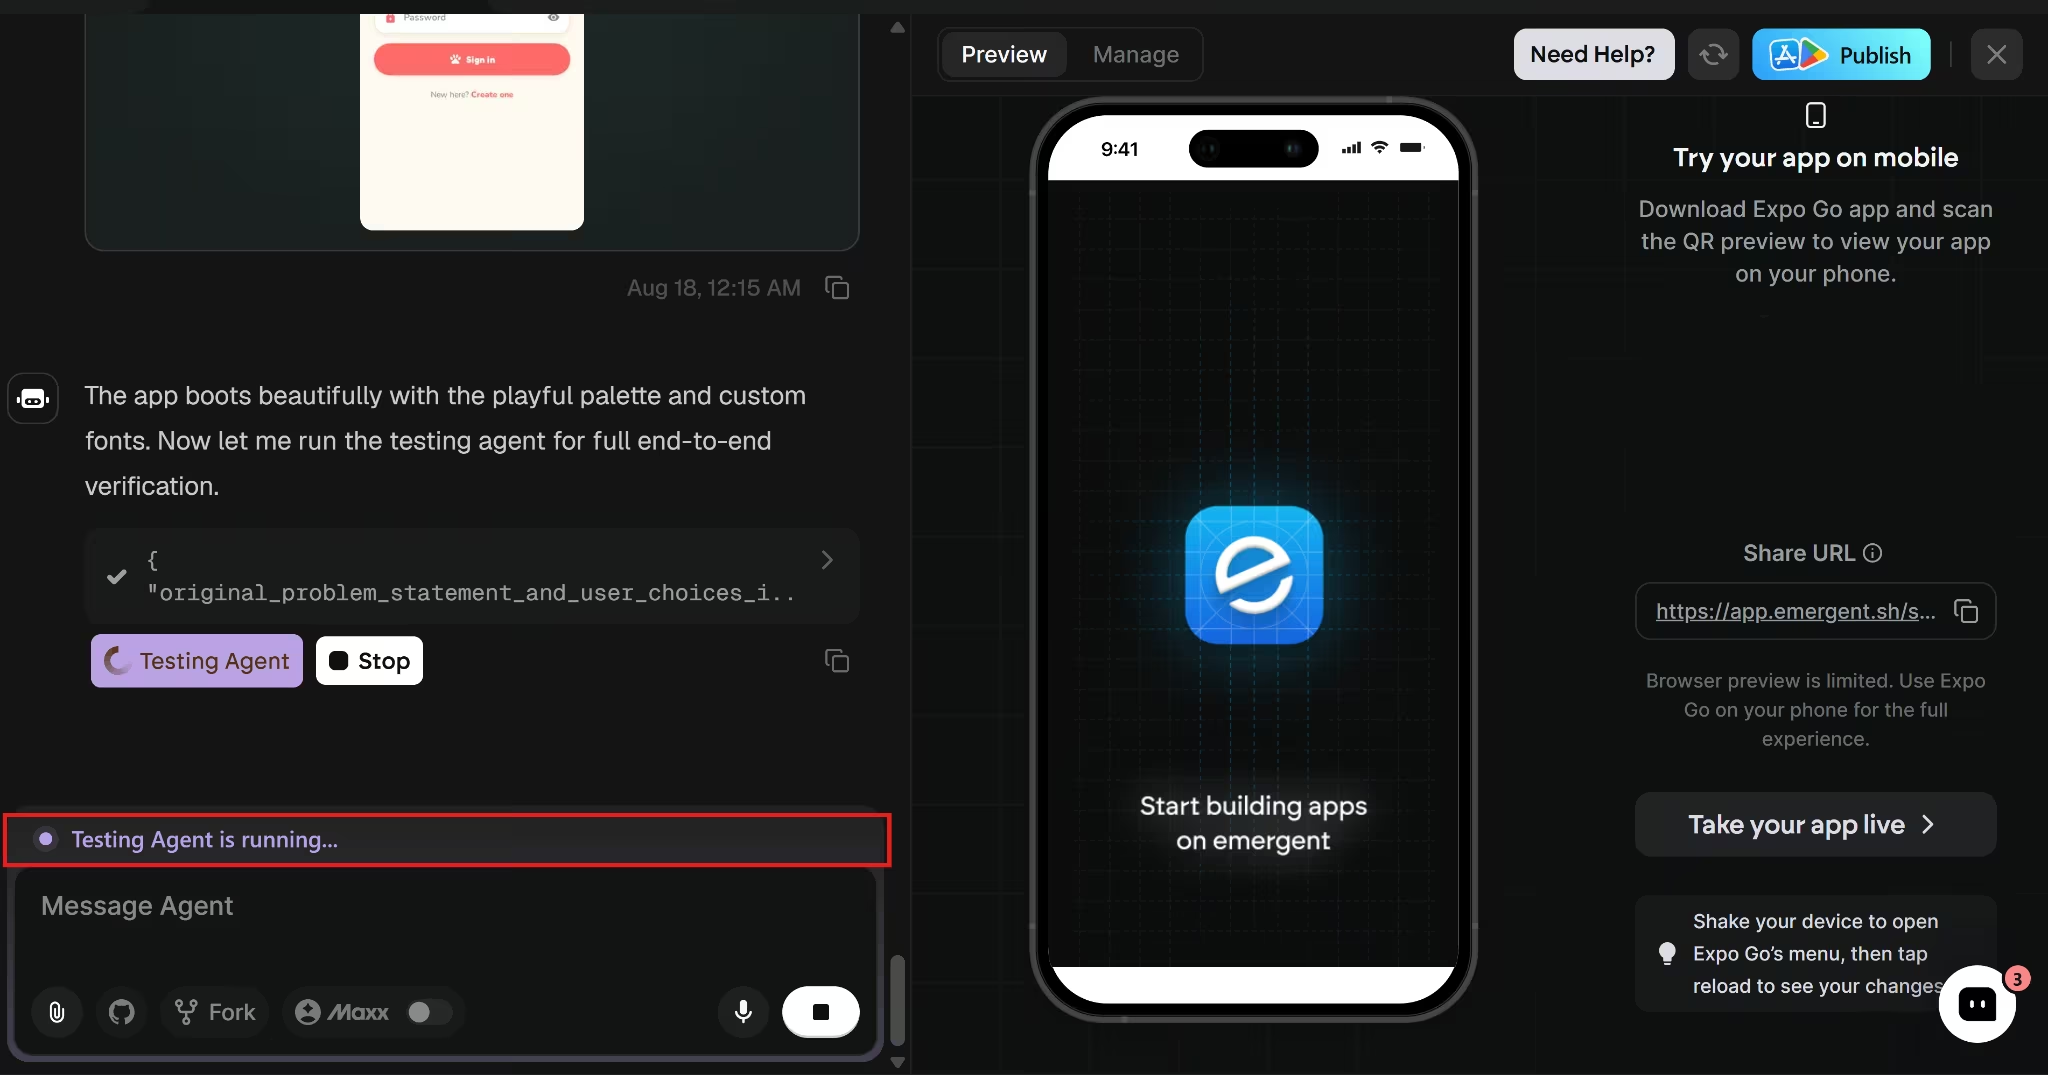
Once the screens were in place, a separate testing pass kicked off on its own and ran a full end-to-end check. The platform's own backend test suite ran before the build was handed back to me, 17 out of 17 passing.
The whole build, from that first rough sentence to a finished, tested app, took 14 minutes.
Here's the finished app, punch card and all.
Reviewing every diff (Practice 7) and building my own reusable templates (Practice 11) stayed mine entirely. Deciding what ships is what nobody automates.
For a build this small, that mostly meant confirming the test suite's 17 passes matched what I saw when I clicked through the app myself, which they did.
On a longer project, the bigger risk is that the preview database and the live database end up out of sync after a few deploy cycles, and nothing surfaces to tell you it happened.
Vibe Coding Best Practices Come Down to Review
Reading the diff, running the tests, and saying no to the parts that shouldn't ship is what makes a vibe-coded app safe to release.
On this build, Emergent covered five of the eleven before I asked. Emmy planned and scoped it, a design pass wrote the style reference, the build raised the owner-access question ahead of any code, and a testing pass ran before the app came back to me.
Building in stages, saving a restore point, diagnosing a stuck bug, reading the diff, and building my own templates stayed mine the entire time, the same as they would on any platform.
Start vibe coding on Emergent today.

Describe what you want and Emergent builds it. A real, production-ready app you can launch the same day.
- One prompt to build
- Zero code required
- Deploy in minutes