A wedding website replaces dozens of group chats, forwarded emails, and "wait, what time does the ceremony start?" texts with a single link. Guests get the date, venue, dress code, event schedule, RSVP form, and photo gallery in one place. You get fewer questions and more time to focus on what actually matters.
Most couples end up on platforms like The Knot, Zola, or Wix, dragging elements around a template, toggling settings, and still ending up with a site that looks like everyone else's. The process takes hours, customization is limited, and you are locked into whatever layout the template allows.
There is a faster way. With Emergent's AI wedding website builder, you describe what you want in plain language, and the AI generates a complete, working website from that description. No templates, no drag-and-drop, no code. This tutorial walks through the entire process on Emergent, from your first prompt to a live, deployed wedding website with RSVP functionality, a photo gallery, event schedule, countdown timer, and a personalized design aesthetic.
If you want to see the full process before reading, here is the video walkthrough:
What Your Wedding Website Needs (Before You Start Building)
Before you open any tool, spend five minutes thinking through what your guests actually need from this site. Every wedding is different, but the pages and features below cover what 90% of couples end up including. Having this list ready before you start makes the entire build faster, regardless of what platform you use.
Essential pages and features
Hero section with names and date. This is the first thing guests see. It should include the couple's names, the wedding date, and ideally a countdown timer so there is a sense of occasion every time someone visits.
Event schedule. If your wedding spans multiple events (mehndi, ceremony, reception, rehearsal dinner, brunch), each one needs its own card or section with the date, time, venue name, address, and dress code. Guests should not have to ask you what to wear.
RSVP form. An online RSVP form is non-negotiable. It should capture at minimum the guest's name, attendance status, and number of additional guests. Meal preferences, dietary restrictions, and song requests are common additions. The form should store responses in a database you can access later, not just send an email notification.
Photo gallery. Pre-wedding shoots, engagement photos, or curated stock photography for a placeholder gallery you can update later with real photos. A lightbox viewer (click to enlarge) makes the experience feel polished.
Our Story / Love Story section. A timeline or narrative section where you share how you met, key milestones, and the proposal. This is what makes the site feel personal rather than transactional.
Travel and accommodation info. If guests are traveling, include hotel recommendations, directions to the venue, and any transportation arrangements. Embedded maps help.
Registry links. If you have gift registries on external platforms, link to them directly from the site.
Design decisions to make upfront
You will save time if you decide these before you start building:
Color palette and aesthetic. Romantic and elegant? Earthy and warm? Minimal and modern? Knowing this upfront means fewer revision cycles.
Typography direction. Serif fonts (Cormorant Garamond, Playfair Display) lean traditional and formal. Sans-serif fonts (Outfit, Inter) lean modern and clean.
Photo assets. Have your engagement photos or pre-wedding shoot images ready to upload, or decide that you are fine starting with curated placeholder images.
Step 1: Open Emergent and Start a New Project
Go to Emergent's AI wedding website builder and sign in with your Google account. You will land on the home screen with a prompt bar in the center.
Give the project a name that you want. In the walkthrough video, the project is named "happily-ever-after-20."
The prompt bar is where you describe what you want the AI to build. Unlike a template-based builder where you pick a layout and then fill it in, here you write a description and the AI generates the entire site from that description.
Step 2: Write Your Prompt
This is the most important step. The quality of your prompt determines how close the first draft is to what you actually want, which directly affects how much back-and-forth you need afterward.
Here is the prompt used in the walkthrough, simply by clicking the chips in the chatbox:
"Create a beautiful wedding website that includes a Love Story section, RSVP Form, Photo Gallery, and Event Schedule, allowing guests to explore our journey as a couple, view our special memories, stay informed about all wedding events, and easily confirm their attendance through a seamless and engaging experience."
That single paragraph gives the AI enough to work with. It knows the core pages (Love Story, RSVP, Gallery, Events), the purpose (inform guests, collect RSVPs), and the tone (seamless, engaging, beautiful).
Tips for writing a good prompt:
Be specific about what pages you need but do not dictate code or layout. If you have a color scheme in mind, mention it. If you want a specific font, say so. If you want a countdown timer on the hero, include that.
You do not need to be exhaustive. Emergent’s AI agent will ask follow-up questions to fill in the gaps.
Step 3: Answer the Emergent Agents’ Setup Questions
After you submit the prompt, the AI agent (called Neo) works for about 16 seconds processing your request, then returns a structured set of questions to scope the project before writing any code. This is similar to what a freelance designer would ask you in a discovery call.
In the walkthrough, the AI asked:
Couple's names and wedding date (for the hero section)? Answer: Use placeholder names ("Aarav & Priya", date "March 15, 2026"). The AI noted it would set it up so you can edit later.
Design aesthetic preference? Answer: Elegant & romantic.
RSVP storage — where should RSVPs go? Answer: MongoDB only.
Photo Gallery — how should photos be added? Answer: Pre-seeded with curated stock wedding photos.
Admin access — do you want a simple admin page to view RSVPs? Answer: No, skip for now.
These are not rigid options. You can answer in natural language, give partial answers, or change your mind later. The AI adapts.
Step 4: Let the Emergent Agent Build
Once you answer the setup questions, Emergent’s AI agent starts building. In the walkthrough, this phase took about 10 minutes. You do not need to do anything during this time.
Here is what the AI did autonomously:
- Read 11 existing files to understand the project structure
- Created 12 new files (frontend components, backend routes, data files, styles)
- Ran 3 commands (dependency installation, test suite, screenshot verification)
- Edited the footer component
- Took a screenshot to verify the site loads correctly
The Hexa Designer agent (the sub-agent that handles design tasks) completed everything without any additional input.
After the build finished, the AI posted a summary of what it created:
Frontend: A single-page wedding site with a Hero section (live countdown), Love Story timeline, Event Schedule, Photo Gallery with lightbox, RSVP form, and Footer. Fonts used: Cormorant Garamond and Outfit. Color palette: deep olive and pale linen luxury tones.
Backend: FastAPI + MongoDB with POST/GET endpoints at /api/rsvp and GET at /api/rsvp/stats. RSVPs persist to the rsvps collection.
Testing: All testing_agent_v3 tests passed. Backend: 11 out of 11 (CRUD, validation, sort, stats). Frontend: 100% of requested flows (navigation, countdown, timeline, events, gallery with lightbox, RSVP submission, mobile menu).
Smart adjustment: The AI noticed the wedding date was in the past relative to the server's clock (mid-2026), so it automatically adjusted the date to March 15, 2027 in the wedding-data.js file to keep the countdown timer functional. It flagged this as easily editable in one place.
Step 5: Preview the Wedding Website
Click the Preview button in the top-right corner of the Emergent interface. This opens a live, interactive preview of your site, not a static mockup.
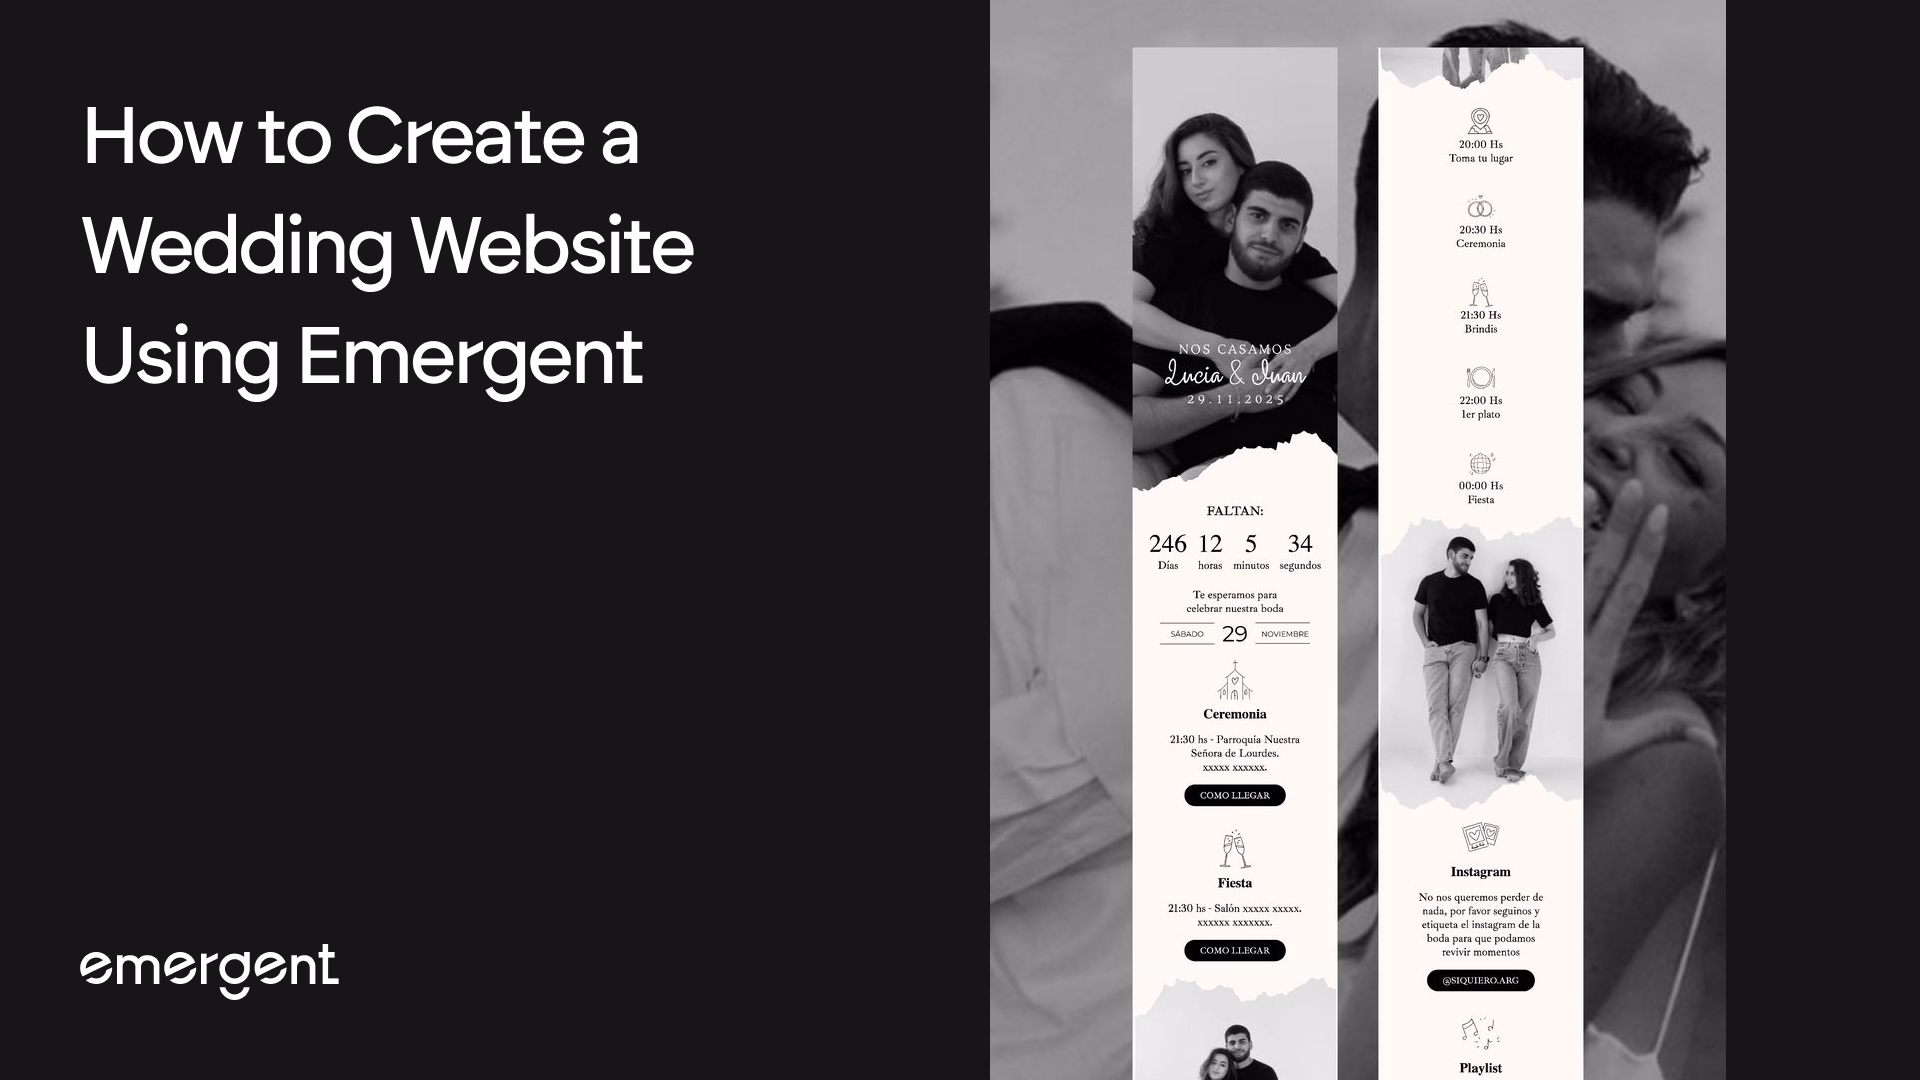
The site that loaded in the walkthrough had:
Hero section: Full-bleed wedding photo background with the couple's names (A & P), navigation links (Our Story, Events, Gallery, RSVP), a live countdown timer (271 days, 22 hours, 40 min, 10 sec), and two call-to-action buttons: "RSVP Now" and "Our Story."
Love Story section: Headed "Our Journey" with the title "The Love Story" and a narrative intro. This is where the couple's timeline would go.
Event Schedule section: Four events laid out in a two-column grid:
- Mehndi Night (Saturday, March 13, 2027) — The Leela Palace, Courtyard Lawn, Udaipur, Rajasthan. Dress Code: Mustard, Coral, Olive.
- Sangeet (Saturday, March 13, 2027) — The Leela Palace, Grand Ballroom, Udaipur, Rajasthan. Dress Code: Festive Indian.
- Wedding Ceremony (Sunday, March 14, 2027) — Jagmandir Island Palace, Lake Pichola, Udaipur. Dress Code: Traditional Formal. "Phere by the lake at sunset. Bring tissues."
- Reception (Monday, March 15, 2027) — Jagmandir Island Palace, Garden Terrace, Lake Pichola, Udaipur. Dress Code: Black Tie / Indian Formal.
Each event card includes the date, time, venue with sub-location, city, and dress code. The level of detail here came entirely from the AI interpreting "Event Schedule" in the original prompt and generating realistic, well-structured content.
Photo Gallery: Pre-seeded with curated stock wedding photography in a grid layout with lightbox viewing.
RSVP Form: A functional form connected to the MongoDB backend. Guests can submit their attendance and the data persists.
Step 6: Customize the Design with a Follow-Up Prompt
The first build looks good, but say you want a different aesthetic. Instead of manually adjusting colors, fonts, and backgrounds across multiple files, you just describe the change.
In the walkthrough, the user typed:
"Make the aesthetic more earthy"
That is the entire prompt. Four words.
Neo worked for 1 minute and 5 seconds, edited 9 files, took a verification screenshot, and reported:
"The aesthetic is now warm and earthy — sandy parchment backgrounds, deep walnut text, and terracotta accents replace the previous olive-green palette. Countdown is also live (272 days)."
The transformation was comprehensive. Every component on the page, from the hero background to the event cards to the footer, updated to reflect the new earthy palette. No manual color picking, no CSS editing, no file-by-file adjustments.
This is the core advantage of building with an AI website builder rather than a traditional template tool. You stay at the level of intent ("make it earthy") and the AI handles the execution across the entire codebase.
Step 7: Deploy Your Website
Once the site looks right, click the Deploy button in the top-right corner.
In the walkthrough, the deployment finished immediately. The status indicator showed "Deployment finished" and the site was live.
Deploying on Emergent provisions:
- A live URL accessible from any browser (shareable with guests immediately)
- Managed MongoDB database for RSVP storage
- Persistent backend and frontend hosting
First deployment uses 50 credits/month or 2 credits/day. Without deploying, the site only runs during your Emergent session.
After deployment, you can connect a custom domain (like aarav-and-priya.com) to give guests a clean, memorable URL.
Step 8: Iterate Until It Is Perfect
Your wedding website is live, but you can keep talking to the AI to refine it. Every new prompt builds on everything that already exists. Nothing gets overwritten unless you ask for it.
Here are example prompts for common follow-up changes:
Content updates:
- "Replace the placeholder couple names with Rahul and Sneha, and change the wedding date to November 22, 2027."
- "Rewrite the Love Story section with our actual timeline: met in college in 2019, first trip together to Goa in 2020, got engaged in Paris in December 2025."
Design refinements:
- "Change the heading font to Playfair Display and make the overall feel more minimalist."
- "Add a parallax scrolling effect to the hero section."
New features:
- "Add a Travel & Accommodation page with hotel recommendations near the venue and an embedded Google Map."
- "Add a song request field to the RSVP form."
- "Create a password-protected page so only invited guests can access the site."
- "Add a gift registry section that links to our Amazon and MyRegistry pages."
Post-wedding updates:
- "Replace the RSVP section with a Thank You message and add a gallery of photos from the wedding day."
Each request takes between one and ten minutes depending on complexity. The AI preserves everything already working and only modifies what you ask it to change.
What the Emergent’s Agent Actually Built (Technical Summary)
For those curious about what is running under the hood, here is the technical breakdown. This is a real, deployed web application, not a static page.
Frontend stack: React with Cormorant Garamond (headings) and Outfit (body) typography. Single-page architecture with smooth-scroll navigation. Responsive layout with a mobile hamburger menu. All components are modular and individually editable.
Backend stack: FastAPI (Python) with MongoDB for data persistence. Two API routes handle RSVP operations: a POST/GET endpoint at /api/rsvp for submitting and retrieving RSVPs, and a GET endpoint at /api/rsvp/stats for aggregate statistics.
Features built from a single prompt:
- Live countdown timer (auto-calculating from a configurable date)
- Love Story timeline section
- Multi-event schedule with venue details, times, and dress codes
- Photo gallery with lightbox viewer
- RSVP form with MongoDB persistence
- Responsive mobile layout with hamburger navigation
- Footer with relevant links
Data architecture: All wedding-specific content (names, dates, venues, events, photos) lives in a single wedding-data.js file. To personalize the site with your real details, you only need to edit that one file, or just ask the AI to update it.
Test coverage: 11 out of 11 backend tests passed (CRUD operations, validation, sorting, statistics). 100% of requested frontend flows verified (navigation, countdown, timeline, events, gallery with lightbox, RSVP submission, mobile menu).
Conclusion
A wedding website used to mean hours inside a template builder, picking layouts, adjusting colors element by element, wiring up a third-party RSVP tool, and still ending up with something that looked like everyone else's. The process described in this tutorial is fundamentally different. You write what you want, the AI builds it, and the entire thing, hero countdown, love story section, multi-event schedule, photo gallery, working RSVP form, deployed backend, is live before you would have finished choosing a font on a traditional builder.
What makes this practical rather than just fast is that the site keeps evolving with you. Your venue changes three months out? One prompt. You decide the color palette needs to feel warmer? One prompt. You want to add a travel page two weeks before the wedding? One prompt. Nothing breaks, nothing gets rebuilt from scratch, and you never have to touch code.
If you are ready to start building, Emergent's AI wedding website builder covers everything in this tutorial and more, RSVP management, photo galleries, multi-event scheduling, custom domain connection, and design personalization, all from a single description of what you need.
Emergent turns your idea into a full-stack web or mobile app, no coding required.
 No coding required
- Web & mobile apps
- Deploys instantly


on emergent today