Beginner
•
How to Build a Visually Stunning 3D Website with Spline Animations
3D Website with Spline Animations.
Written By :

Avilasha Chalki
In this tutorial, we’re going to create something that not only catches the eye but also keeps your users engaged: a 3D Website with Spline Animations.
What we’ll build here is simple yet incredibly powerful. Instead of using static images and text to showcase your brand or product, we’ll be using 3D animations to captivate your visitors from the moment they land on your site.
The end result? A website that comes to life, engages your audience, and leaves them with a memorable impression of your business.
By the end of this guide, you’ll know how to:
Integrate a 3D Spline scene into your website
Add stunning scroll-triggered animations and hover effects
Make the website interactive, linking UI elements to the 3D model to create a truly immersive experience.
Let’s get started!
P.S. This is how our final product will look like :
http://aura-robotics.preview.emergentagent.com/
Created entirely using prompts, by the way!
Why This Matters
Before we dive into building, let’s address why you should care about adding 3D animations to your website.
We live in a world where visual experiences are everything. Static, flat websites are no longer enough to capture attention. To stand out in today’s digital world, you need something more engaging, something interactive. That’s where 3D websites come into play.
Here’s what we’re solving with this tutorial:
Lack of engagement: A simple, static website is easy to ignore. 3D animations draw attention and encourage users to interact.
Boring user experience: 3D animations can make navigating a website feel more like an adventure rather than a chore.
Competitive edge: By adding 3D elements to your site, you instantly make it stand out from the crowd.
Imagine this, a user visits your site, and as they scroll, parts of the 3D model start animating, reacting to their mouse movements, and even changing when they hover over specific parts of the page. That’s the experience we’re going for here.
Understanding 3D Spline Websites - Quick Concept + Use Cases
What is Spline?
Spline is a tool that lets you create 3D designs and animations for websites. It's easy to use, interactive, and gives you a lot of control over how your 3D models behave. With Spline, you can create full-fledged 3D environments, animations, and interactive experiences that work smoothly in any browser.
Why 3D Animations?
3D animations provide an immersive experience that grabs attention. Here’s how they can be used:
Landing Pages: Catch users' attention immediately with a dynamic, animated 3D hero section.
Product Displays: Showcase your product in a 3D space so customers can interact with it, zoom in, and explore.
Interactive Portfolios: Create a portfolio that visitors can explore in 3D, making it more fun and engaging.
What We’re Building
In this tutorial, we’ll focus on creating a full-screen 3D landing page that reacts to scroll and hover events, with animations triggered by user actions.
We’ll also link the 3D model to other UI elements, like buttons, to make it interactive.
Here we are building a futuristic, high-tech landing page for a robotics company called AURA.
Tools & Setup – What You Need Before Starting
Before we jump into the code, here’s what you’ll need to set up:
Emergent Account
Why you need it: Emergent will serve as the backend for our project, automating the logic and handling the deployment. It’s where all the workflows will happen.
Signup: Emergent
Spline Account
Why you need it: You’ll be using Spline to design and animate your 3D models. Spline allows you to create stunning, interactive 3D scenes with minimal effort.
Signup: Spline
How to Get the Embed Code for Your 3D Spline Scene
To embed a Spline scene into your website, you'll first need the embed code. Here’s how you can get it:
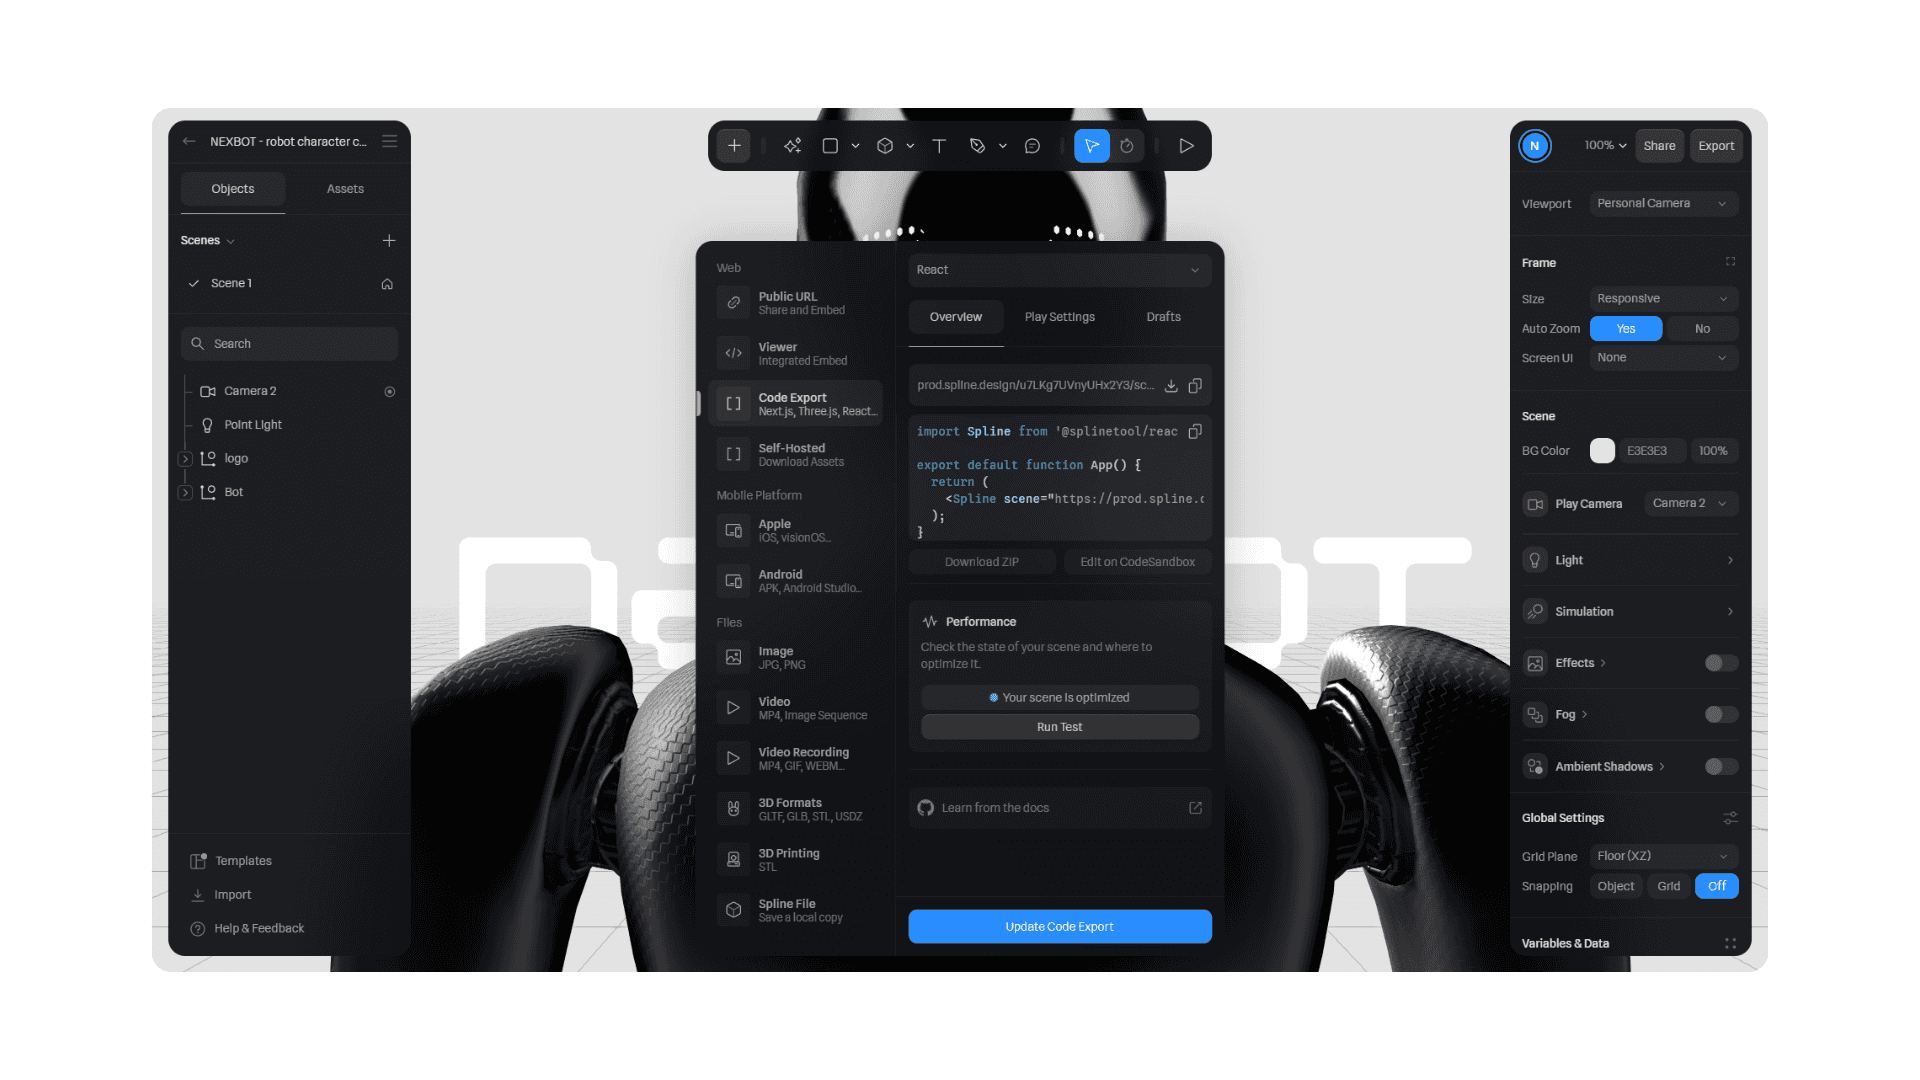
Create Your Own Scene: If you've made your own 3D model or animation, go to the Export option in Spline. From there, you can choose the embed code for React or other formats that suit your project.
Using Other People's Creations: If you’re looking to use a pre-made 3D model or animation, head over to Spline’s Community section. Browse through the stunning designs shared by others, and once you find one you like, you can easily export the embed code by clicking on the Export button in the scene editor.
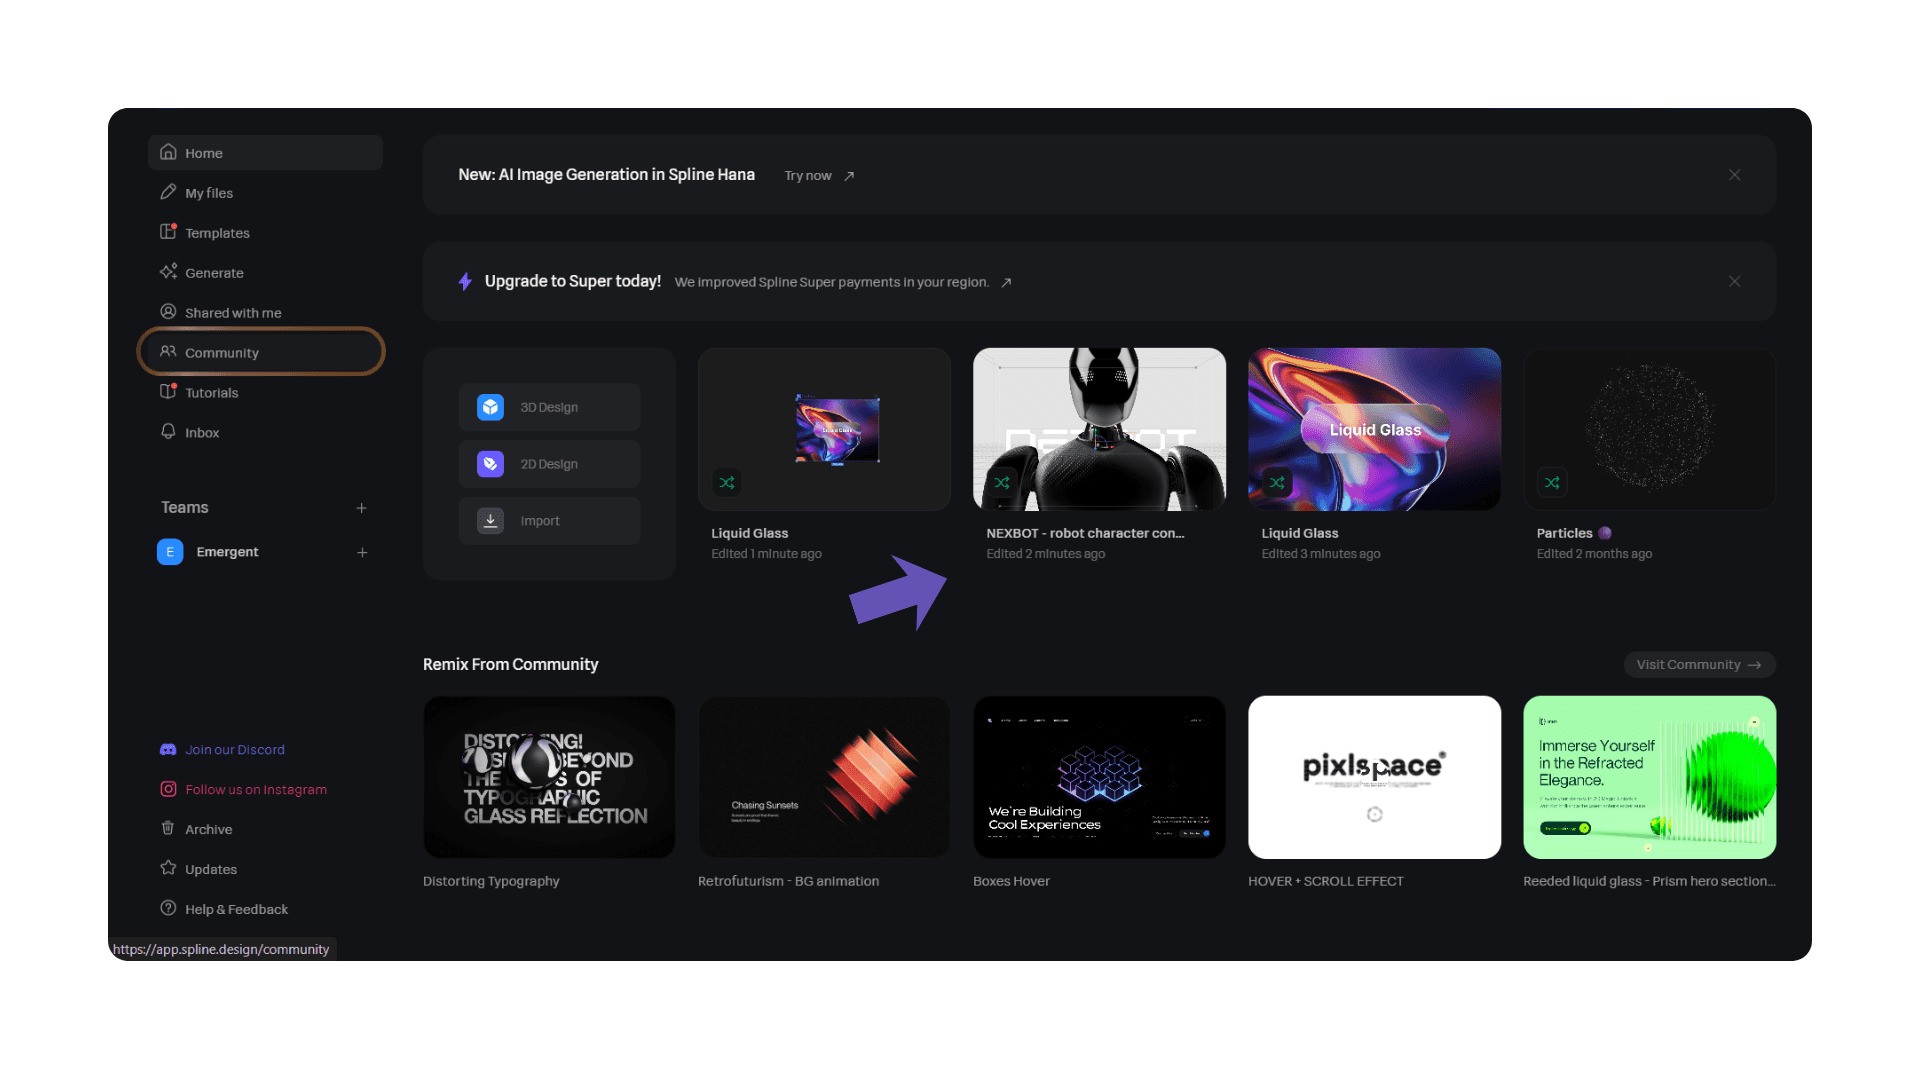
Note: On the free tier, you're allowed to export up to 3 scenes per month, so be mindful of your usage if you plan to experiment with multiple designs or use shared creations.
Building on Emergent
Once you're on Emergent, the entire app begins with a single detailed prompt.
Don’t worry, our agents will do most of the work!
Step 1: Create Your Emergent Project - Give the Initial Prompt
Go to emergent.sh and create a free account to get started.
The first step in the journey is setting up your Emergent project.
This is where you’ll define the vision and inspiration you have for your landing page.
Here’s the exact prompt I used :
I want you to build a futuristic, high-tech landing page for a robotics company called AURA.
**VISION & INSPIRATION:**
- Tesla Optimus robot aesthetic - sleek, dark, premium feel
- Cyberpunk/sci-fi design language with cyan accents (#00FFD1)
- Professional yet cutting-edge brand presentation
**TECHNICAL REQUIREMENTS:**
- React frontend with Tailwind CSS
- Framer Motion for animations
- Spline 3D model integration (@splinetool/react-spline)
- FastAPI backend with MongoDB
- Responsive design for all devices
**KEY SECTIONS & FEATURES:**
1. Hero Section:
- Full-screen with 3D robot model integration
- Animated content reveal after model loads
- Interactive video panel
- Circular progress indicator with custom animations
- Fixed horizontal navigation dock
2. About Section:
- Company introduction with clean typography
- Scroll-triggered fade-in animations
3. Interactive Sections:
- Video integration with custom controls
- Hover-to-play functionality
- Bento-style gallery grid with mixed content types
4. Technical Capabilities:
- Glassmorphism-style cards
- Icon integration with stats
5. Newsletter/Contact:
- Terminal-style form design
- Interactive background elements
**DESIGN SYSTEM:**
- Color Palette: Pure black (#000000), cyan-green (#00FFD1), white
- Typography: KodeMono (mono), Inter (sans), Orbitron (headers)
- Animations: Smooth, staggered, scroll-triggered
- Spacing: Large, breathing room between elements
**INTERACTION PATTERNS:**
- Delayed content reveal after 3D model loads
- Scroll-triggered bottom fade-in animations
- Hover effects on interactive elements
- Smooth scrolling navigation
- Video controls with play/pause states
**TECHNICAL SPECIFICATIONS:**
- Hot reload for development
- Component-based architecture
- Mock data initially, backend integration later
- Error handling for 3D model loading
- Performance optimized animations
Please proceed step-by-step, starting with the foundation and adding complexity gradually. Begin with the hero section and then expand to other sections. Testing thoroughly at each stage to ensure smooth animation and functionality is recommended.
Once you hit enter, Emergent’s AI will get to work, setting up your project environment, including the structure for the animations and embedding the 3D model.
Step 2: Answering the Agent’s Clarifying Questions :
At this stage, the Emergent agent will ask a few clarifying questions to ensure that the app is tailored exactly to your needs. Here's how you can respond to each question:
3D Robot Model Source:
The agent asks whether you have a specific 3D robot model URL or if they should use a placeholder.Here you have to add the spline component, so just enter the embed code we just copied.
Video Content:
The agent asks if you have specific video URLs for the interactive video panels or if they should use placeholders for now.
You can provide the URLs of the videos you want to feature in the hero section and other video sections. If you don't have them ready, feel free to use placeholders temporarily.
Company Content:
The agent asks if you have specific text for the About section and other content areas or if they should create realistic sample content.
You can either provide your own text here or allow the agent to generate realistic sample content for the sections.Newsletter/Contact:
The agent asks whether the contact form should store data in MongoDB or integrate with an email service.
You can choose to simply store the form data in MongoDB, which is the default backend, or provide an email service integration like Mailchimp or SendGrid, depending on your preference.Logo:
The agent asks whether you have an AURA logo URL or if they should create a text-based logo with the brand colors.
If you have a logo URL ready, provide it here; otherwise, the agent can create a simple text-based logo using your brand colors.
After you answer the questions, you should be able to see the 3D model on your site, but it’s still static. (If you don’t yet, we will tell you how to debug right after this section!)
Now let’s add some visual animations to bring it to life.
Step 3: Add Visual Animations - Scroll, Hover, Motion Triggers
Now comes the fun part, adding animations that react to scroll and hover events.
Scroll Animations
You want parts of your model to animate as the user scrolls down the page. Here's how you can achieve that:
Inside Spline, use the timeline tool to create animations.
Add Scroll-based triggers: In Emergent, define when and how these animations should happen based on the user's scroll position.
For example, you could animate the rotation of a product as the user scrolls down the page, or make different parts of your 3D model appear/disappear.
Here, we have implemented text animations through prompting :
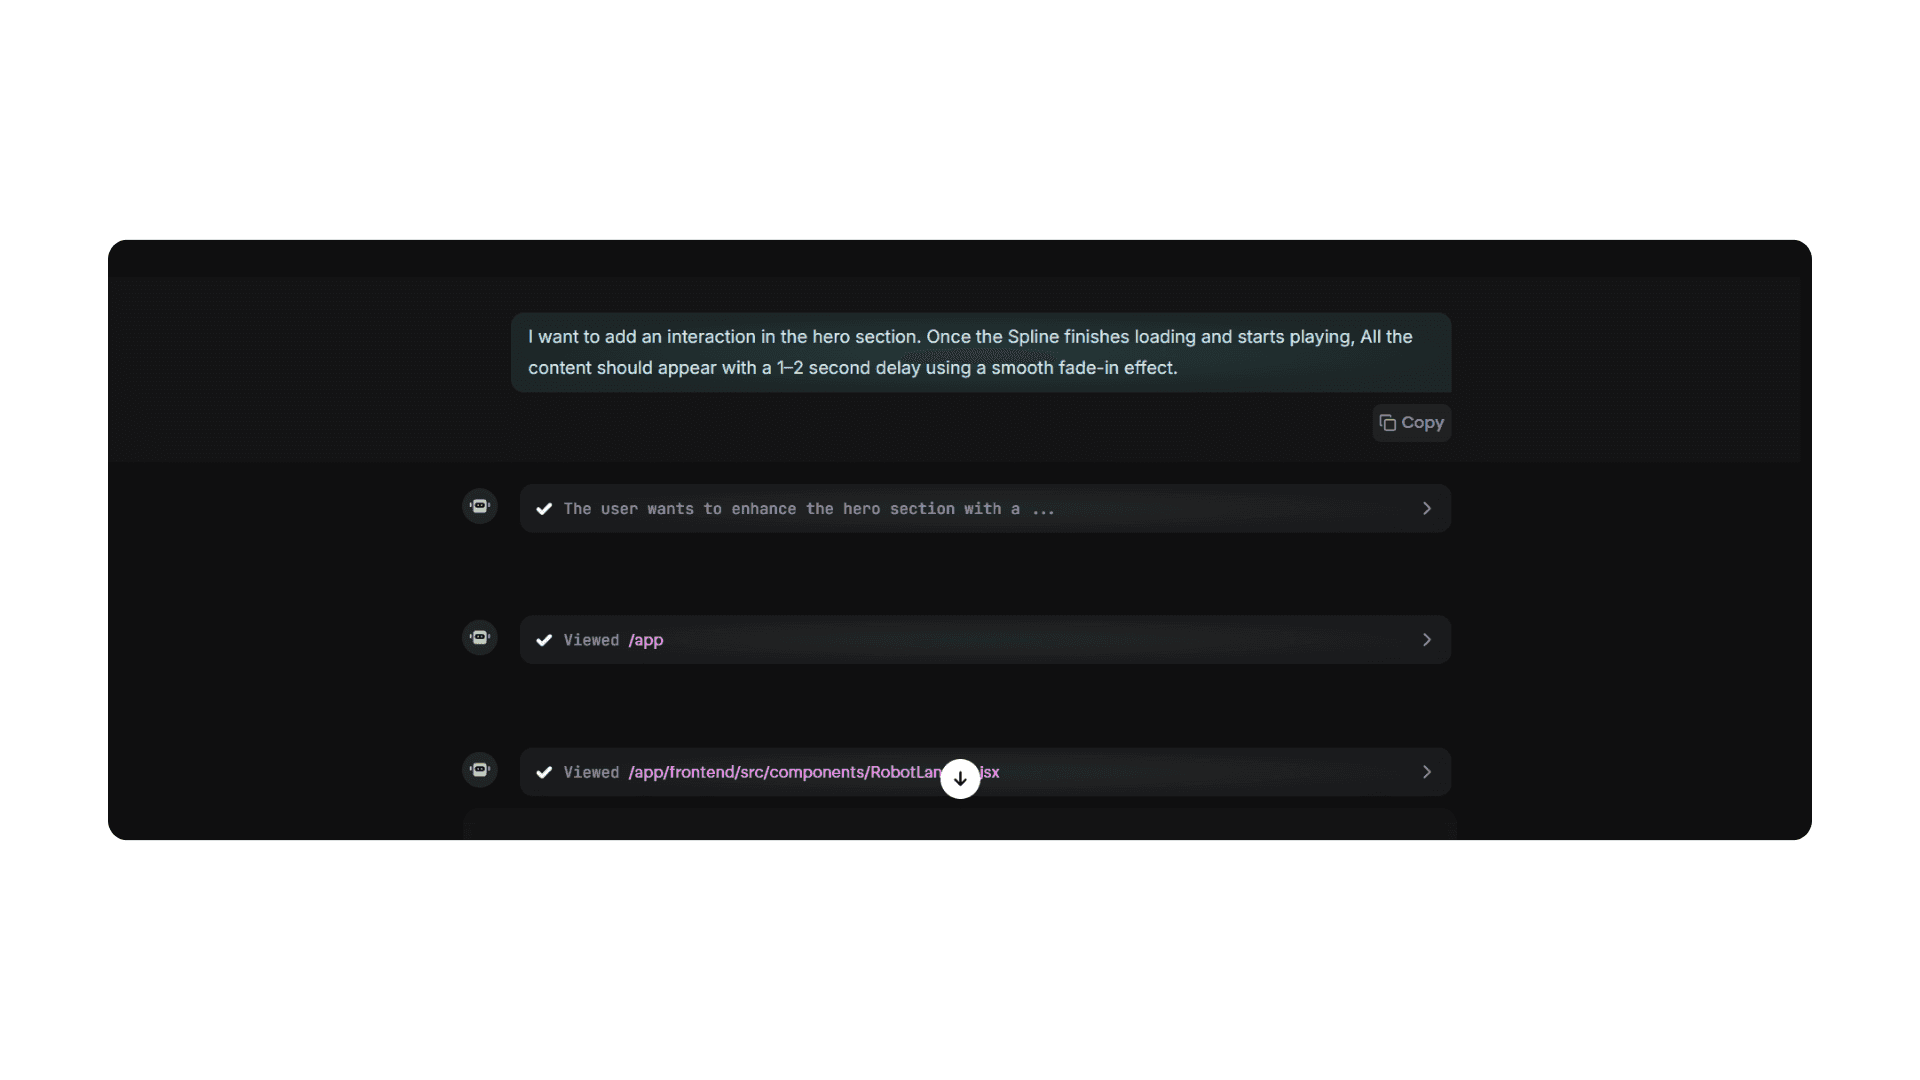
Hover Animations
Hover effects will add another layer of interactivity to your website.
In Spline, link animations to hover states. You can make certain parts of the 3D model change color, move, or react when the user hovers over them.
You can also integrate motion triggers, where parts of the 3D model react to the user’s mouse movement across the screen, creating a truly dynamic experience - and you can do it just by telling the agent what to do.
Step 5: Debugging and Testing
Now that everything is set up, it’s time to test your website and ensure everything is working smoothly.
Here's how you can debug and test your 3D website:
Testing Animations
Test Scroll Animations: Ensure that the animations are triggering at the right point during the scroll. If something feels out of sync, tweak the trigger points or animation duration.
Test Hover Animations: Hovering over elements should trigger the right effects in the 3D scene. If they’re not working, check the Spline settings for hover triggers and ensure they're properly linked to your UI elements.
Debugging is an essential part of building your 3D website, but with Emergent, you’ll find that most of it is handled automatically by the agent.
Here’s how I went through the debugging process with a few issues I encountered:
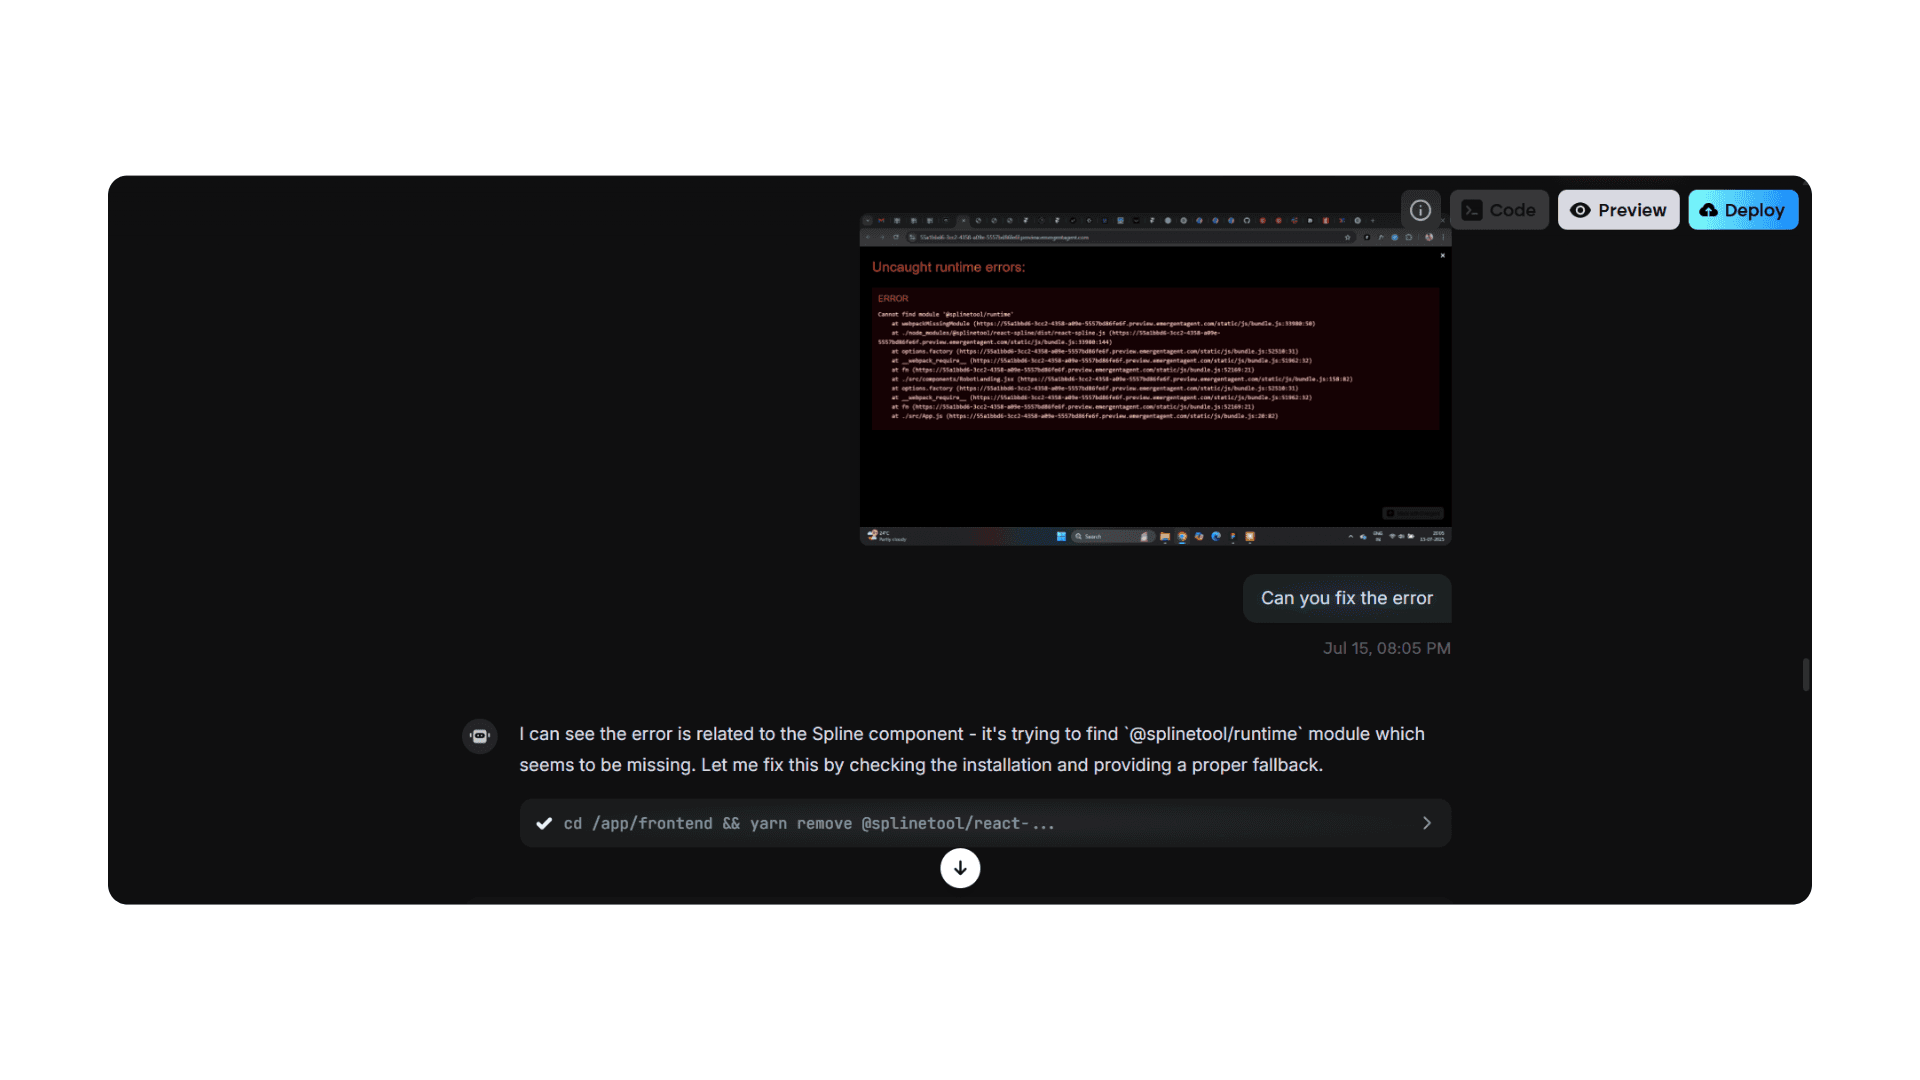
Runtime Error:
The first issue I faced was a runtime error.
To resolve this, I simply screenshotted the error and pasted it into the platform. I asked the agent,
“Can you please fix the error?”
The agent quickly identified the problem, debugged it autonomously, and provided me with a working output.
Tip: For any error you encounter, just screenshot and paste it into the platform. The agent will take care of the rest.
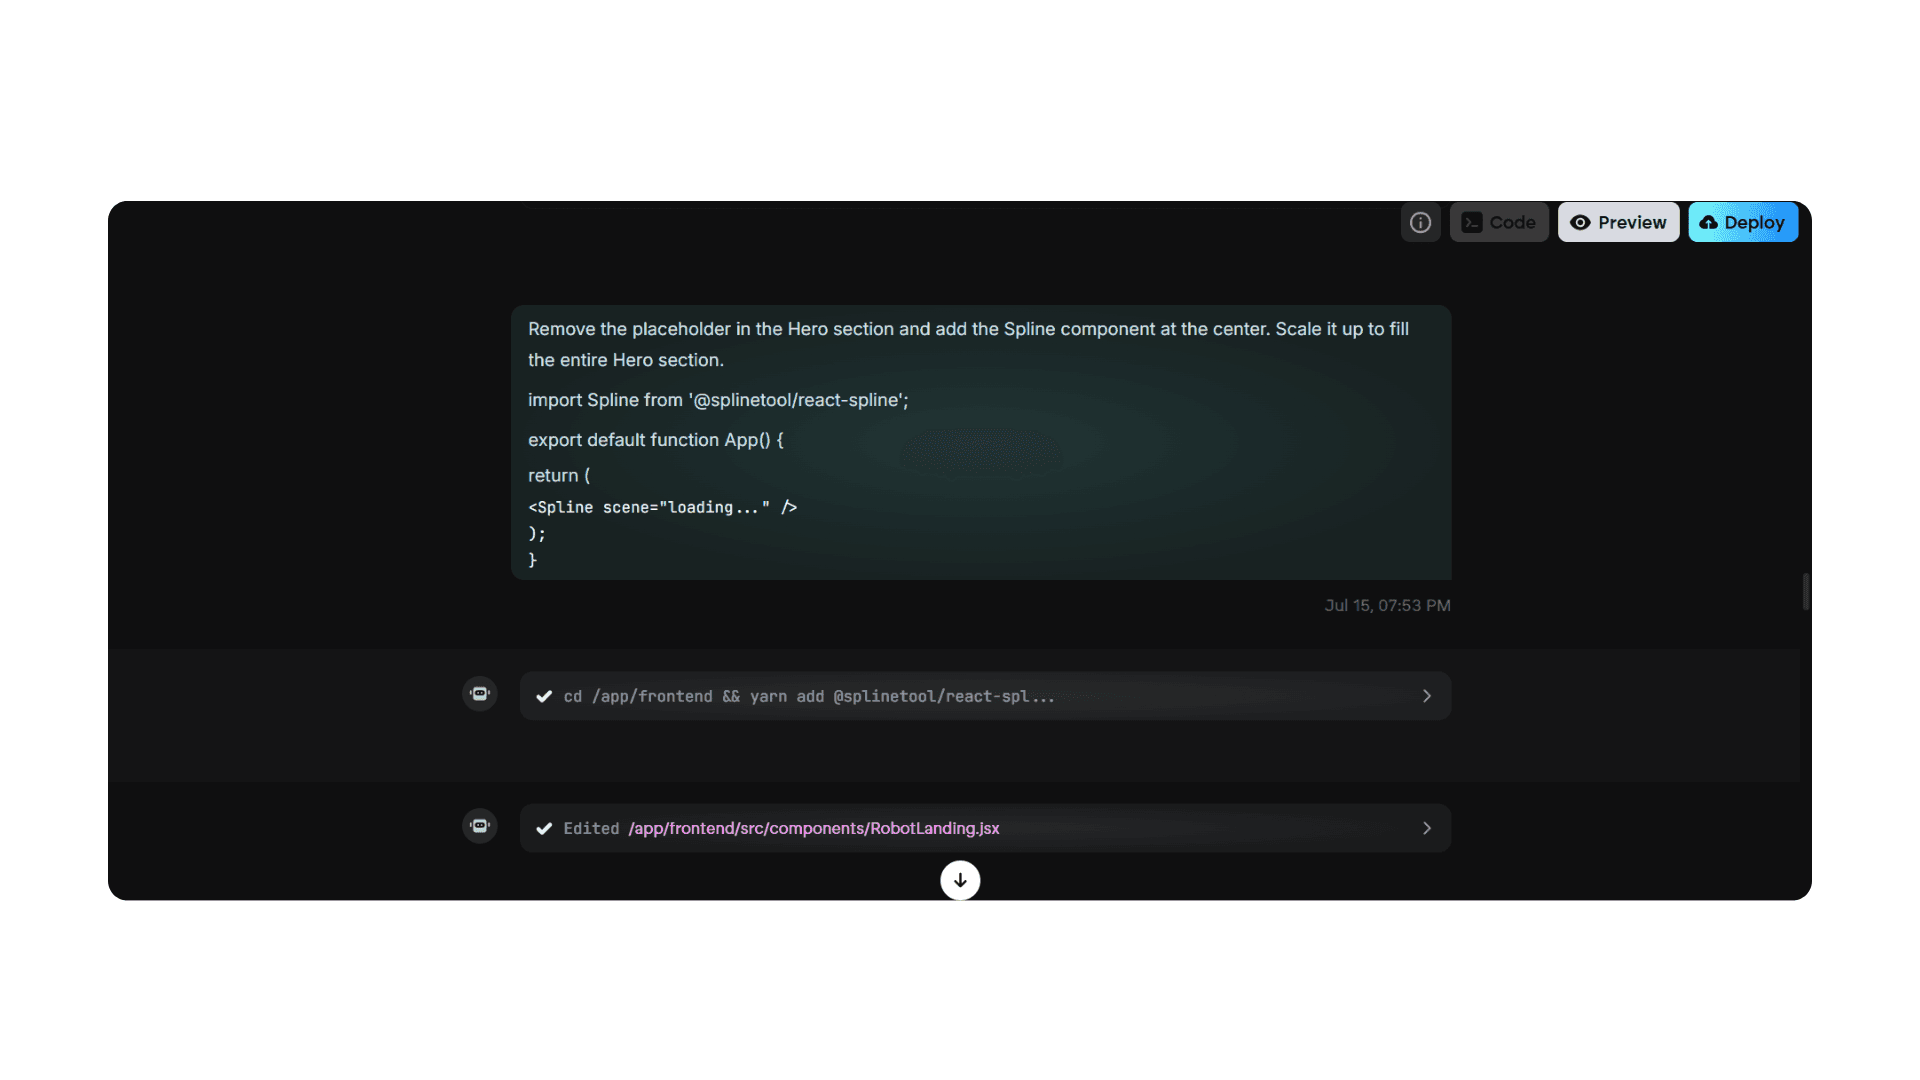
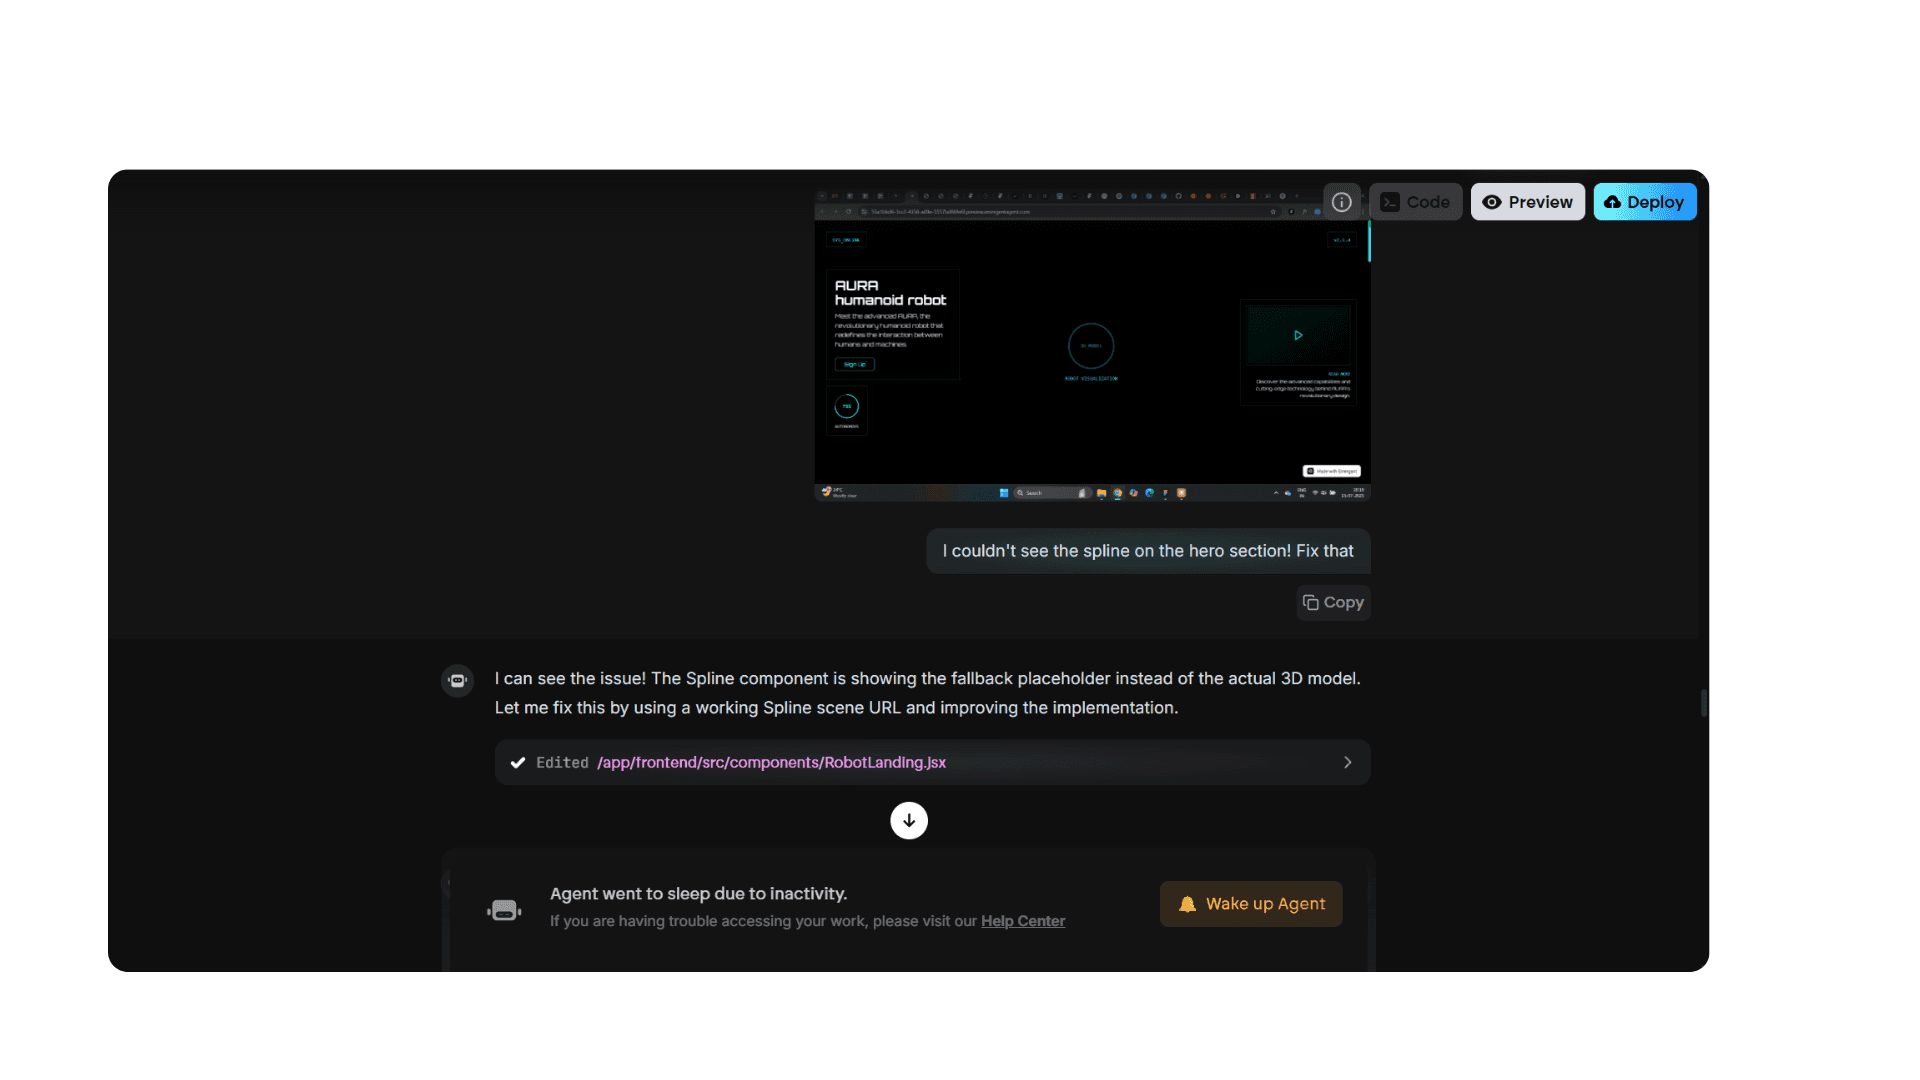
Spline Not Appearing in Hero Section:
The second issue was that I couldn’t see the Spline in the hero section of my landing page.
Again, I screenshotted the problem and asked the agent to fix it. The agent examined the frontend section and autonomously fixed the issue by updating the components.
Tip: Always capture what’s happening and share it with the agent. It’s a quick way to get the problem fixed.
Module Error:
The third issue was a module error. While this may not happen in every case, it’s something that can pop up from time to time.
If it does, the solution is simple: you’ll need to use this prompt :
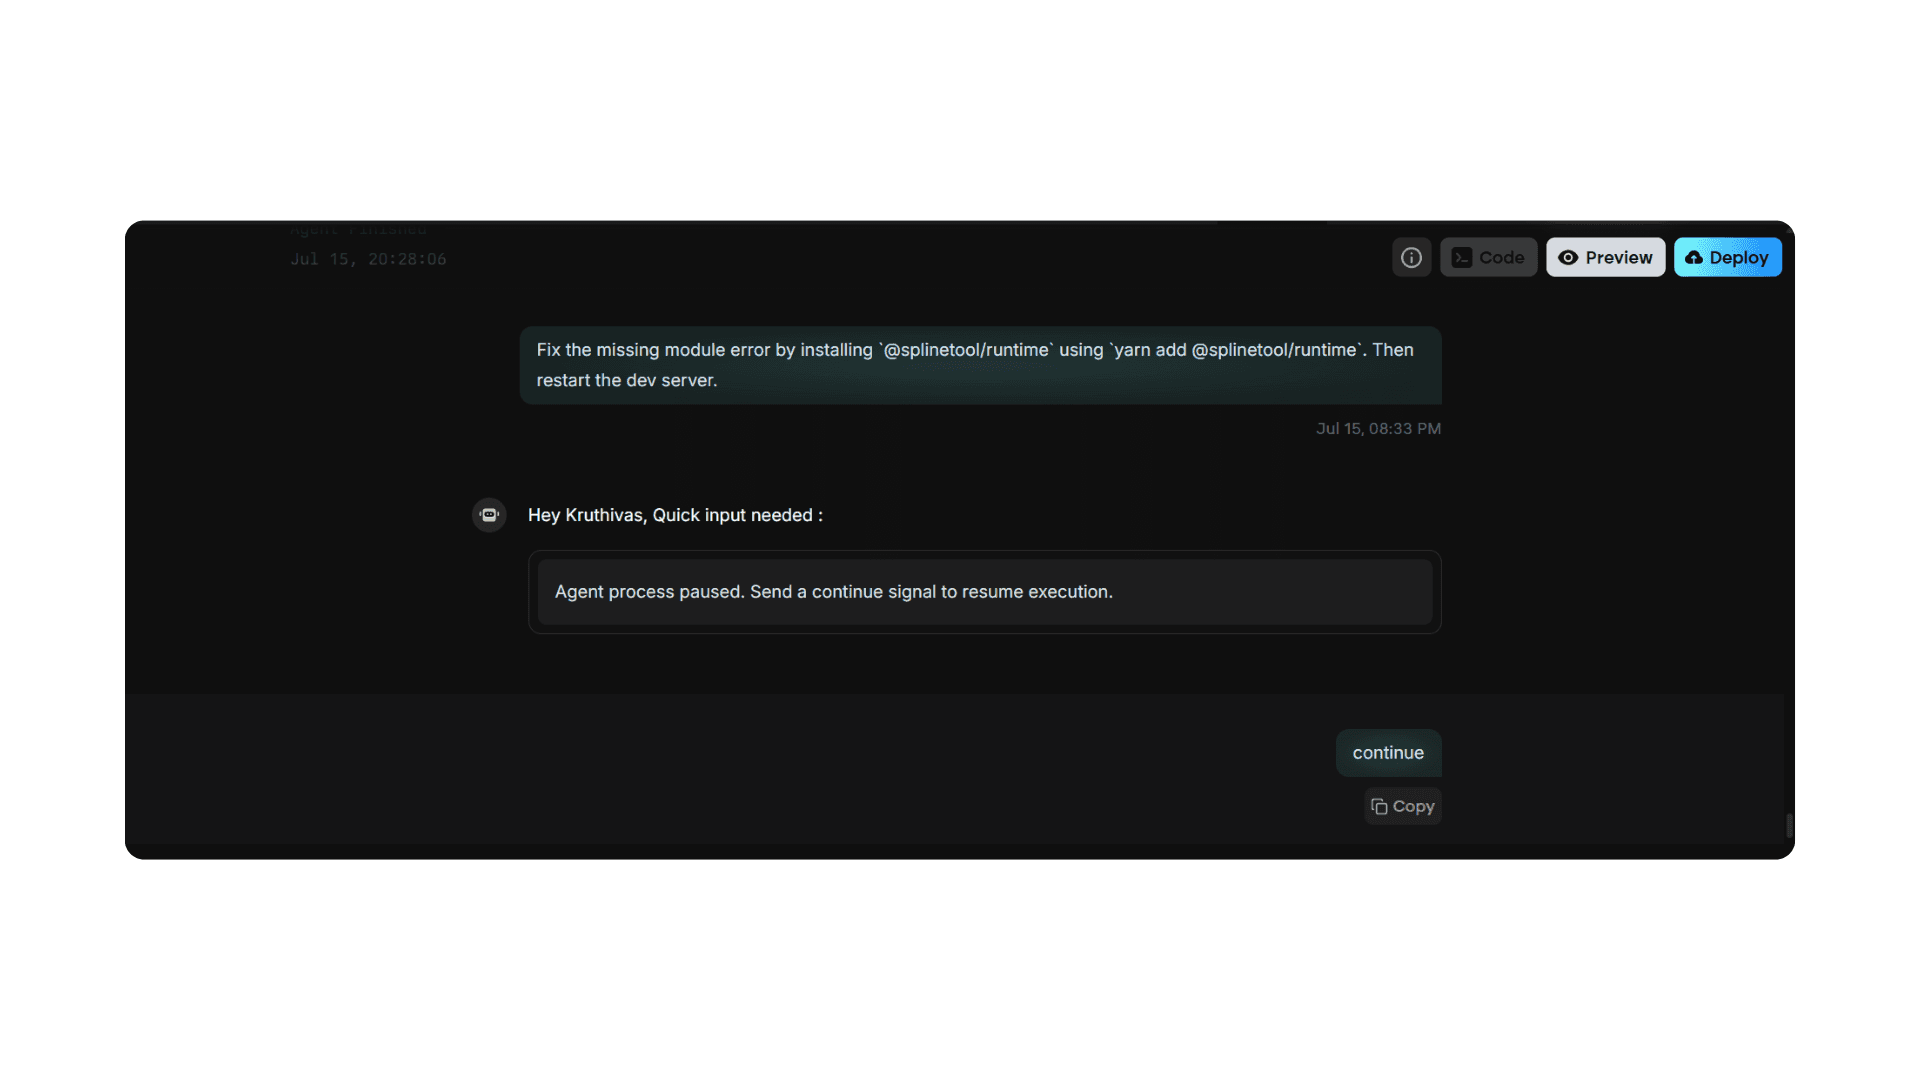
Let the agent take over and handle any additional steps if needed.
Forking: Keeping Your Project Organized and Efficient
One of the most powerful features of Emergent is forking.
This feature is especially important when working on large, complex projects, as it allows you to continue where you left off without losing context. But first, let’s understand what context is:
Context refers to the state and information of your ongoing project.
As you build, the platform stores all the details, code, errors, and fixes in its memory. However, as the project grows, there’s a chance the agent will lose track of all this context.
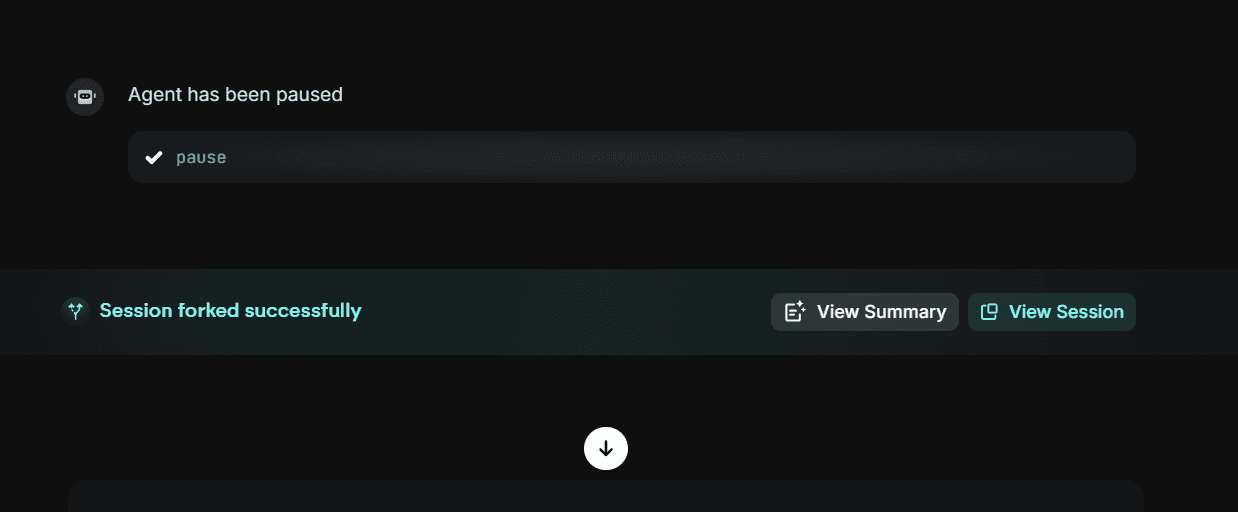
When this happens, the platform will prompt you with an option to fork the session. Here’s how it works:
Forking the Session:
When the agent detects it has reached its context limit, it automatically creates a summary of your current session. This summary includes everything you’ve done, every fix applied, and all debugging steps taken. The summary is then passed to a new task in a new tab, allowing you to continue working from where you left off with fresh context.Benefits of Forking:
Fresh Context: The forked session comes with updated context, so you don’t have to explain what you’ve done previously.
Efficiency: Forking reduces the amount of credits consumed because the new session uses the summarized context, and the agent consumes fewer resources.
Continuity: You can keep working on your project without losing any progress, even when you reach the context limit.
How it Works:
Once the session is forked, you’ll be able to:Continue building without starting from scratch.
Work in a new tab where the agent is aware of all previous context, ensuring no data is lost.
Work with the agent consuming fewer credits since the previous context has been condensed.
Forking is a great way to maintain continuity while ensuring the agent runs efficiently, especially for large projects like a complex 3D website with multiple moving parts.
So, whenever you hit the context limit, don’t worry - fork it, and keep building seamlessly.
Step 6: Publish / Deploy Your 3D Website
Once you’re happy with the setup and everything works as expected, you can deploy your 3D website.
How to Deploy:
In Emergent, click “Deploy”.
You can host your site on Emergent’s platform or connect a custom domain.
Ensure responsiveness on all devices (this is key for 3D sites!).
Now your website is live, fully interactive, and packed with stunning 3D animations that engage users.
Wrapping Up
So, what have you built today?
A 3D website that not only looks great but also engages your visitors through scroll-triggered animations, hover effects, and interactive UI elements.
With Spline and Emergent, you’ve created something that will definitely stand out.
What’s Next?
Add more models: Keep adding more 3D models and animations to expand the interactivity. (Make sure your landing page does not break tho!)
Experiment with complex animations: Explore more advanced animation techniques, like physics-based models or interactive storytelling.
Make it a custom landing page for your business: Turn your 3D website into a landing page that will impress users as soon as they visit!
And there you have it! Your visually stunning 3D website with Spline animations is up and running.
Time to impress your visitors with something truly unique.
Check out the preview to the landing page here : http://aura-robotics.preview.emergentagent.com/
Start building now on emergent.sh!