

Getting Started with OpenClaw on Emergent
This tutorial walks through the complete beginner journey of setting up OpenClaw (previously Moltbot) on Emergent and then extending it to real-world communication channels like Telegram and WhatsApp.
By the end, you will not only have OpenClaw running, but also be able to interact with it outside the Emergent interface and understand how to keep it running autonomously.
Introduction
Understanding what is OpenClaw, starts with how it simplifies autonomous agents. OpenClaw is a preconfigured autonomous agent chip on Emergent that can be launched in minutes. Traditionally, setting up an autonomous agent required installing dependencies, configuring API keys, provisioning servers, and accepting security risks on a personal machine or paid VPS.
Emergent removes these barriers by handling the entire setup automatically in the cloud. A single action provisions the agent runtime, connects language models, and prepares the environment for multi-platform interaction.
This tutorial covers the initial setup and the most common next steps users take to get real value from OpenClaw. If you want to see the full walkthrough of using OpenClaw on Emergent, do check out the video down below!
TLDR: Essentials to setup OpenClaw with Emergent
Here's the key steps and considerations you need to follow to start exploring straight away:
- If you haven't yet, you should definitely set up your Universal Key on Emergent to automatically refill the balance once it drops below a certain number of credits (we recommend 5). Here's where to find those settings:
- If you have an existing Claude subscription, you would see more economical token rates if you use your own API key. Simply select the Anthropic option from the initial dropdown where you select which key to use with OpenClaw, and enter your own key.
We've outlined how to get the same down below! - If you want your OpenClaw to be persistent and stay online 24x7, do remember to deploy the bot with the "Deploy" button on the top right of your Emergent chat. Again, we cover this further ahead too.
Learning Outcomes
By completing this tutorial, you will be able to:
- Launch OpenClaw with no manual configuration
- Understand how Emergent provisions the agent environment
- Connect OpenClaw to Telegram
- Connect OpenClaw to WhatsApp
- Interact with the agent across platforms
- Publish the agent so it runs continuously
- Use the agent for basic automation and scheduled tasks
Step 0: Prerequisites
Before starting, ensure the following:
- A modern web browser such as Chrome
- A Google account for authentication
- A Telegram account if you plan to connect Telegram
- A WhatsApp account if you plan to connect WhatsApp
No API keys are required to get started.
Step 1: Open the Emergent Home Page
Navigate to:
This is the main entry point for launching agent chips.
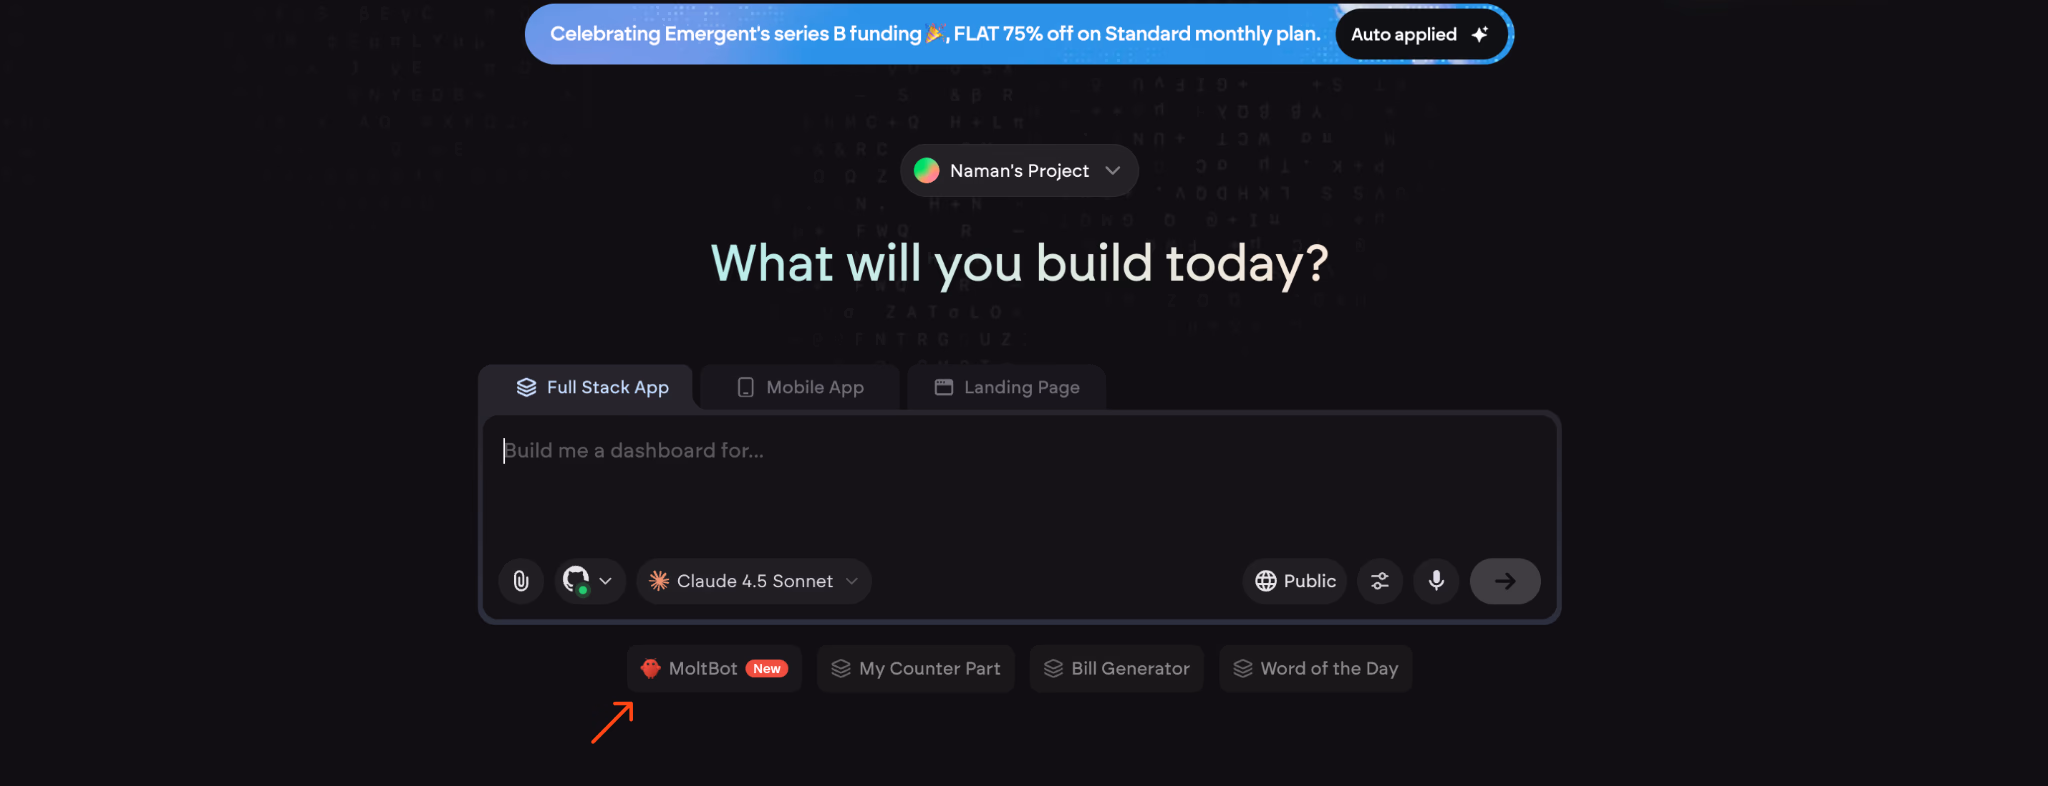
Step 2: Select the OpenClaw AKA MoltBot Chip
Locate the MoltBot chip on the home screen and select it.
This chip represents a predefined autonomous agent template managed by Emergent.
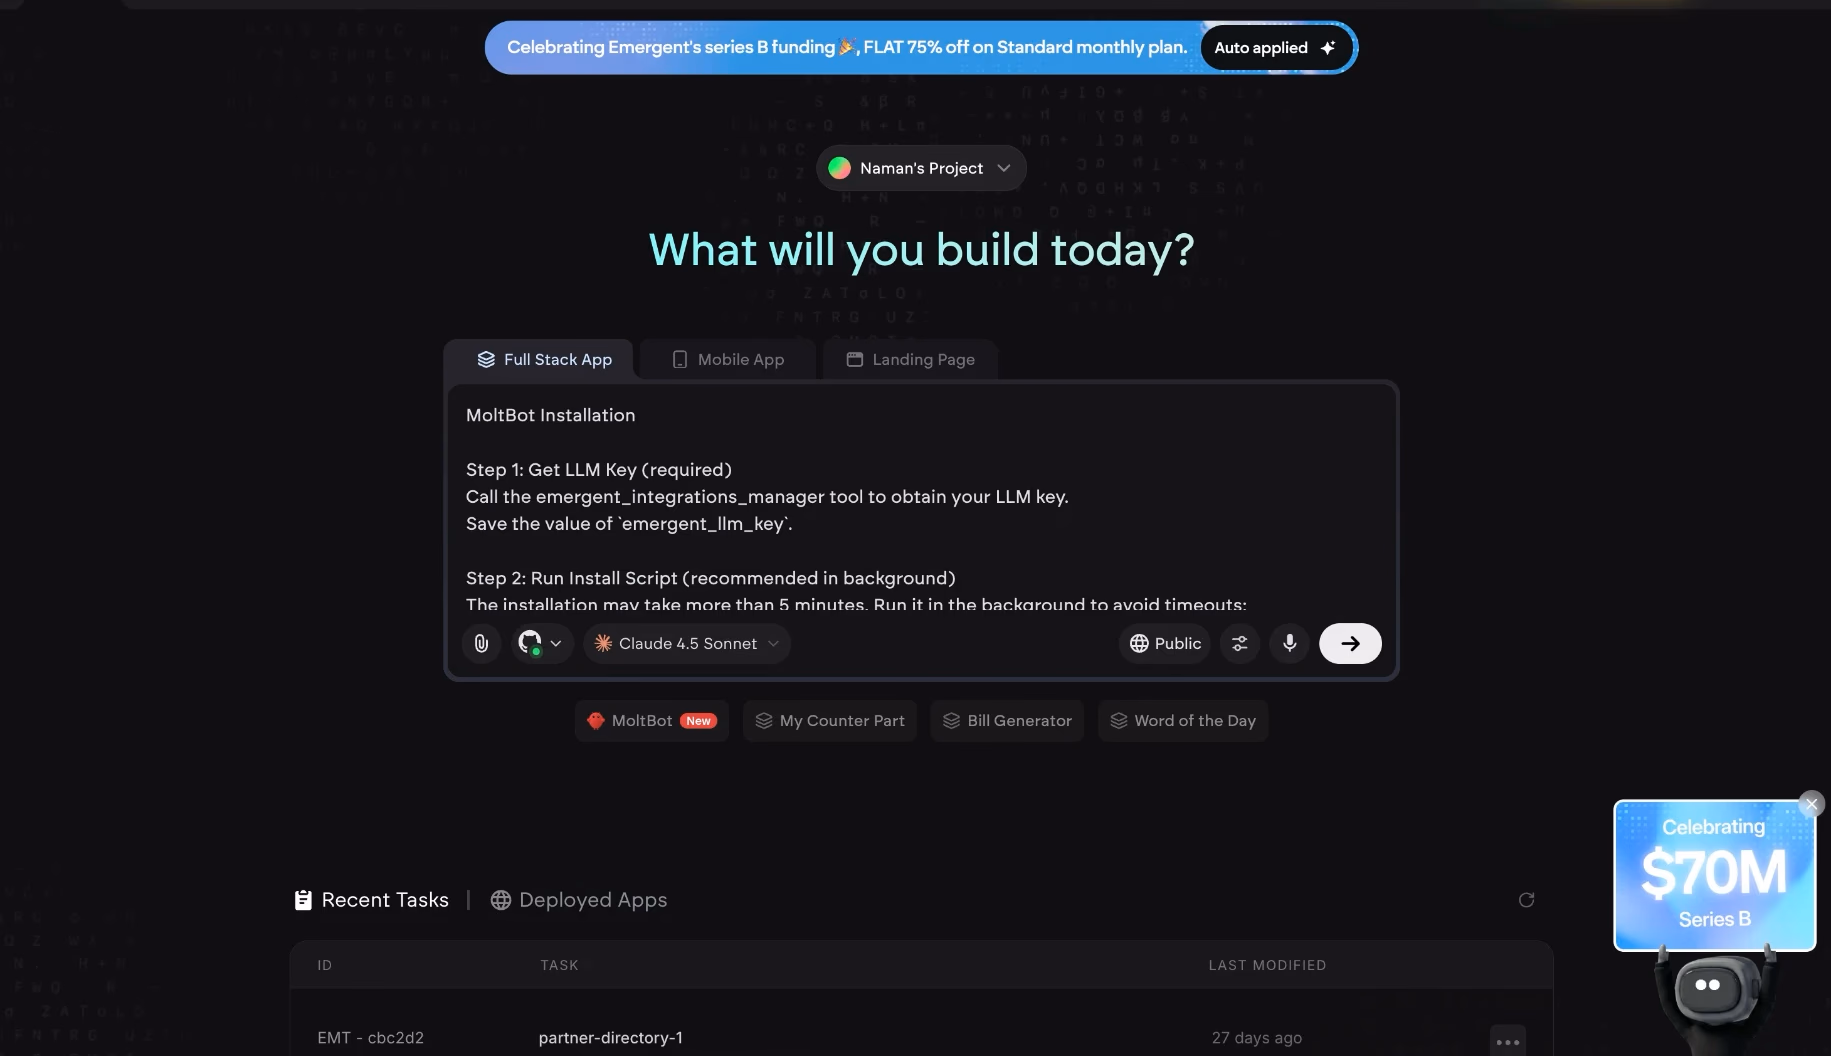
Step 3: Initiate the Setup
With the OpenClaw chip selected, press Enter or trigger the primary action.
This single action starts the entire setup flow. No configuration screens or forms appear.
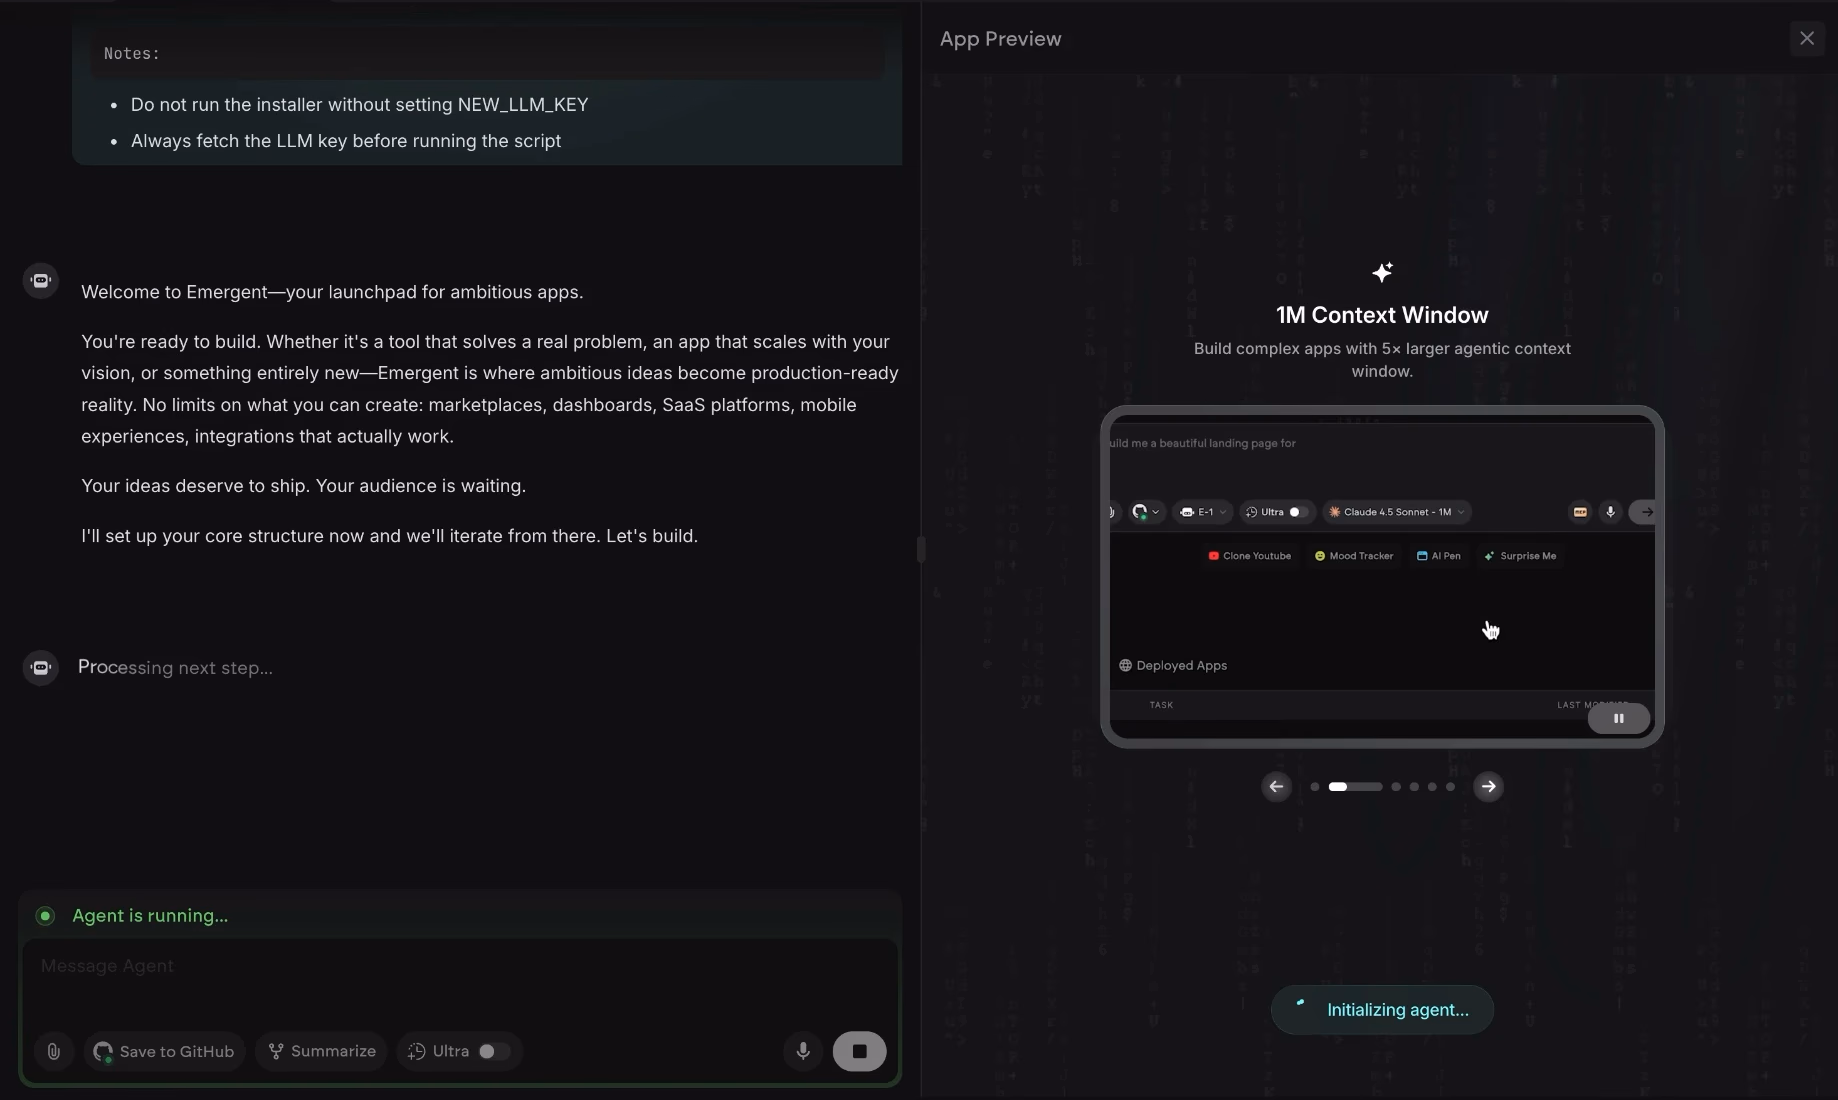
Step 4: Autonomous Background Setup
Emergent now provisions everything automatically in the background:
- Agent runtime on a cloud virtual machine
- OpenClaw dependencies and tools
- Default recommended LLM configuration
- Secure, isolated execution environment
This process usually completes in about five minutes, though it may take between two and eight minutes.
No interaction is required during this phase.
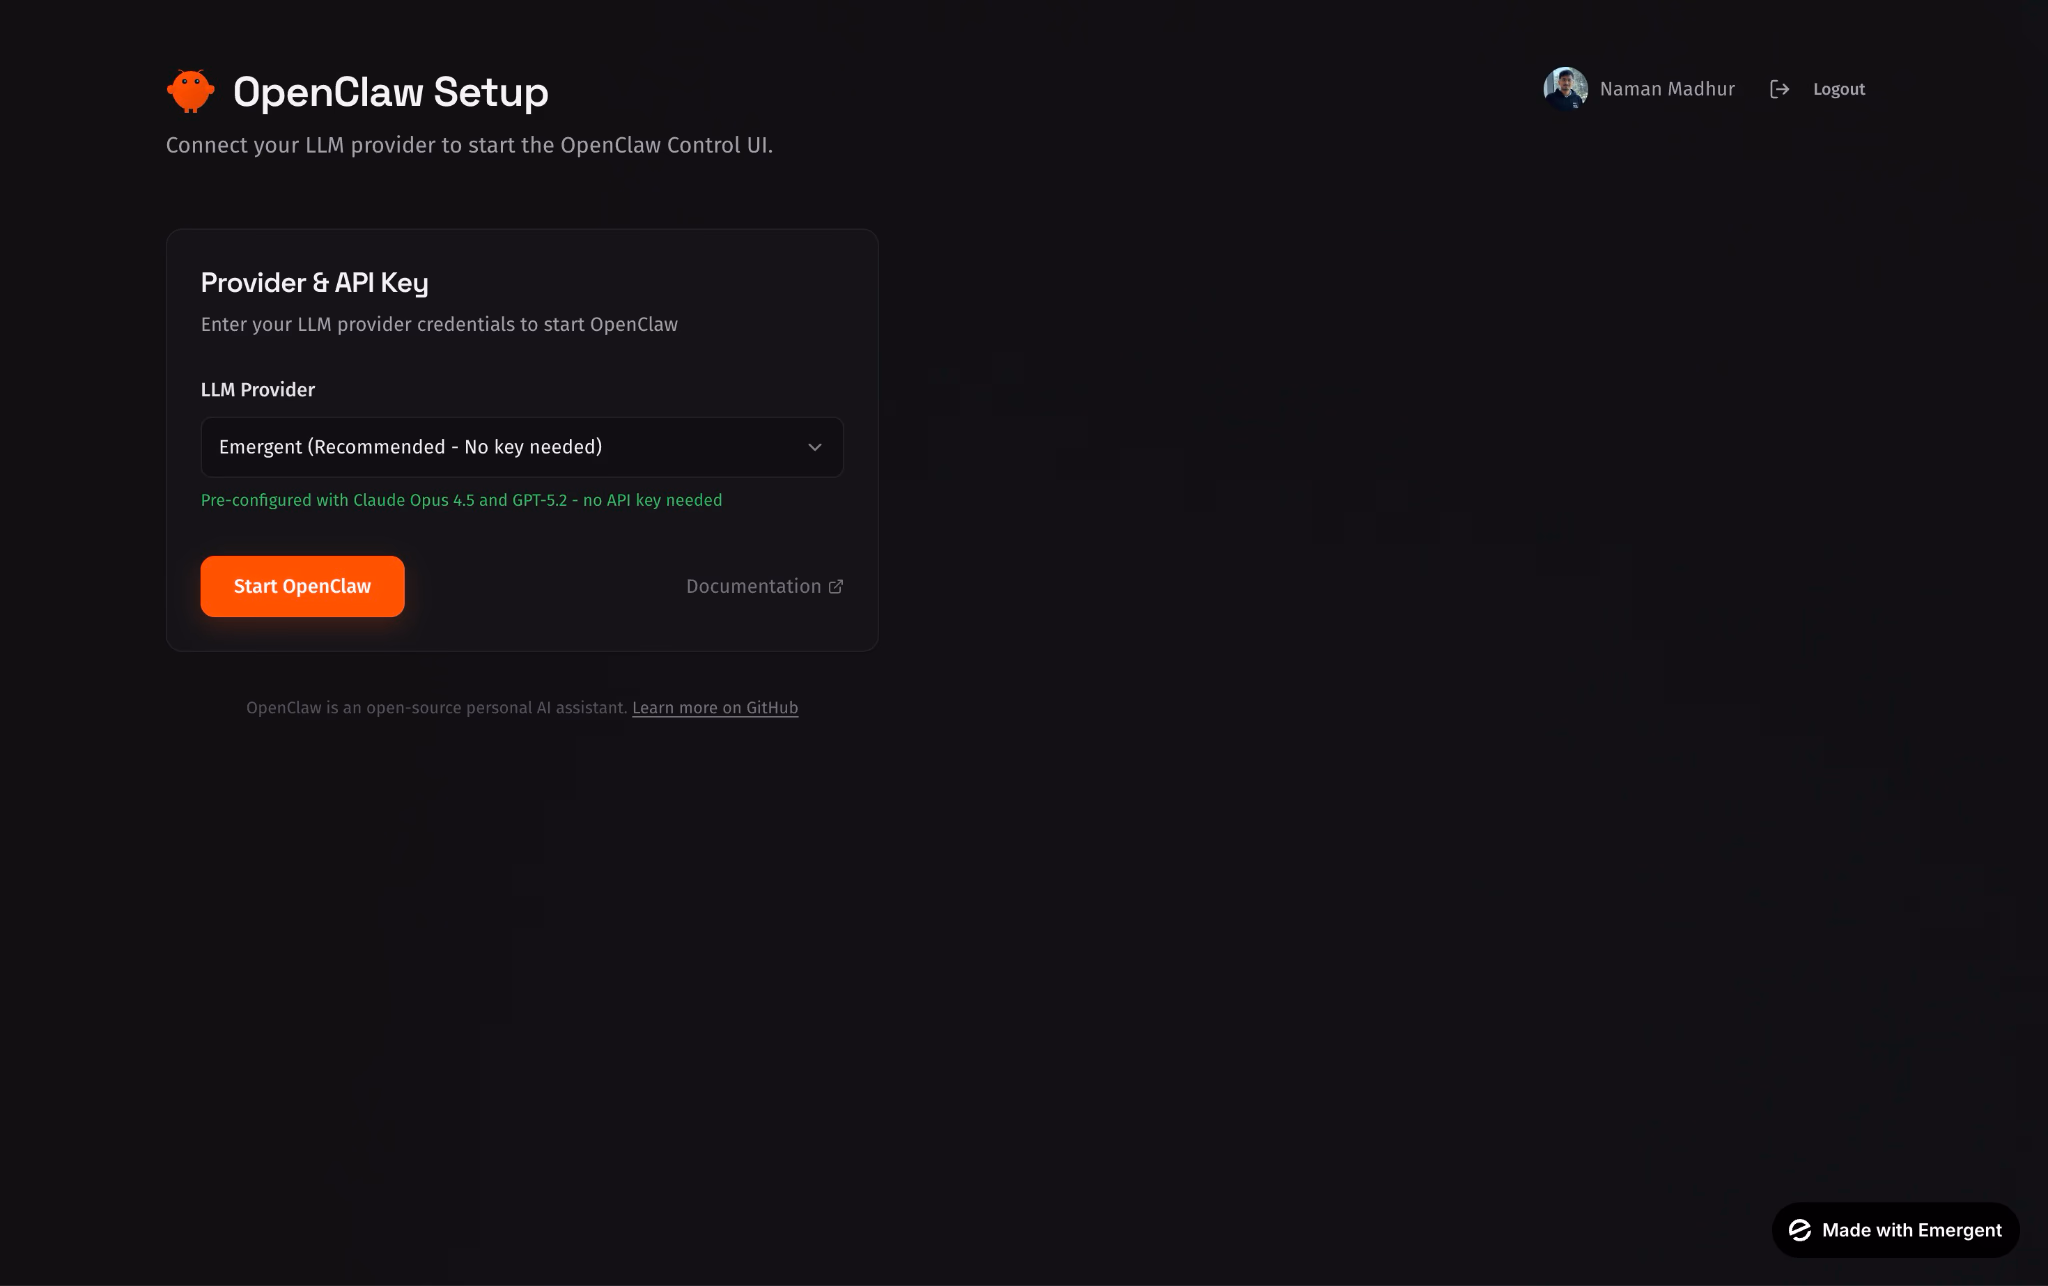
Step 5: LLM Key Handling
Emergent supplies its own recommended LLM keys by default. This allows users to start immediately without providing OpenAI or Anthropic credentials.
Users can optionally add their own API keys later, but this is not required to proceed.
Step 6: Setup Completion Confirmation
When setup finishes, the interface displays a success message:
"OpenClaw started successfully"
This confirms that OpenClaw is live and the agent environment is ready.
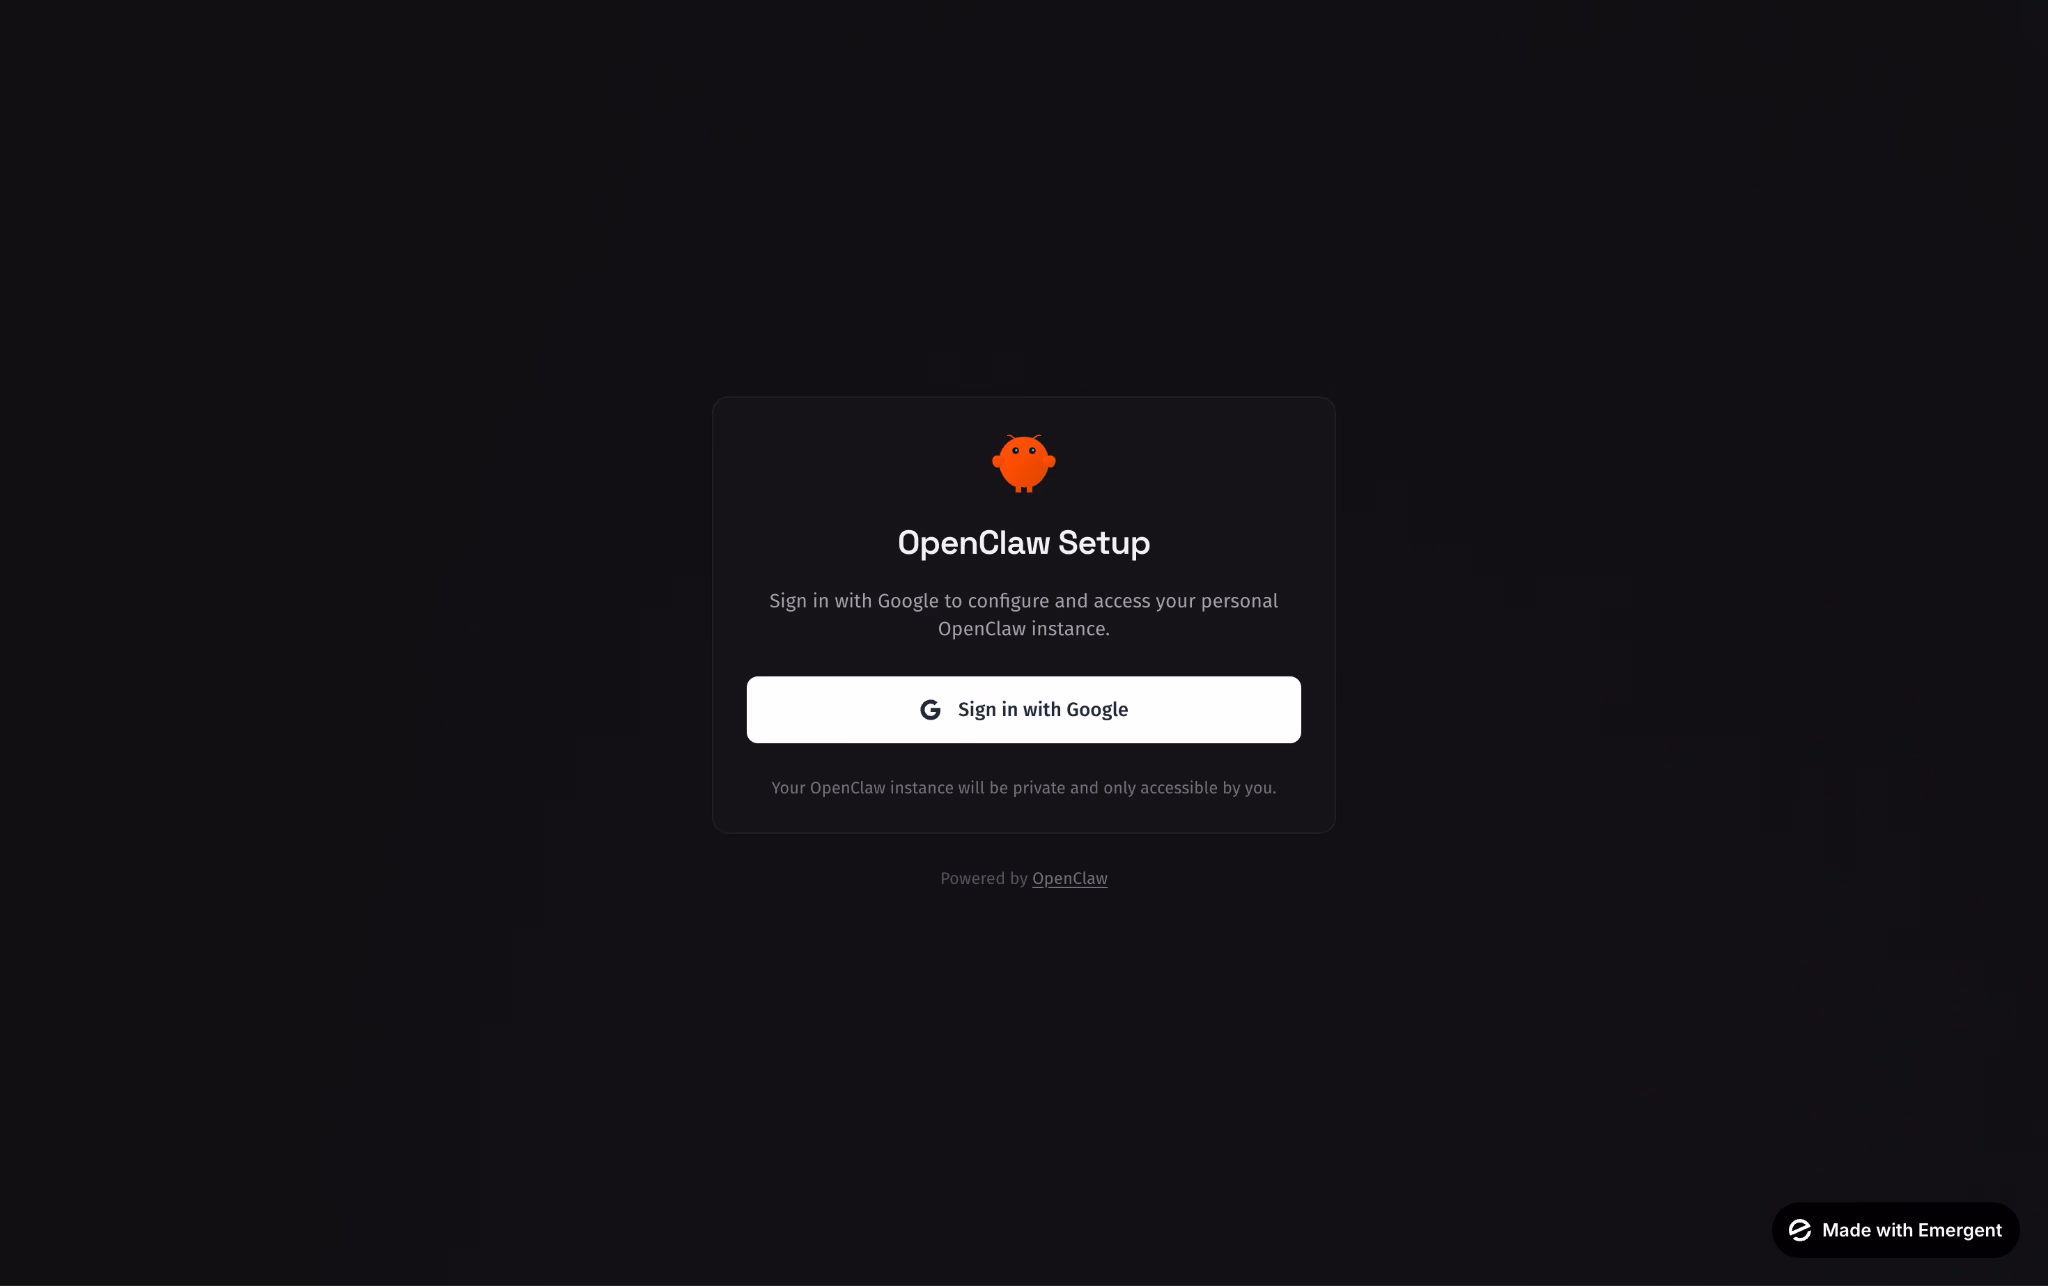
Step 7: Sign In to Continue
Select Continue with Google and sign in.
Any email address can be used. This step creates or links your Emergent account and unlocks the agent workspace.
Step 8: Understanding the Default Agent State
At this point:
- OpenClaw is running on a cloud VM
- The agent is isolated from your personal device
- No local computer access is granted
- The agent can access web-based tools and APIs
If the agent is not published, it will stop when the session ends. Publishing is required for long-running tasks and automations.
Step 9: Connecting OpenClaw to Telegram
Telegram is the most common first integration.
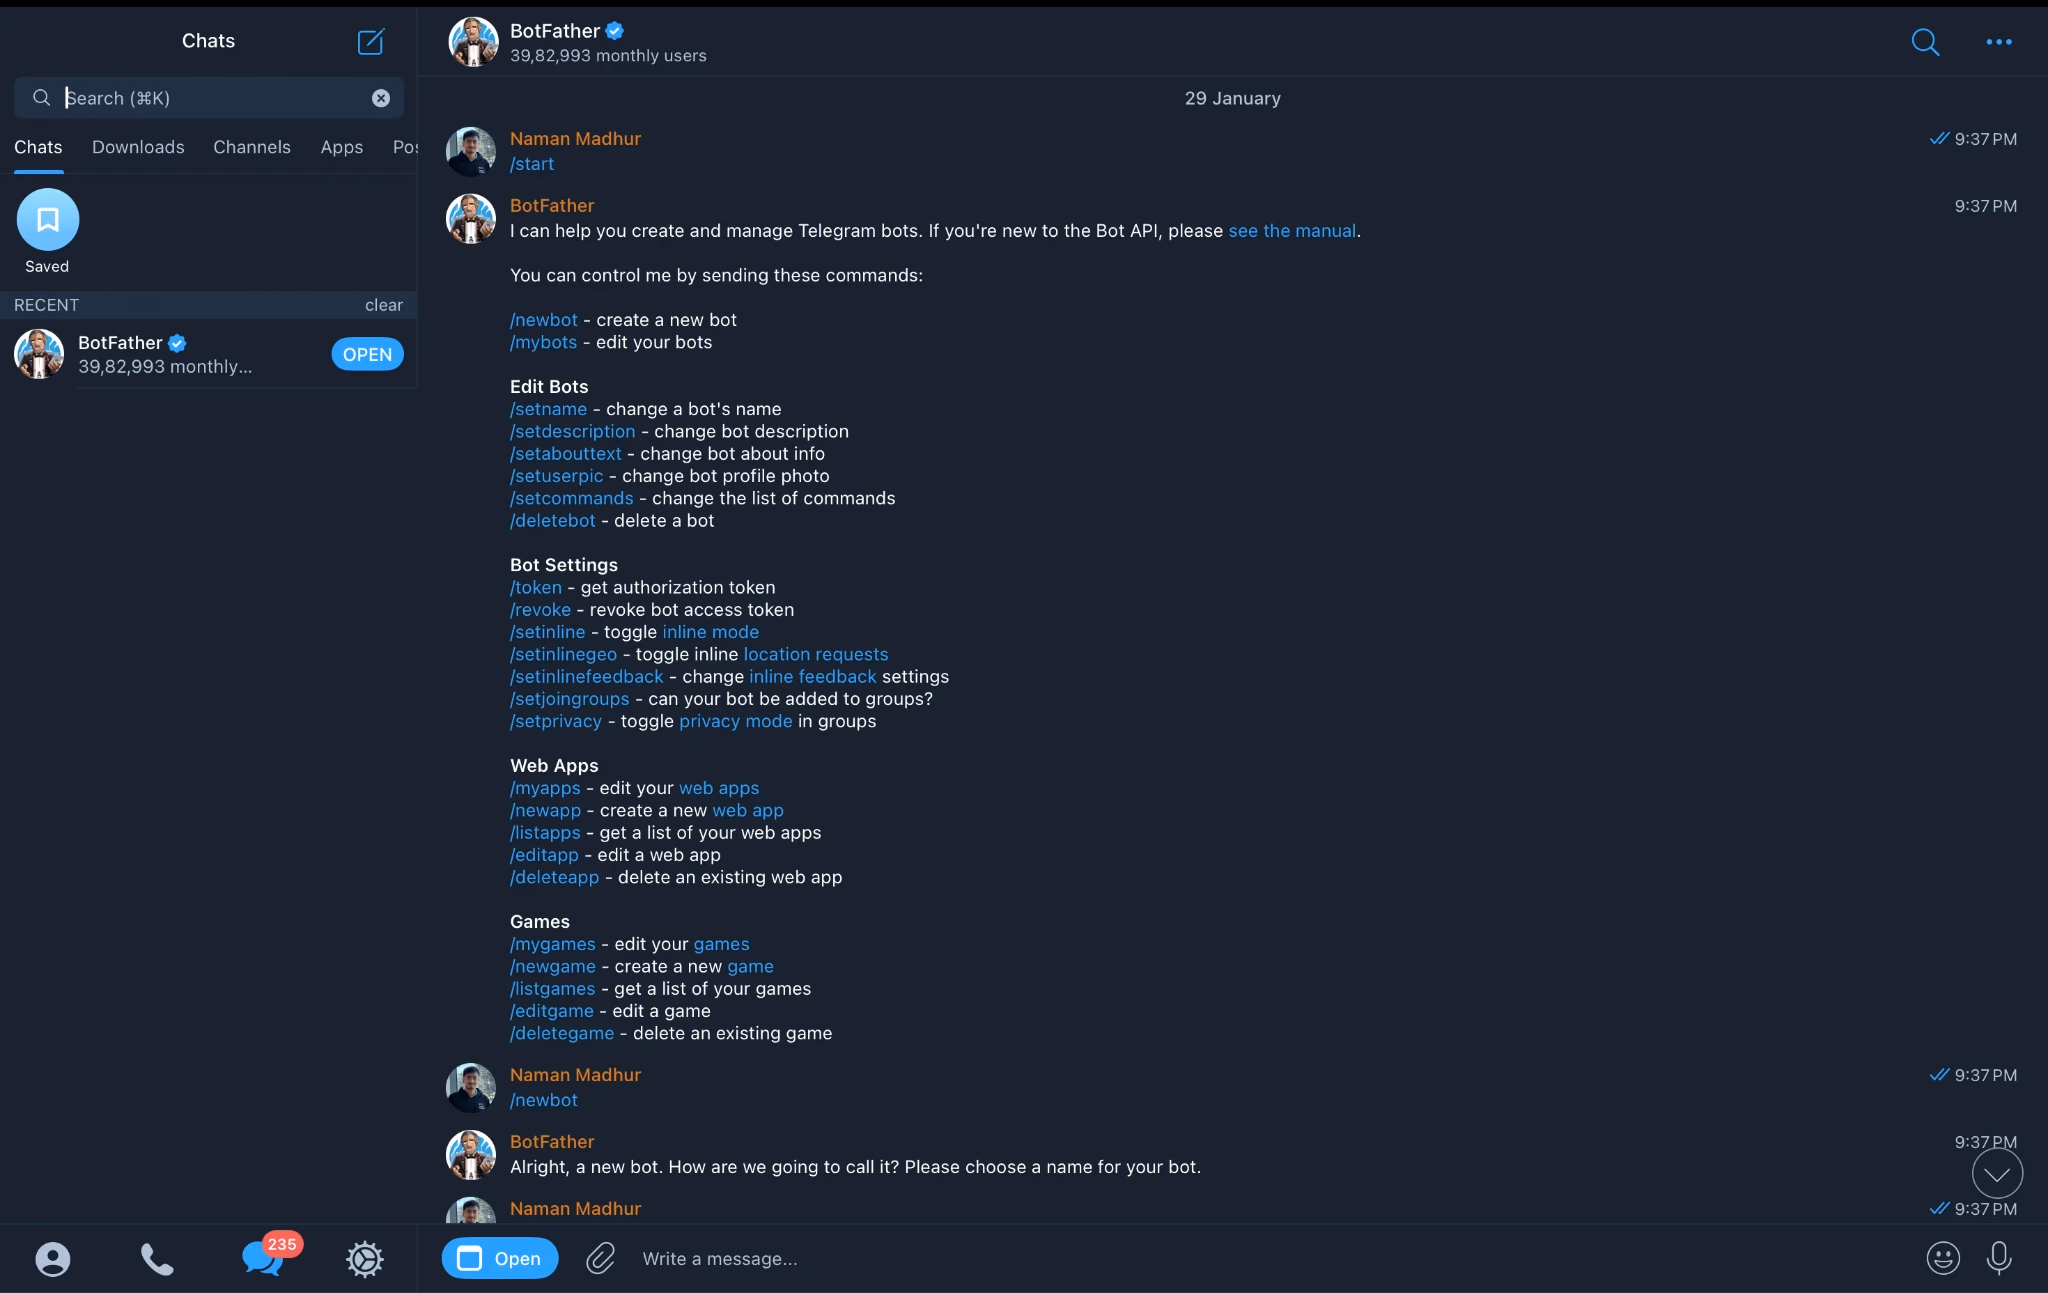
Create a Telegram Bot
- Open Telegram on mobile or web
- Search for @BotFather
- Send the command
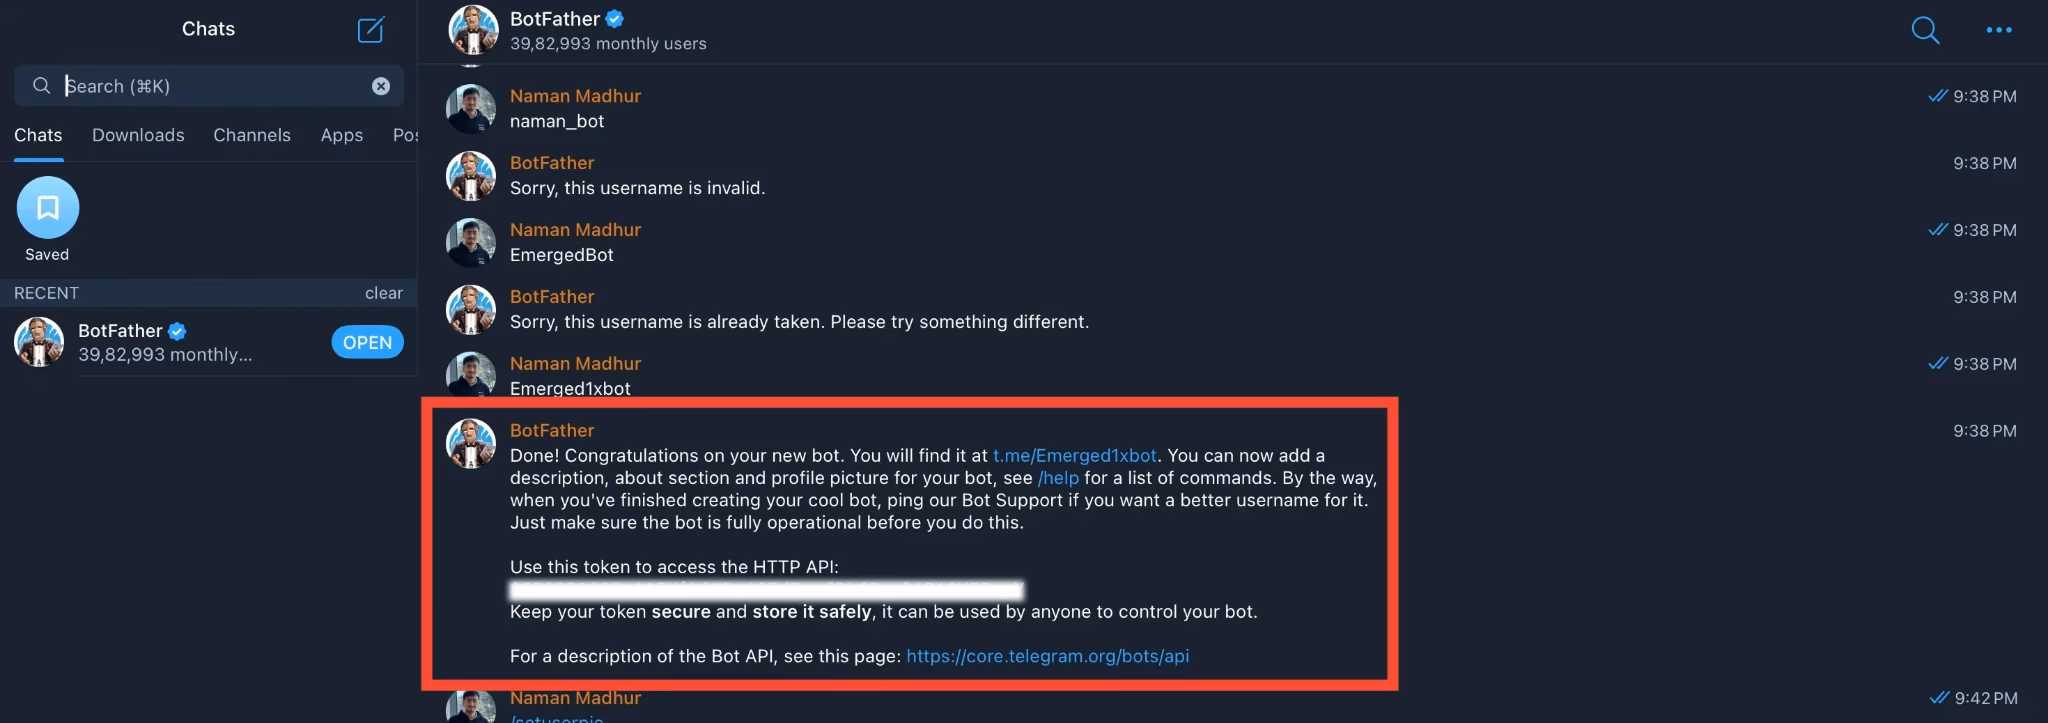
/newbot - Choose a name for your bot
- Choose a username ending with
bot - Copy the API token provided by BotFather
Connect Telegram to OpenClaw
- Return to the Emergent OpenClaw interface
- Paste the Telegram API token into the chat or connection field
- Find your newly created bot on Telegram
- Send a message such as
hi - Receive a pairing code from the bot
- Enter the pairing code back into Emergent
Once confirmed, the connection is complete.
Test the Integration
Send a message to your Telegram bot, for example:
Send me five random life philosophies
OpenClaw should respond directly in Telegram.
Step 10: Connecting OpenClaw to WhatsApp
WhatsApp integration allows the agent to communicate via your phone number.
Initiate WhatsApp Connection
- In the Emergent interface, ask the agent:
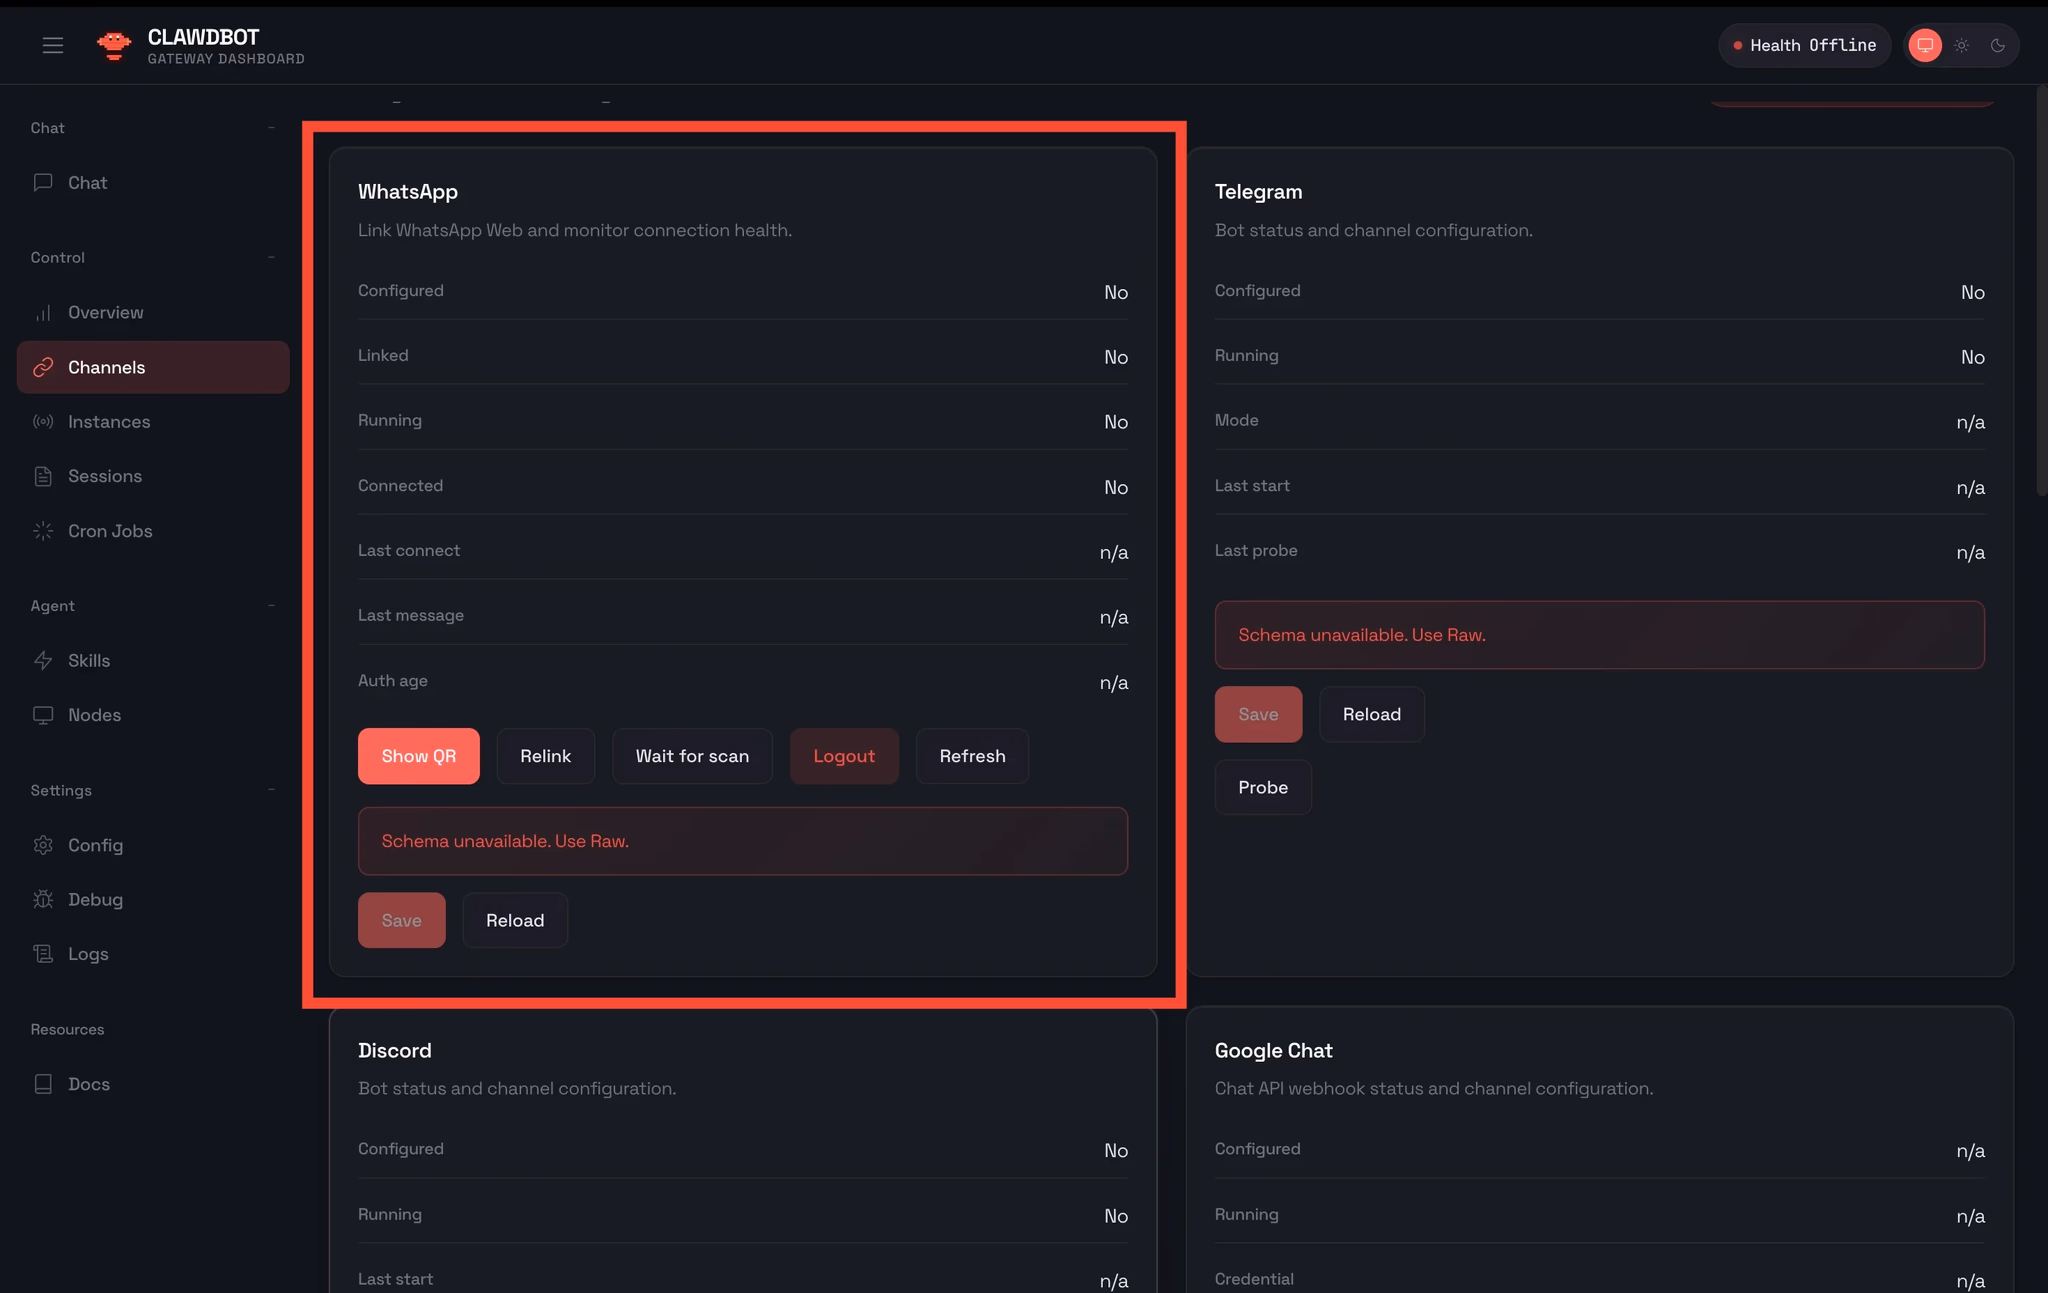
Help me connect my WhatsApp - Open the Channels or Integrations section
- Select WhatsApp
- Click Show QR
Complete the Connection
- Open WhatsApp on your phone
- Scan the QR code
- If prompted, refresh once
- Enter your phone number with country code
Once connected, the agent will send a confirmation message to WhatsApp.
Step 11: Cross-Platform Interaction
After connecting Telegram and WhatsApp:
- You can message the agent from any connected platform
- Context is preserved across platforms
- You can instruct the agent to send messages to specific contacts
Example prompt inside OpenClaw Control UI (Via Emergent):
Send a summary of today’s AI news to my WhatsApp
Note:
If you face any issues in connecting WhatsApp or Telegram via the agent chat, please navigate to the Channels tab in the Control UI and follow the steps there!
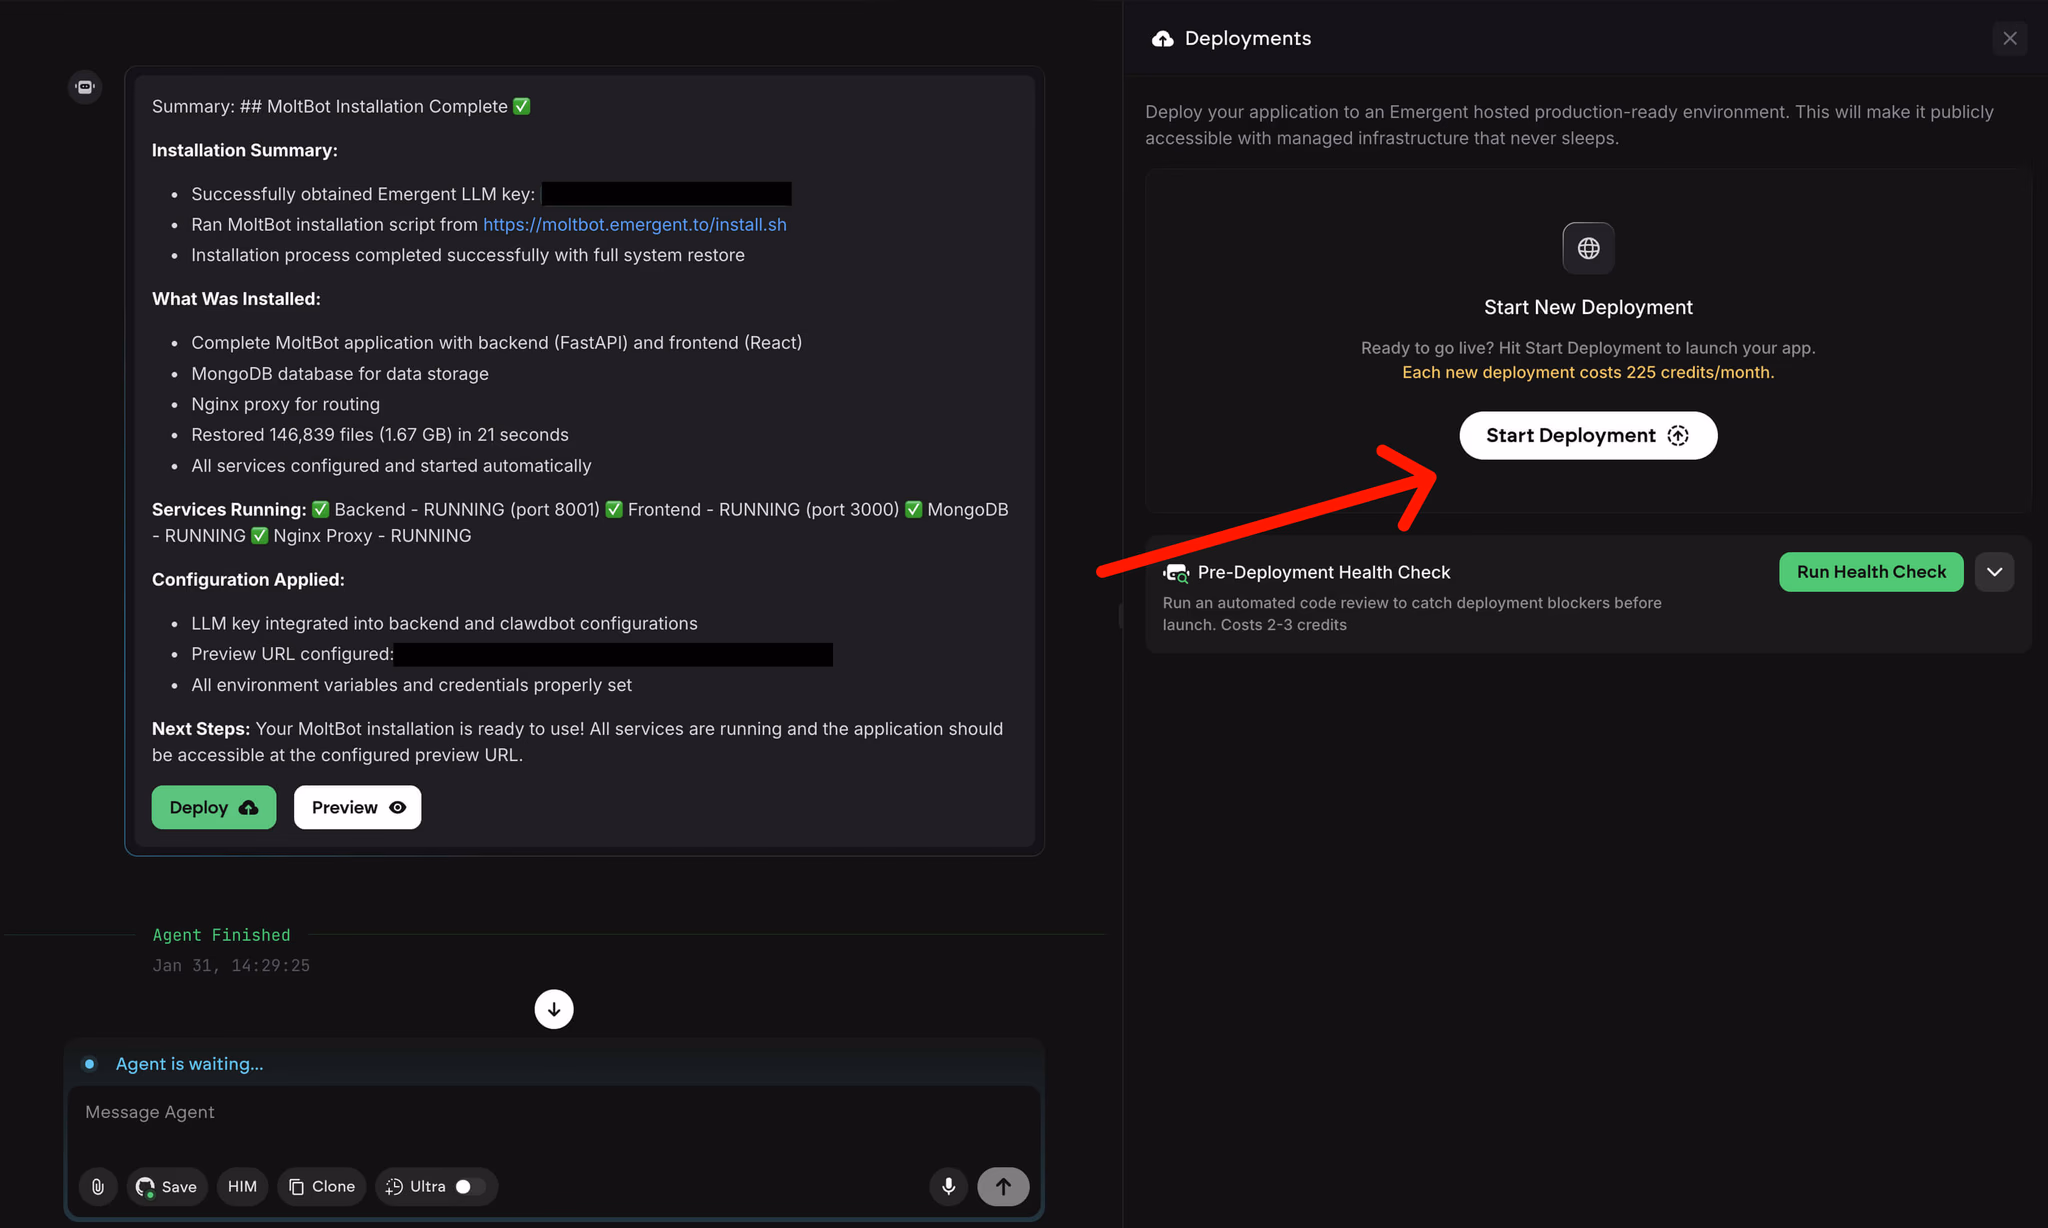
Step 12: Deploying the Agent for Persistence
To enable long-running behavior:
- Deploy the agent from the Emergent interface
Deploying keeps the virtual machine running continuously. This is required for:
- Scheduled tasks
- Cron jobs
- Continuous monitoring
- Background automation
Undeployed agents stop when the session ends.
Step 13: Using Scheduled Tasks and Automation
Once published, you can create recurring tasks.
Example prompts:
- Send me the latest AI developments every hour
- Check Twitter for viral AI posts daily and summarize them
- Remind me every morning to practice Spanish
These tasks run automatically without further input.
What OpenClaw Can and Cannot Do:
What Works Well?
- Web-based tools and APIs
- Messaging platforms
- GitHub repositories
- Research and monitoring
- Content generation
- Scheduling and automation
What Does Not Work?
- Access to local files or apps on your personal device
- Apple Notes, local folders, or system-level permissions
- Anything requiring physical device access
Ideas to Build With OpenClaw
Once OpenClaw is set up and connected to your preferred platforms, it becomes a flexible foundation for building personalized, autonomous workflows. Below are example use cases that users can build or adapt based on their own needs.
These are not presets. They are starting points for custom agents.
Daily Morning Briefing
OpenClaw can act as a single daily briefing system that replaces dozens of notifications.
Each morning, the agent can:
- Scan emails received in the last 24 hours
- Identify which messages require action or decisions
- Summarize key points instead of forwarding raw emails
- Check real-time traffic conditions for the user’s commute
- Adjust recommended departure time based on traffic
- Set an alarm ten minutes before the user needs to leave
- Curate news updates from topics, industries, or niches chosen by the user
The result is one concise briefing delivered via Telegram, WhatsApp, or another connected channel, instead of fragmented alerts across multiple apps.
This use case works especially well with scheduled tasks and agent publishing enabled.
Memory-Based Personal CRM
OpenClaw can function as a long-term memory system for human relationships.
By reading conversations across connected platforms, the agent can:
- Build a structured record of people the user interacts with
- Store personal details such as preferences, context, and past discussions
- Remember notes added explicitly by the user through text or voice
- Retrieve all known information about a person on request
Example prompts include:
- Remember that Alex prefers active communication
- What do I know about Sarah from past conversations
- Summarize my last three interactions with this client
This turns OpenClaw into a personal CRM without manual data entry or rigid forms.
Language Learning via Voice Coaching
OpenClaw can be used as a continuous language learning companion embedded into daily communication.
Users interact with the agent through voice messages on platforms like Telegram or Slack. MoltBot can:
- Listen to pronunciation and speech patterns
- Compare them against pronunciation datasets
- Identify specific sounds, words, or phrases that need improvement
- Provide targeted feedback instead of generic corrections
- Suggest focused practice based on recurring mistakes
Because this happens inside normal conversation, learning becomes low-friction and continuous rather than session-based. Want to check out how it may work? Here’s our shot at it:
Smart Deal Finder and Negotiator
OpenClaw can automate price comparison and negotiation.
In this setup, the agent:
- Searches the web for products or services the user wants to buy
- Identifies relevant sellers and listings
- Contacts sellers via email or website forms
- Requests discounts or negotiates pricing
- Collects and evaluates responses
- Presents the best available option to the user
The user stays out of the negotiation loop until a decision is required, turning deal hunting into a background task.
Trend Monitoring and Auto Execution
OpenClaw can continuously monitor trends across the internet.
Users can specify:
- Topics, niches, or industries
- Competitors or brands to watch
- Social platforms, news sources, or RSS feeds
The agent can then:
- Detect emerging trends or viral content
- Summarize what is gaining traction and why
- Suggest app ideas or content angles
- Automatically generate posts in the user’s voice
- Build quick prototypes using Emergent tools
- Publish content automatically in supported workflows
This use case allows users to react to trends in near real time without constant manual monitoring.
How to Approach Building Your Own Use Case
When designing a OpenClaw workflow, start by answering three questions:
- What information should the agent monitor continuously
- What decisions or actions should happen automatically
- Where should results be delivered
Because OpenClaw runs in a persistent cloud environment, it is best suited for workflows that benefit from memory, scheduling, and cross-platform communication.
These examples are meant to show the range of what is possible rather than prescribe fixed solutions. Each can be combined, simplified, or expanded depending on the user’s goals.
Recap
In this tutorial, you:
- Set up OpenClaw in minutes using Emergent
- Avoided manual configuration and API key setup
- Connected the agent to Telegram and WhatsApp
- Learned how to publish the agent for persistence
- Enabled cross-platform communication and automation
OpenClaw is now ready to act as a persistent autonomous assistant across messaging platforms.
Emergent turns your idea into a full-stack web or mobile app, no coding required.
 No coding required
- Web & mobile apps
- Deploys instantly
on emergent today