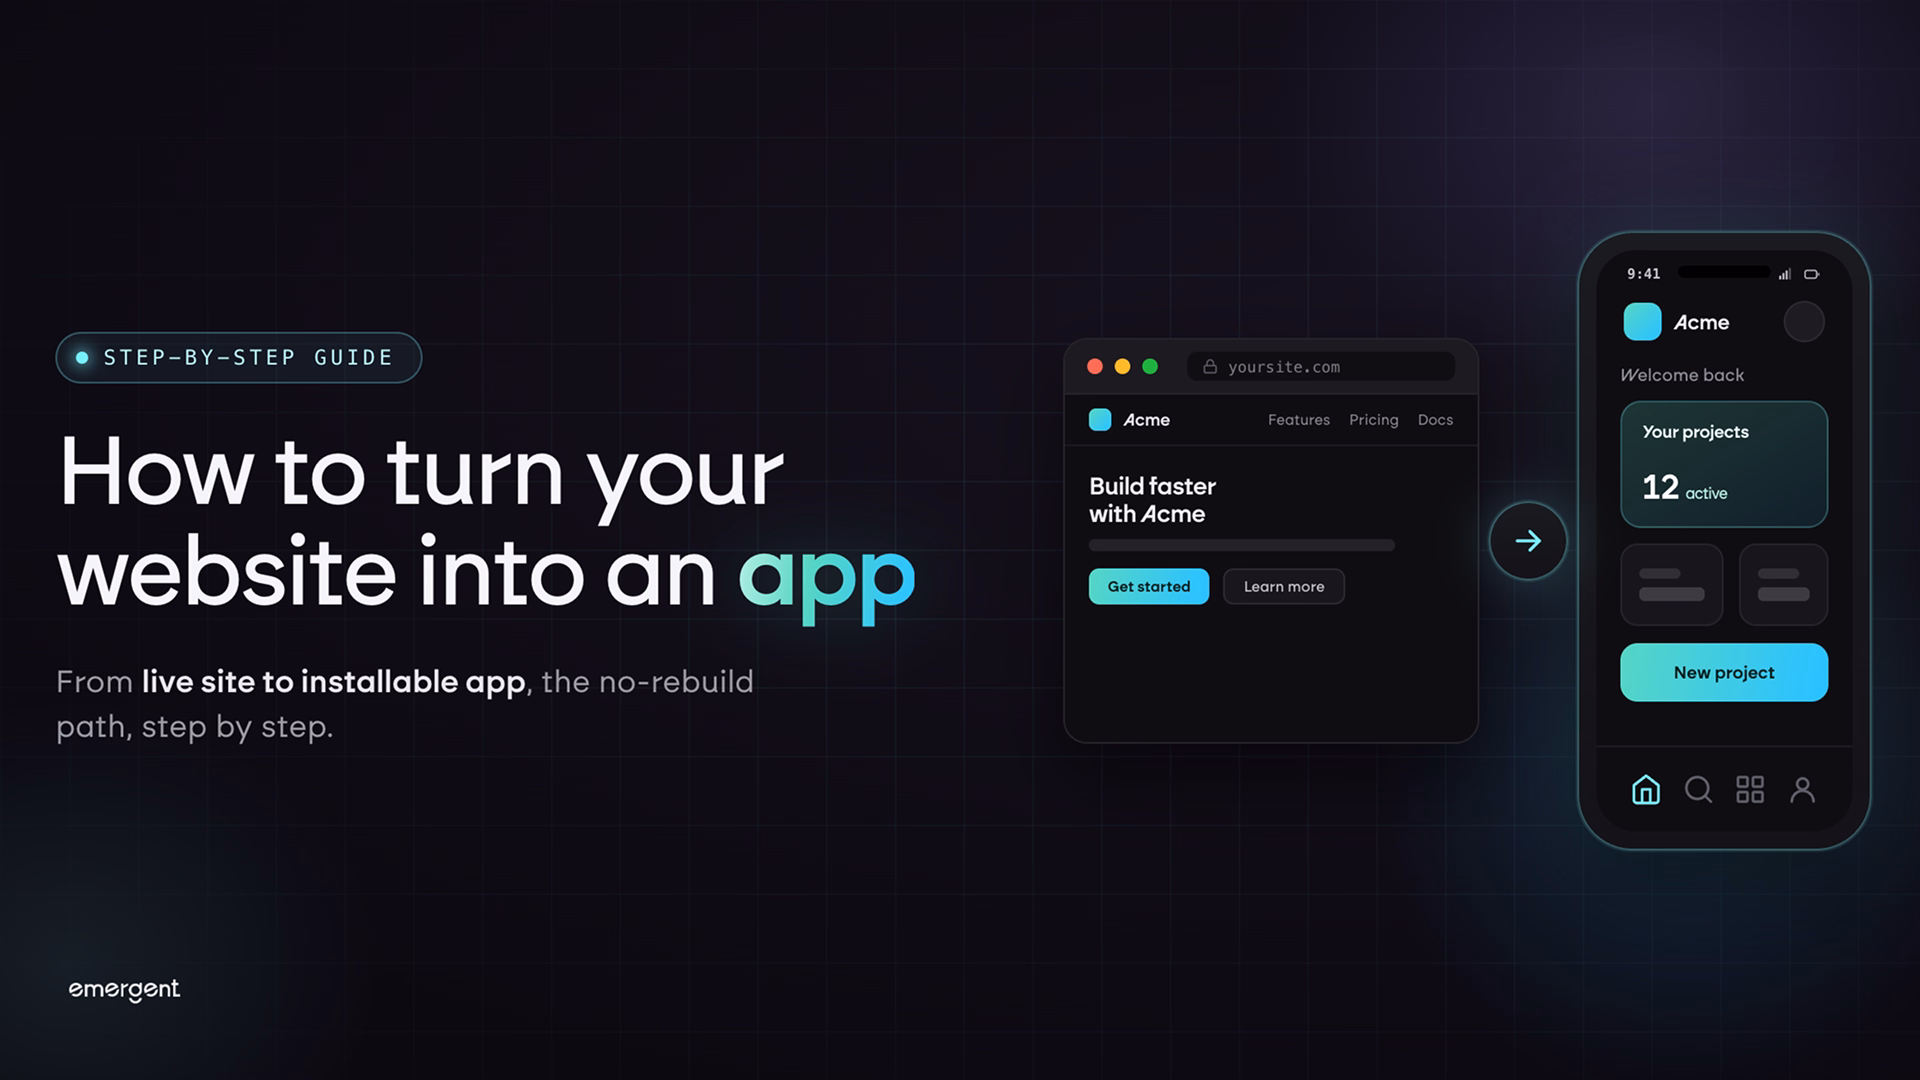
If you're trying to figure out how to make a website an app, here's how I did it. I turned a headshot-generator site into a working mobile app with Emergent. This guide walks through the whole process, from the first prompt to a build I could test on my phone.
What It Means to Make a Website an App
Turning a website into an app usually means one of three things, and the right choice depends on what you need from the mobile version. If you just want people to open your site from their home screen, you can install it like a web app. If you want an App Store or Google Play listing, you can wrap the site in a thin mobile shell.
But if the app needs things like sign-in, payments, camera access, photo uploads, push notifications, or a smoother phone-first flow, you’re better off rebuilding it as a true mobile app.
Each option takes a different amount of effort and gives you a different result, so figure out which one you're actually after before you start.
The difference matters because "app" can mean anything from a bookmark with an icon to a full piece of software that uses your phone's camera. People searching for this are usually picturing the second one, but they reach for the first because it sounds easier.
The example I'll use throughout is an AI headshot generator: a website where someone uploads a few selfies, pays for a pack of professional photos, and downloads the results once they're ready. It's a good test case because the best version lives on a phone, where the camera and photo library are already in your pocket.
Three Ways to Turn a Website Into an App
There are three common ways to turn a website into an app, ranging from a five-minute trick to a full rebuild. Here's how they compare so you can pick the one that fits your goal. Here's how they compare:
- Install it as a web app (the quickest option): Most browsers let you save a site to your home screen or dock so it opens in its own window without the address bar. On an iPhone, you open the site in Safari, tap Share, and choose "Add to Home Screen." This costs nothing and takes under a minute, but it's still your website in a frame.
This option is fine for a tool you use yourself or share with a small team. It's the wrong choice if you want other people to find your app, trust it, or use features that only a native app can offer.
- Wrap it with a converter tool: Tools like Median or Appilix take your website URL and package it inside a native shell, a method often called a WebView wrapper.
You get an app you can submit to the App Store and Google Play, plus a few extras like push notifications. Setup takes minutes, and it's a solid choice if your site already works well on mobile and you mainly want a store presence.
The catch is that the app is still showing your website, so it can feel slow, and Apple sometimes rejects wrappers that don't add anything beyond what the site already does. If your site is mostly pages of content, a wrapper usually sails through. If it's a tool that should feel native, reviewers tend to push back.
- Rebuild it as a mobile app with AI: This is the path that gives you an app that behaves like one. Instead of framing your website, an AI app builder writes a fresh mobile version that uses the phone's camera, handles sign-in and payments natively, and works the way people expect a phone app to work. That kind of rebuild used to mean hiring a developer.
For this rebuild, I used Emergent, an AI app builder that turns a written description into a working app. I picked it because it handled the whole job, the interface, sign-in, payments, and the AI image step, from a single prompt. It isn't the only AI app builder out there, so if you already have a favorite, these steps will mostly carry over.
What You'll Need Before Starting
You don't need to write code, but a few things make the rebuild go smoothly:
- An Emergent account. The Free plan gives you 10 credits to try it out. For a full app with sign-in and payments, you'll want a paid plan (see Emergent's pricing for current plans and credits).
- A clear picture of what your website does. List the screens and the main actions on each one. Five minutes of notes here saves an hour of back-and-forth later.
- Your brand basics. Your logo, colors, and the name you want on the app.
- Access to any service your site already relies on. For the headshot app, that's the image-generation service the website connects to (often through an API, the link that lets two pieces of software talk to each other). You'll point the mobile app at the same one.
Time required: Plan on an afternoon to get a first build you can test on your phone, and a day or two of refining before it's ready for other people to use.
How to Make a Website an App: Step-by-Step
STEP 1: Map What Your Website Does
Before you open Emergent, write down what your site actually does, screen by screen. The clearer this map is, the closer your first build will land, because the app version does the same job as your website, rebuilt for a phone rather than a desktop.
The site I'm converting is getheadshots.ai, an AI headshot generator that turns selfies into studio-quality professional photos. Its whole pitch is saving people the $200 to $500 they'd spend on a photographer, and it's used by professionals at companies like Google, Microsoft, and LinkedIn. So the app has to feel just as polished as the website it's replacing.

The website runs on a simple three-step flow:
- Upload selfies. A few front-facing photos, no glasses or hats, one person per shot.
- The AI generates headshots. It trains on those images and produces a batch of professional shots.
- Download the results. The finished photos arrive in high resolution, ready to use commercially.
Pricing is credit-based, sold in packs: one credit gets you four headshots, three credits gets you 12, and five credits gets you 20. Each purchase runs through checkout before any generation starts. You can carry that paid step over with Stripe when you're ready to charge, though, for a first build, it's fine to leave generation free and add the paywall later.
Mapping the site this way makes the mobile version almost design itself. The selfies people upload are already taken on their phones, so a camera-first upload screen is a clear win. And the download step gets better on a phone, where saving a headshot straight to the camera roll or sharing it to LinkedIn takes one tap.
Some things get simpler on a phone (a thumb-friendly upload button instead of a drag-and-drop zone), and some things change (taking photos with the camera instead of uploading files from a desktop). Mapping it first means you prompt for the app you want, not the website you already have.
If your brand already lives in a design file, you can bring it straight in through Emergent's Figma integration, so the app matches your site's colors and spacing instead of guessing.
STEP 2: Sign Up and Pick the Right Agent
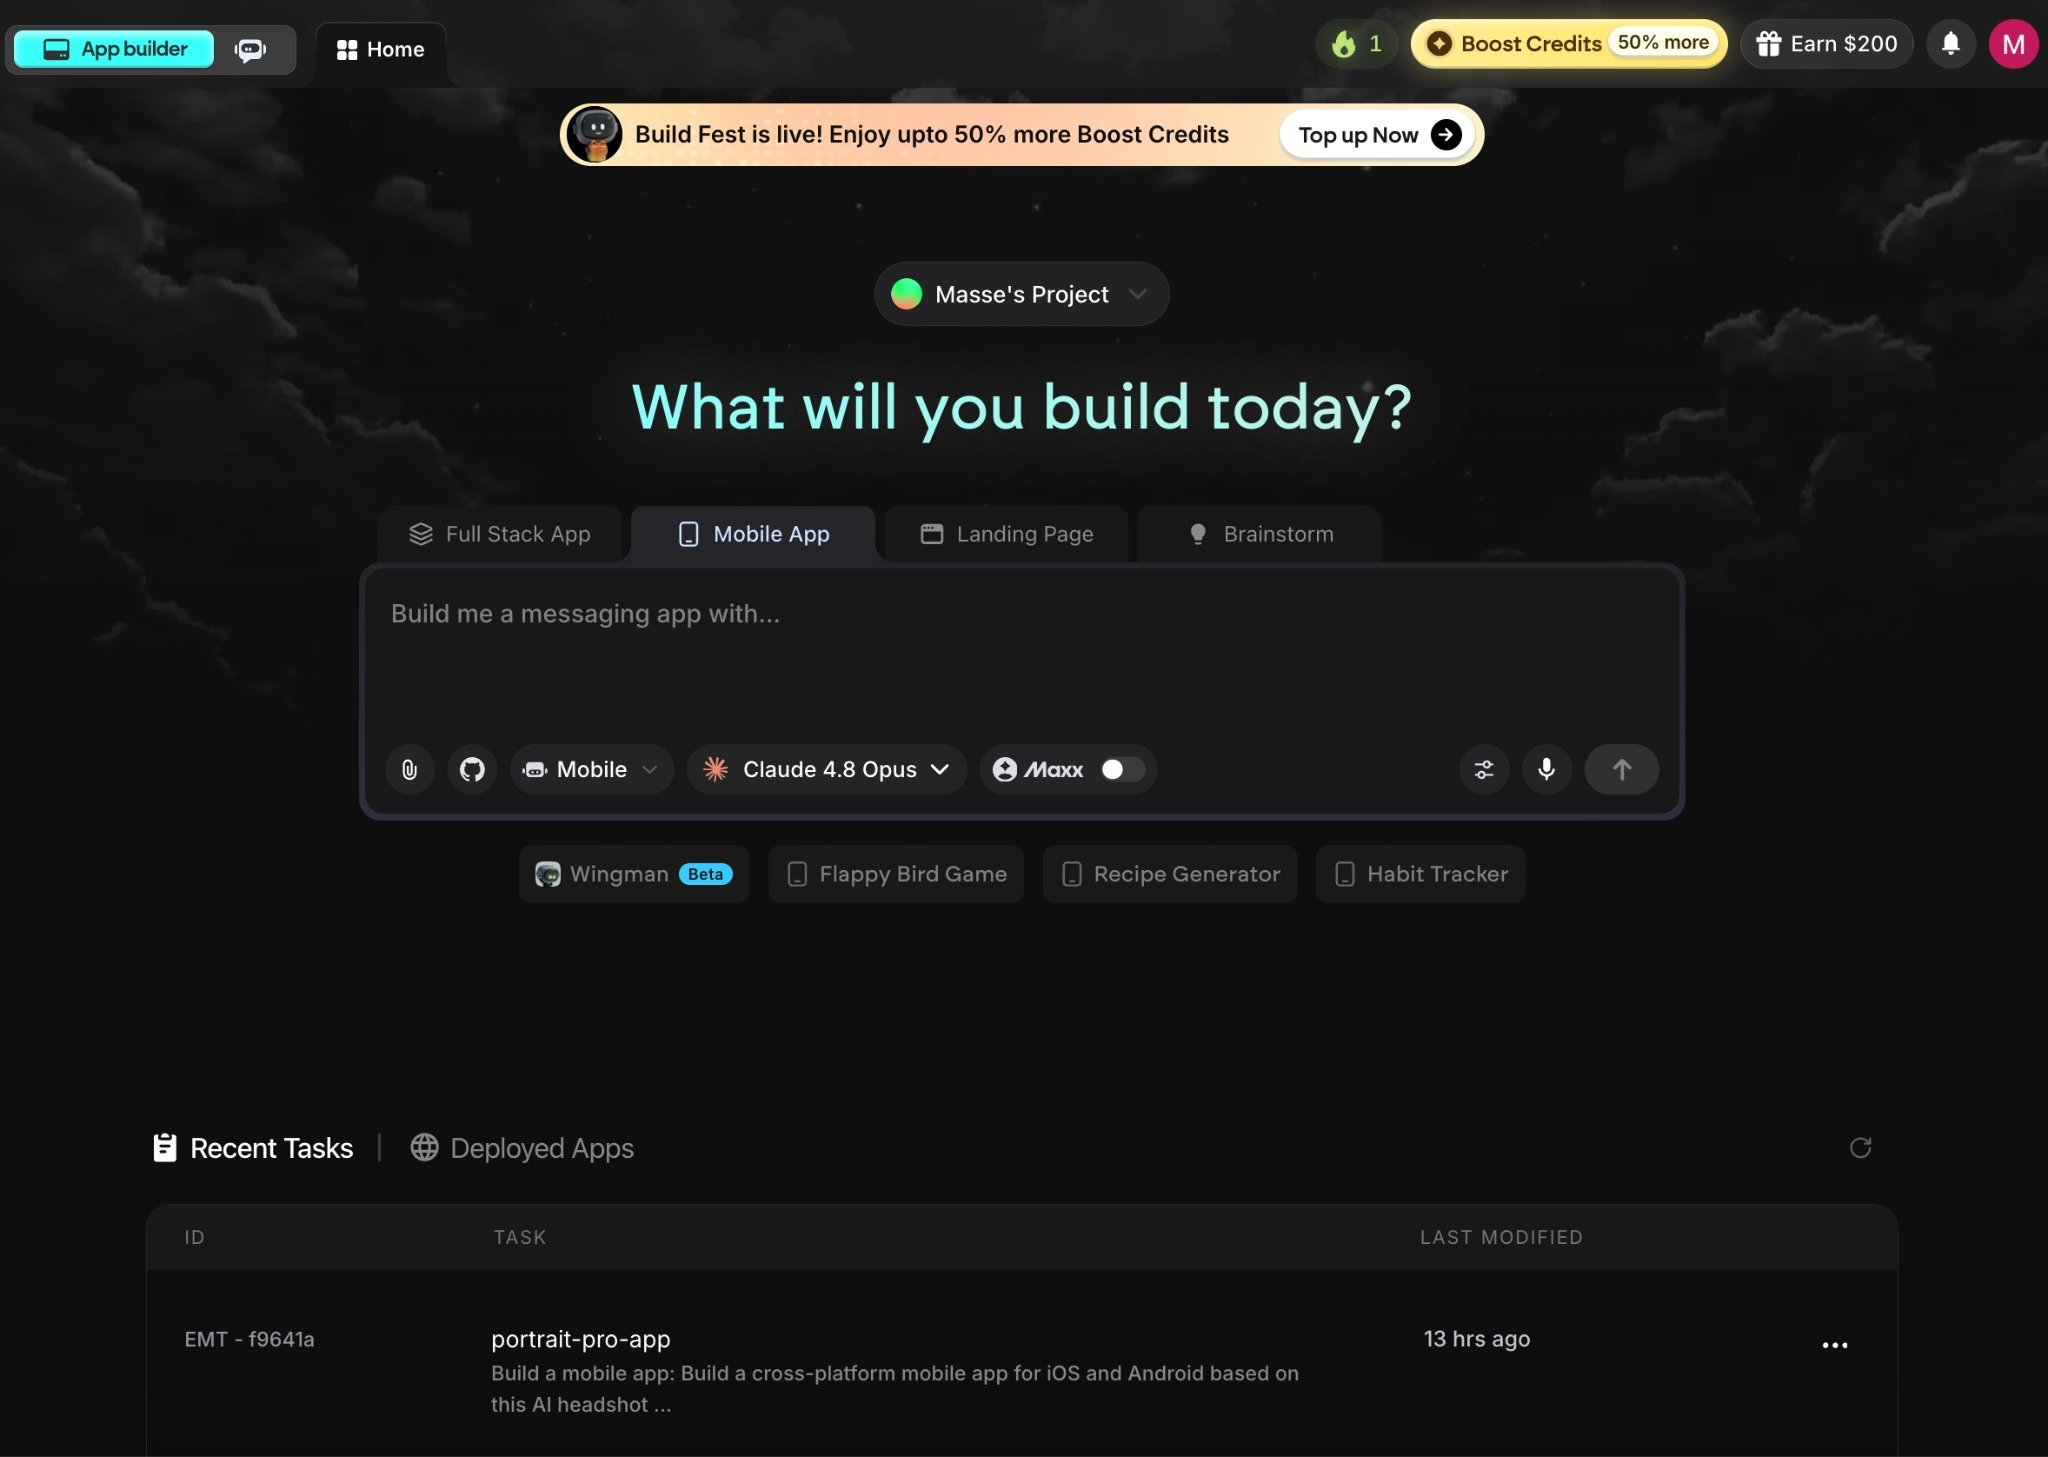
After you create an account at emergent.sh, you'll see a large prompt box with different build options. Since this project is a phone app, I selected the Mobile App tab instead of Full Stack App, then chose the Mobile agent because it matches the kind of app I wanted to build.
The Mobile agent builds cross-platform apps that run on both iPhone and Android, and it coordinates the specialized agents underneath it: some shape the interface, others handle the code and integrations, and testing agents check the build and fix what breaks.
A website-to-app rebuild touches sign-in, photo upload, and an AI generation step all at once, so you want the agent built to keep those moving parts in sync on a phone.
I also switched the underlying model to Claude Opus 4.8 before building. Emergent lets you choose which model powers the work, and for a build with this much happening in the background, I wanted the strongest reasoning I could give it.
I built this app on Emergent's Pro plan, which runs $200 a month for 750 credits. That's more than a basic site needs, but a multi-screen app with sign-in and AI generation moves through credits quickly, and Pro unlocks a few things that made the build smoother.
What the Pro plan adds:
- More credits: 750 a month, up from 100 on the Standard plan.
- A 1M-token context window: the agent keeps the whole project in mind across screens instead of losing track of earlier ones.
- Maxx: The high-power mode for working through more complex logic.
The plan you choose also changes what you see on screen. Higher plans add a Brainstorm tab to the prompt box alongside the standard build types, so if you're on a lower plan, your starting screen will look slightly different from mine.
STEP 3: Write the Prompt That Describes Your App
A good first prompt describes the whole app in plain language, the way you'd explain it to a person. Vague prompts ("make my headshot site into an app") get you a generic result.
A specific description of the app and what each part does gets you something close to right on the first try.
Here's the prompt I used for the headshot app:
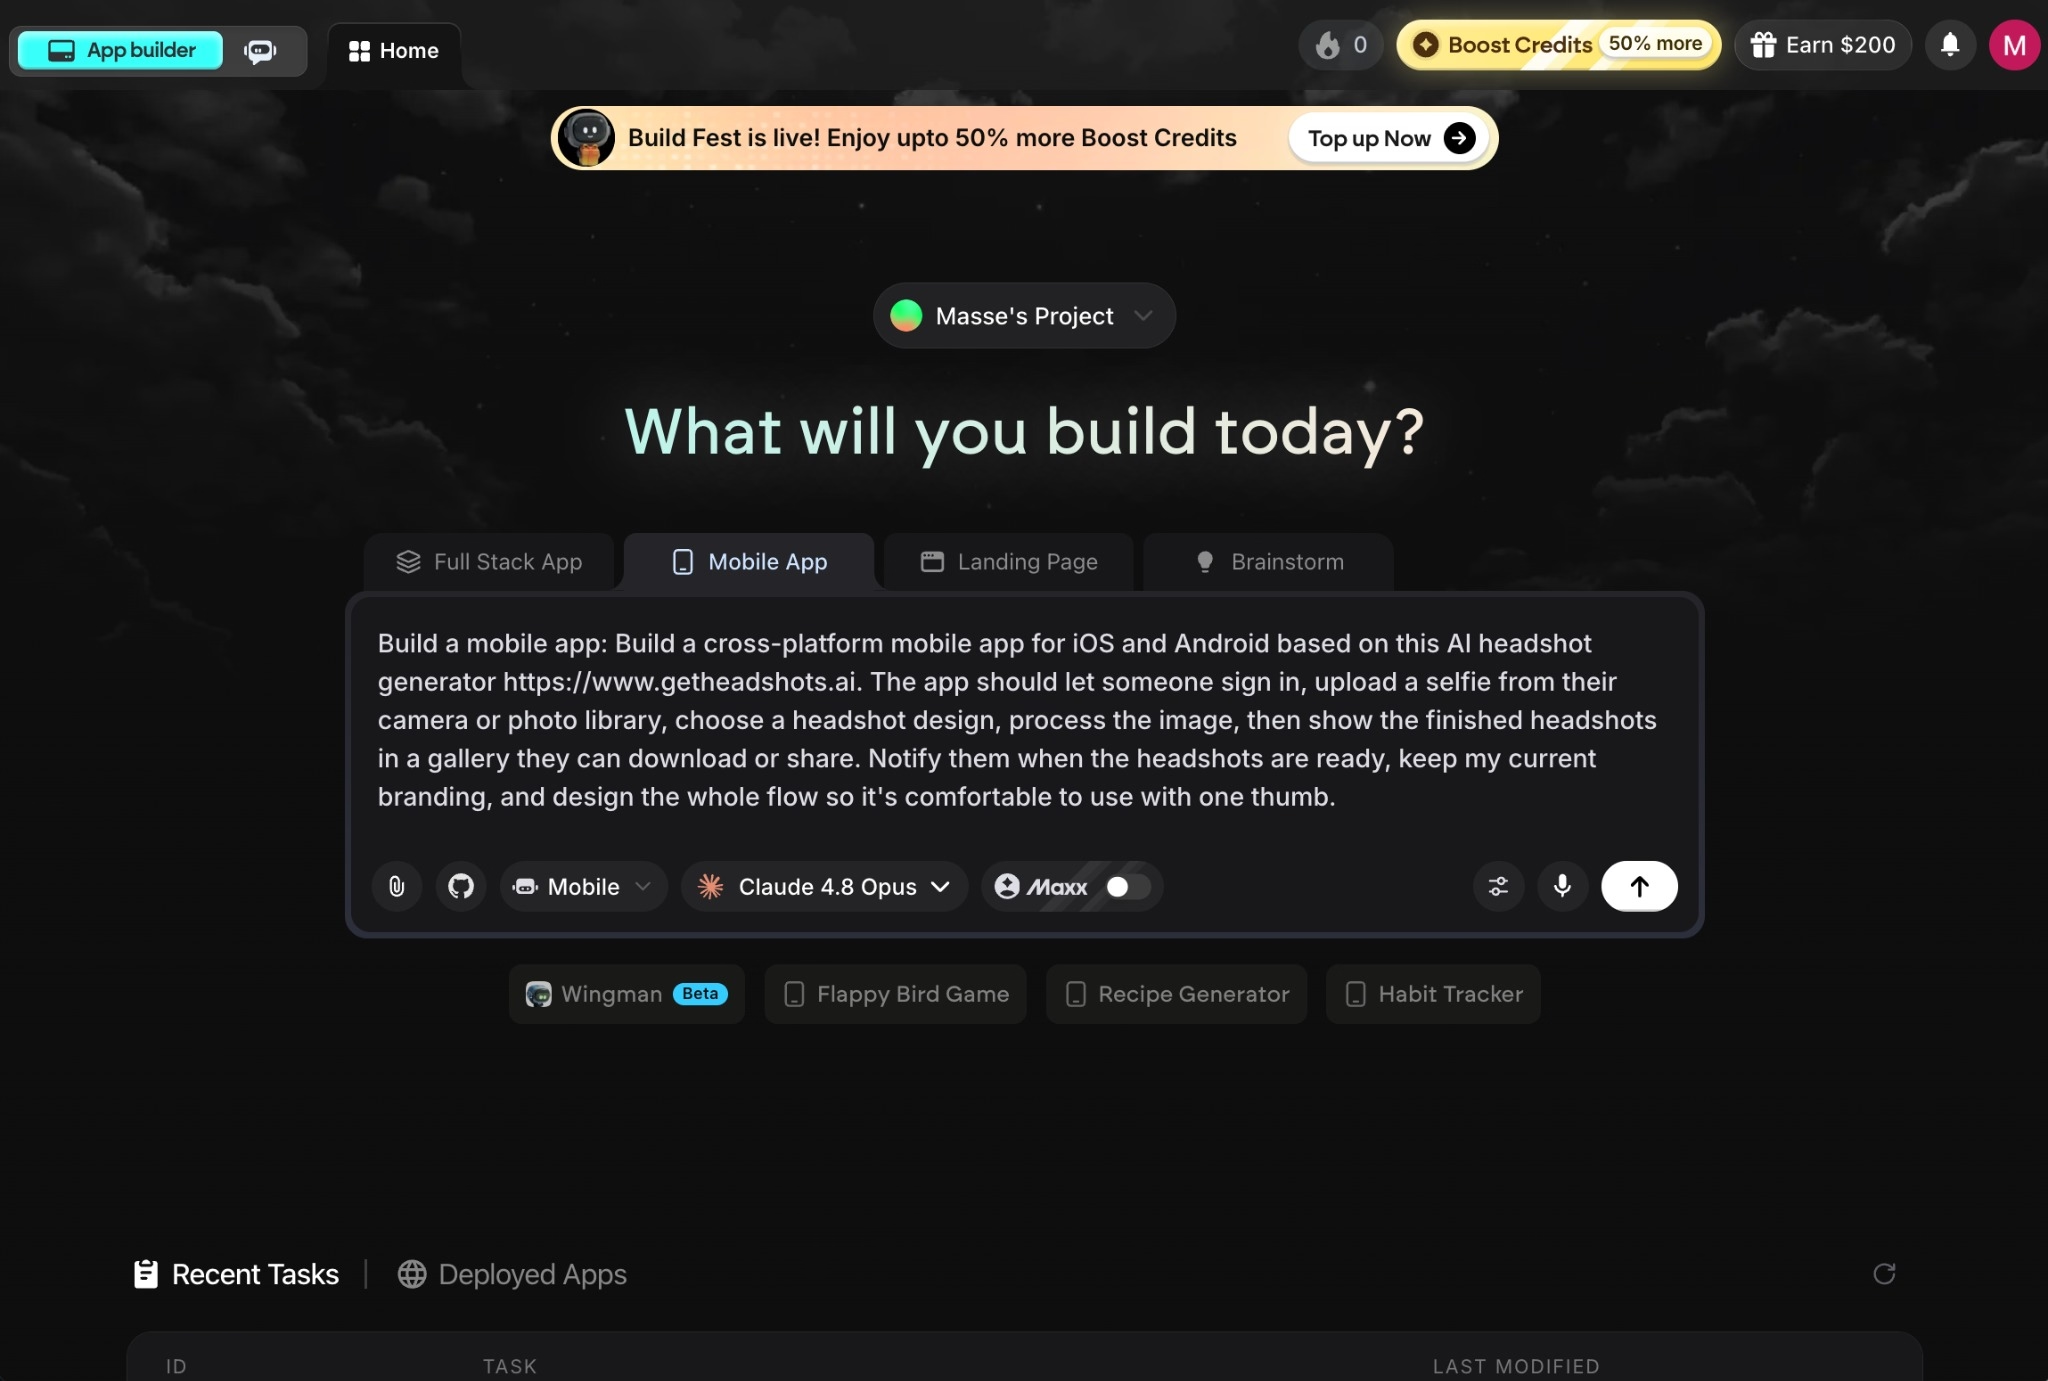
“Build a cross-platform mobile app for iOS and Android based on this AI headshot generator https://www.getheadshots.ai. The app should let someone sign in, upload a selfie from their camera or photo library, choose a headshot design, process the image, then show the finished headshots in a gallery they can download or share. Notify them when the headshots are ready, keep my current branding, and design the whole flow so it's comfortable to use with one thumb.”
The prompt works because it walks through the full journey in order, names the actions a user takes, and points Emergent at the existing site instead of asking it to invent one. That's the level of detail that gets you a usable first build rather than a pretty shell with nothing behind it.
You don't have to get the prompt perfect. You're describing the starting point, and the next step is where you and Emergent fill in the gaps together.
STEP 4: Answer Emergent's Clarifying Questions
Emergent doesn't jump straight into building from a fixed plan. It asks a few clarifying questions first, then builds based on your answers. This is your chance to catch wrong assumptions before any code gets written, and it's worth slowing down for.
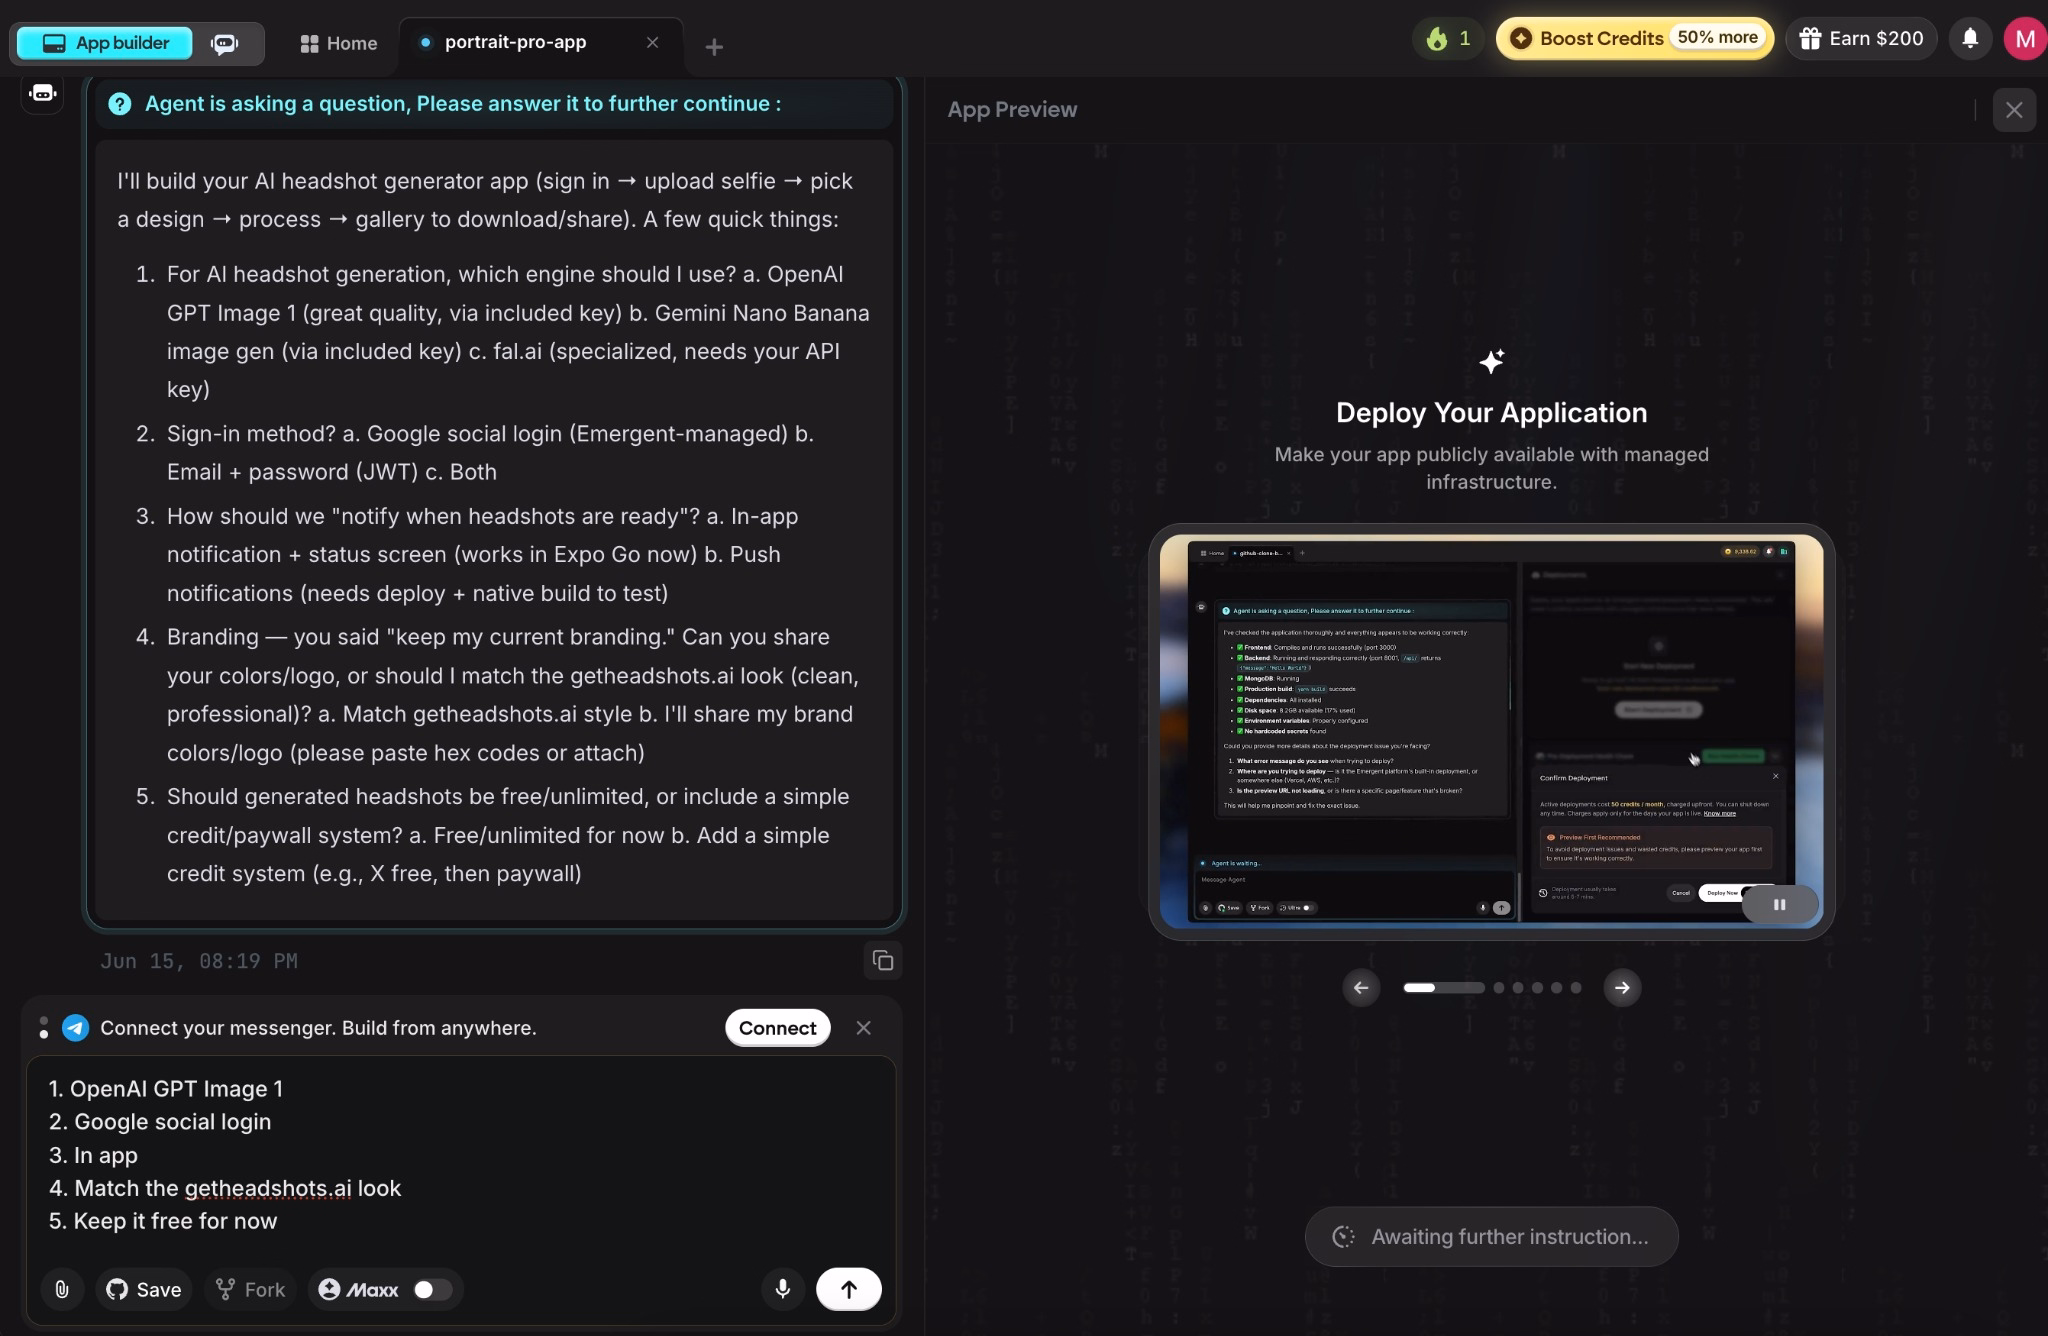
In my build, Emergent came back with five considerations before it wrote any code:
- Which image engine to use for generation: OpenAI's GPT Image 1, Google's Gemini image model, or fal.ai with my own key.
- Which sign-in method: Google social login, email and password, or both.
- How to handle the "ready" notification: An in-app alert and status screen that works in Expo Go right away, or push notifications that need a deployed native build to test.
- What branding to use: Match the getheadshots.ai look, or use brand colors I'd paste in.
- What pricing model to use: Keep generation free for now, or add a simple credit and paywall system.
I answered GPT Image 1, Google sign-in, the in-app alert, match the getheadshots.ai look, and free for now. That was the whole conversation. Emergent built the app from those five answers without a single follow-up question.
The reason this step matters is cost. Fixing a wrong assumption now is a one-line answer. Fixing it after the app is built is a round of changes that spends credits. A few extra minutes here is the cheapest insurance in the whole process.
STEP 5: Review the First Build
Once Emergent finishes the first build, you'll get a live preview you can click through on the right portion of the screen. Treat it like a first draft and go screen by screen against your map from Step 1 before you change anything.
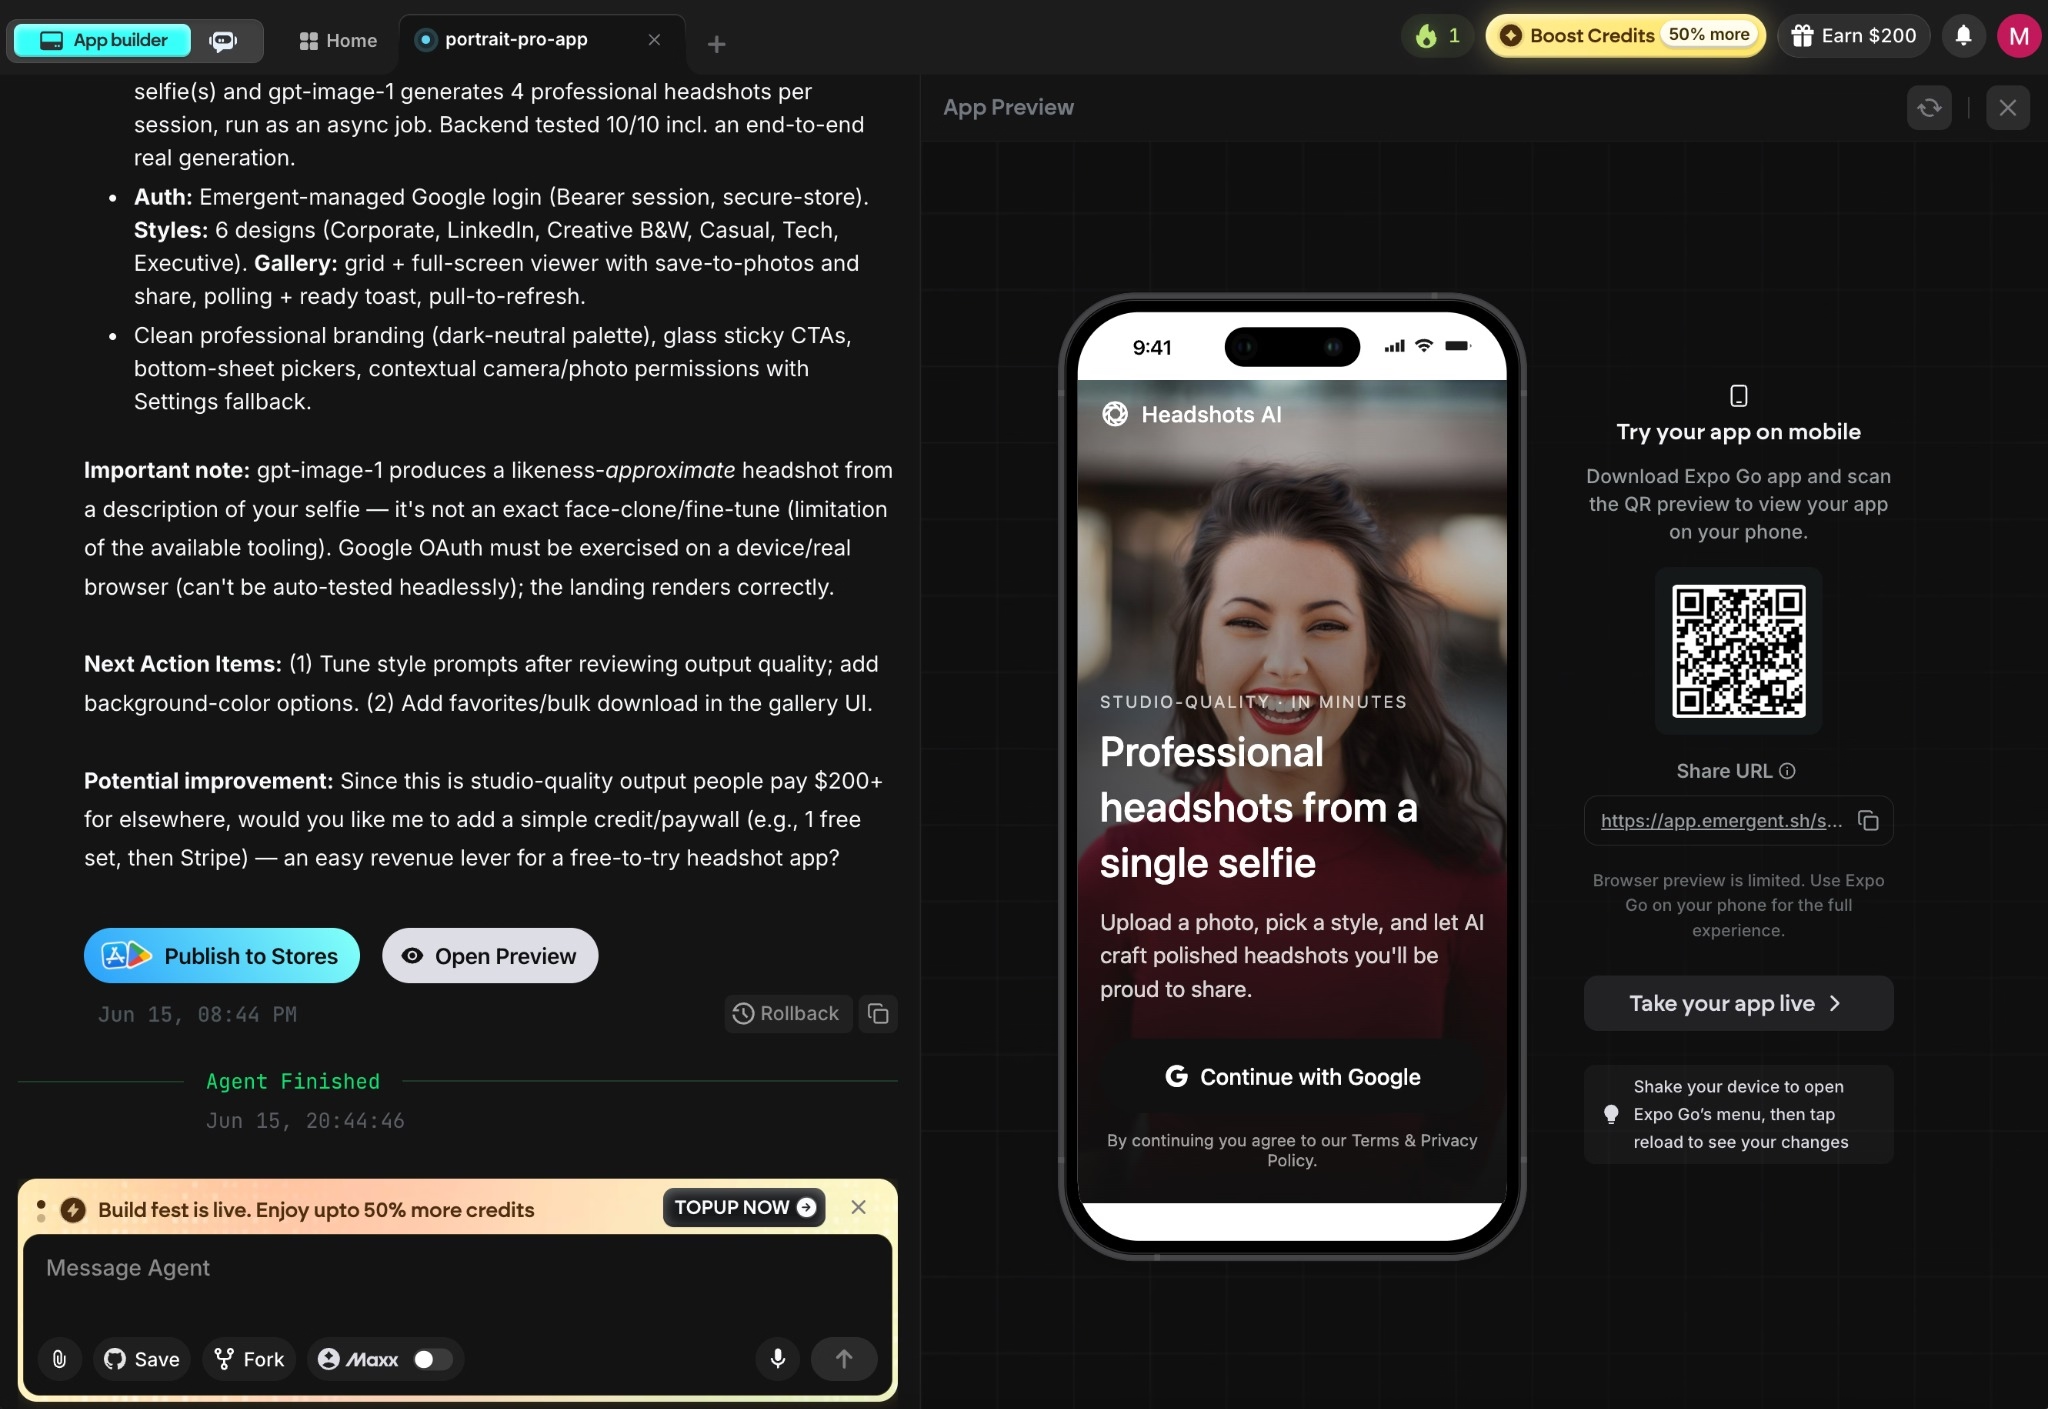
What surprised me was how little there was to fix. I expected to spend the afternoon patching things, since the app runs real sign-in and on-device photo handling feeding an AI generation step in the background. The first pass already worked end-to-end.
For an app with that many moving parts, getting a working build from the opening prompt is not what I expected going in.
You may not need many rounds either, but if something is off, refine with small, specific requests rather than one big list. "Make the upload screen show a preview thumbnail before generation" gets a cleaner result than "fix the upload screen." Specific prompts give the agents a clear target; broad ones leave too much room for guesswork.
For trickier changes that touch several screens at once, turn on Maxx, which reasons through more complex logic and holds the whole project in context. It costs more credits and is part of the Pro plan, so save it for the changes that genuinely need it rather than routine tweaks.
STEP 6: Connect Sign-In, the Camera, and AI Generation
Three pieces make the headshot app feel like a phone app instead of a web page. Emergent handles each one without you wiring it up by hand. Here are the three pieces:
- Sign-in: Ask for Google sign-in, and Emergent sets up the whole flow, including the built-in option, so you don't have to manage credentials yourself.
- The camera and photo library: Because this is a true mobile app, it can ask for camera permission and let users snap a selfie or pick one from their photos. That's the part a wrapped website can't do well, and it's the single biggest reason the app beats the mobile site for this use case.
- AI generation: The app reads the uploaded selfie and creates a set of professional headshots in the background, then drops them into the gallery. This is the work the website did on a desktop, now running from a phone.
Payments work the same way when you want them. Mention Stripe in your prompt, and Emergent builds the checkout, so users pay before generation starts. I kept this first build free to focus on the core flow, and Emergent even suggested adding a one-free-then-Stripe paywall later as an easy way to charge for studio-quality headshots.
These connections are also where the answers from Step 4 pay off. Because I'd already told Emergent to use Google sign-in and an in-app alert, it wired those in the way I meant the first time.
STEP 7: Test the App on Your Phone
Emergent builds mobile apps with React Native and Expo, the standard tools for building one app that runs on both iPhone and Android. That lets you preview the working app on your own phone before you publish anything.
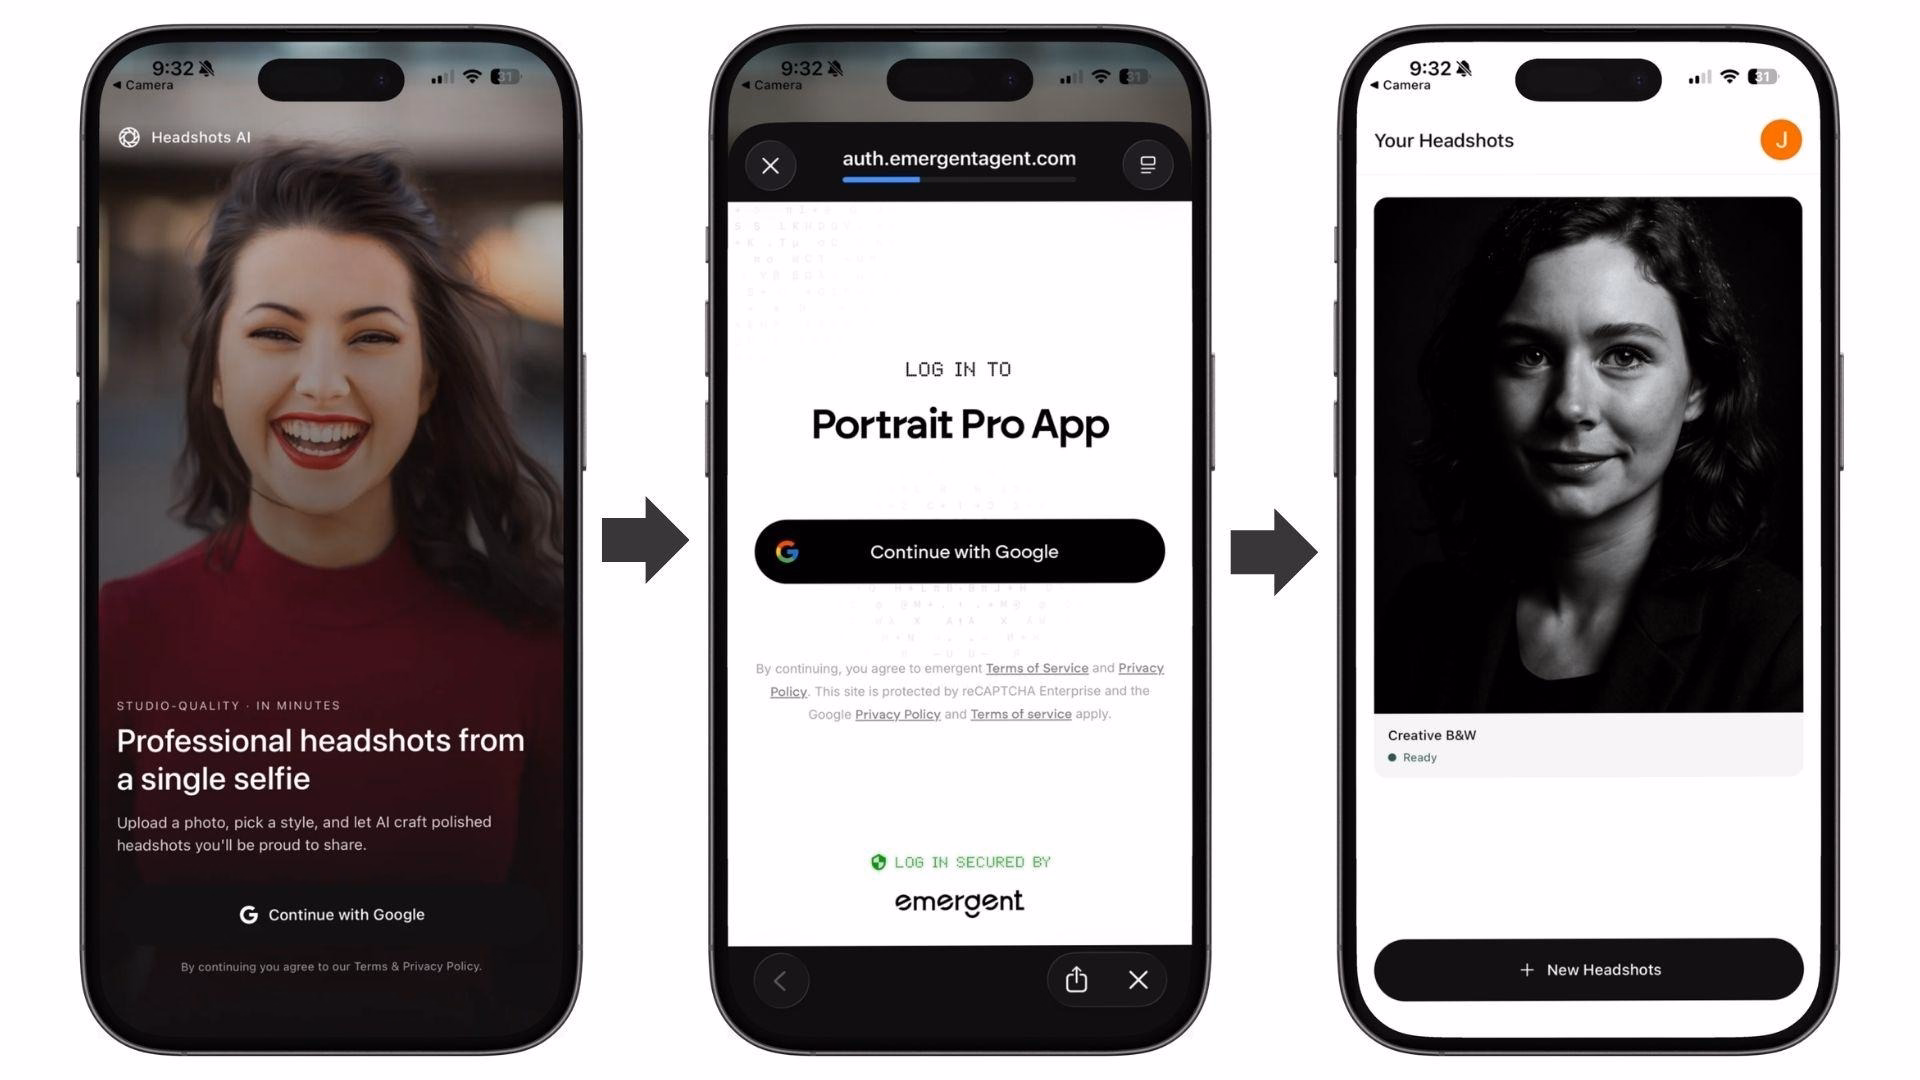
Emergent has a built-in option to open your app on a phone. I downloaded Expo Go, the free app Expo uses for previews, and scanned the QR code Emergent showed me. The app opened on my phone seconds later.
The first thing I tested was the sign-in option. I clicked on the “Continue with Google” button on the homepage, and it opened a login subpage. After I signed in, the app opened the gallery screen, where finished headshots appear.
To generate these AI headshots, click on the “New headshots” button, which opens a screen where you upload the sample selfie photos. You can add one to four sample images here.
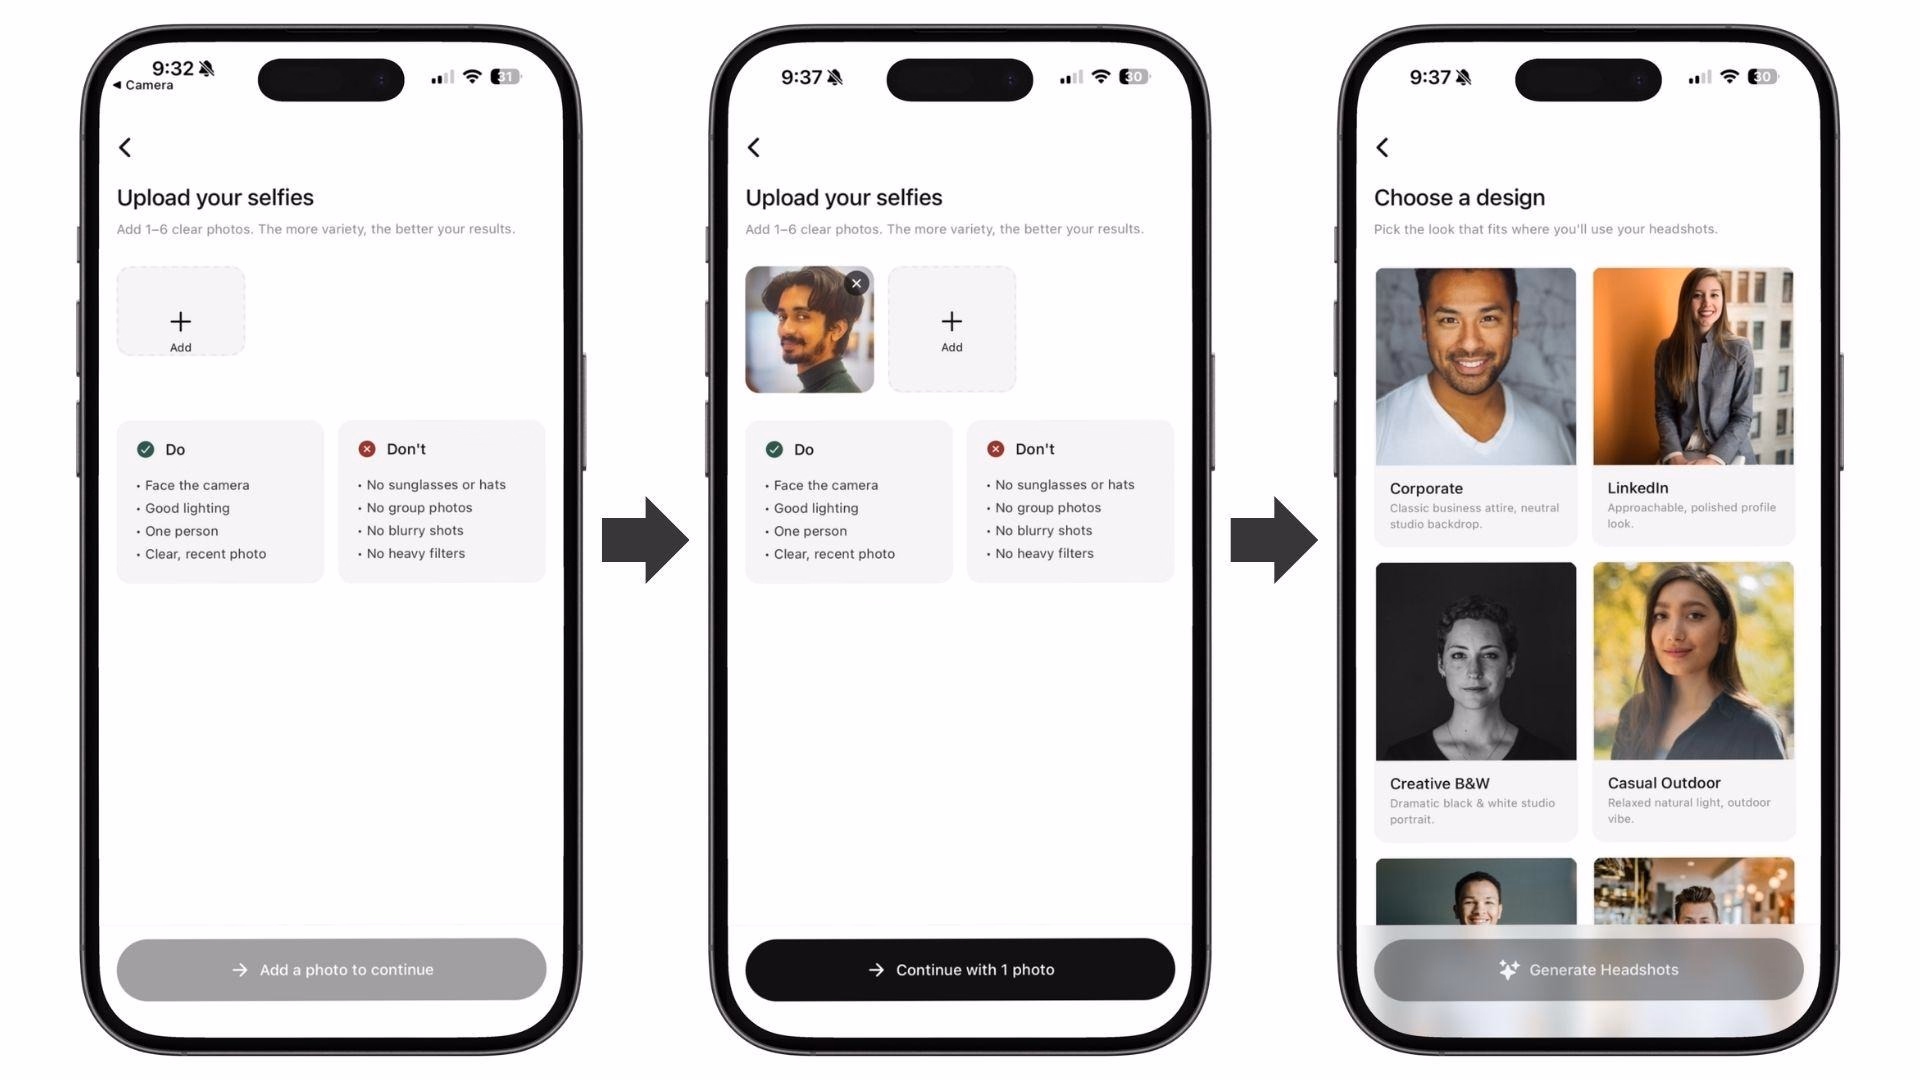
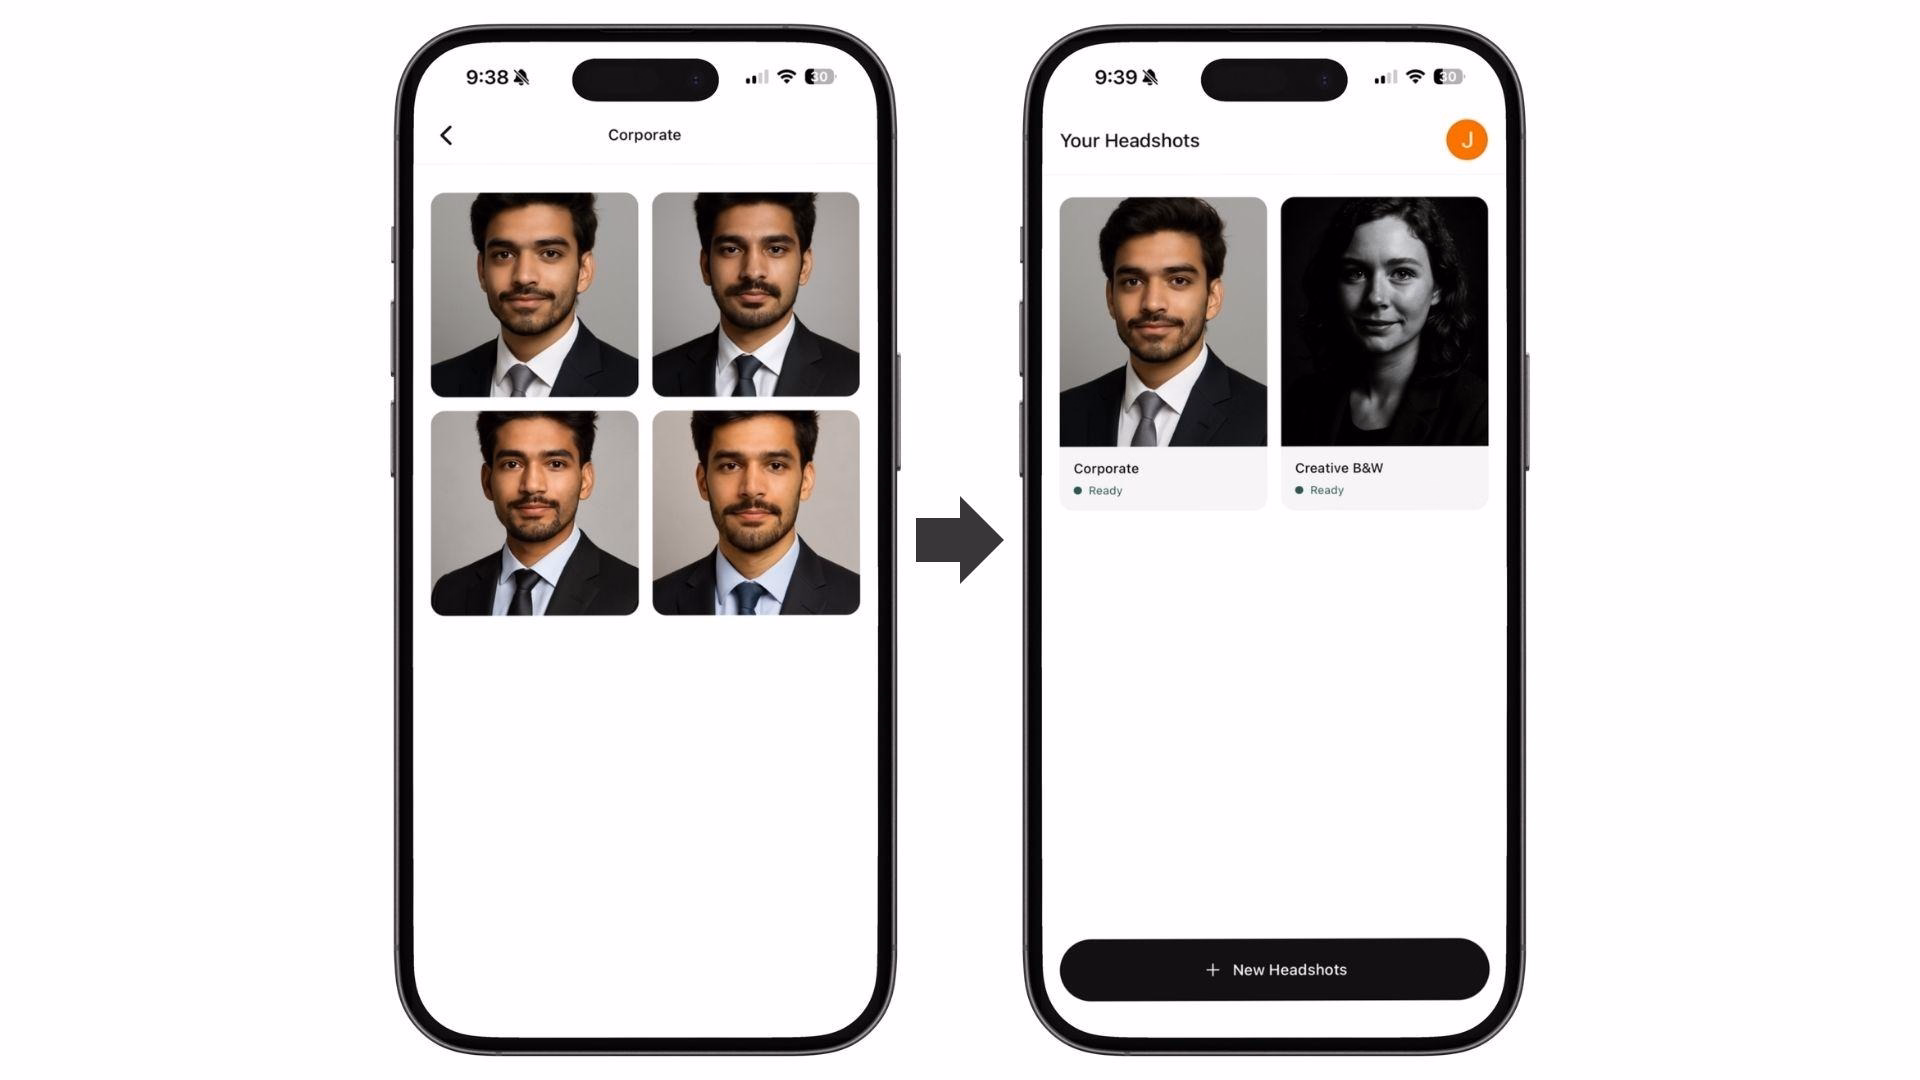
I uploaded a sample portrait, picked the Corporate style from the six built-in options, and tapped generate. About 30 seconds later, the app returned four professional headshots, and the home screen listed every set I had generated.
Testing in Expo Go like this is the safest way to check an app before you put it in front of anyone, since you're tapping the build on an actual phone without having to publish it to Google Play or the App Store first.
Test the things that only break on the phone itself: camera permission prompts, the upload flow over a cell connection, and whether the buttons are easy to reach with one thumb. A build that looks fine in the preview window might still feel awkward in your hand, and this is where you catch it.
STEP 8: Publish the App
There are two halves to publishing, and they work differently. Once you're happy with how the app runs in Expo Go, this is where you turn it into something other people can install. You can do the following:
- Deploy the web version: Click the Deploy button, and after roughly 10 to 15 minutes, it goes live on a *.emergent.host web address. Keep in mind that a deployed app uses 50 credits per month to stay live, and that's a recurring charge, not a one-time cost.
- Add a custom domain (optional): Buy and connect one through Emergent's built-in domain integration. The first year is free, and SSL is set up automatically, so the site loads over HTTPS without any extra work. Here's Emergent's guide to setting up a custom domain.
- Ship the mobile app: Emergent says you can build and submit it to the App Store and Google Play through Expo's build service, with no Mac or Xcode needed on your end. The stores still run their own review before your app goes public, so plan for that wait separately and don't promise anyone a launch date until you've cleared it.
- Keep your own copy of the code: On the Standard plan and up, every build syncs to a GitHub repository under your account, so the app is yours to export, change, or hand to a developer later if you outgrow the builder.
Common Mistakes to Avoid
A few things trip people up when they turn a website into an app:
- Picking the wrong method for the job. Rebuilding a simple marketing site as a native app is overkill, and wrapping a payment-heavy site usually disappoints. Match the method to what the app actually needs to do.
- Writing a one-line prompt. "Turn my site into an app" gets you a generic result. Describe each screen and the main action on it, the way the prompt in Step 3 does.
- Forgetting the phone. Camera permissions, thumb reach, and slow connections don't show up on a desktop. Test on a real device early.
- Skipping the clarifying questions. Rushing past them is how wrong assumptions end up baked into the build. Treat them as the cheapest fix you'll get.
- Ignoring the running cost. A deployed app uses 50 credits a month to stay live. Budget for it instead of being surprised by it.
- Treating the first build as the final build. Mine worked on the first pass, but that won't always happen. The good version usually comes from a couple of small, specific refinements.
So, Should You Rebuild Your Site as an App?
If your site handles sign-ins, payments, and photo uploads, I'd rebuild it as a mobile app every time. A wrapper always ends up feeling like a compromise next to one.
A couple of years ago, I'd have said the opposite, because a rebuild meant months of developer time and a five-figure budget. Describing the headshot app in plain English and holding a working build the same afternoon still feels a little unreal.
That said, wrappers and home-screen installs earn their place. If your site is mostly content and you just want it on the store fast, wrapping it is the smart move, and there's no point spending credits rebuilding something that already works.
But the moment your app needs to do something a website can't, like reach for the camera or take a payment without feeling like a browser tab, the mobile app rebuild is no longer a hard option and becomes the obvious one.
Ready to Turn Your Website Into an App?
If the steps above made the rebuild feel doable, here's what makes Emergent a good place to run it:
- Get a working mobile app from one description: instead of hiring a developer, you describe your app screen by screen, and Emergent's agents handle the planning, design, code, and testing together.
- Build for iPhone and Android at once: Emergent uses React Native and Expo, so a single build runs on both, and you can preview it on your own phone in Expo Go before publishing.
- Keep full ownership of the code: on the Standard plan and up, your build syncs to a GitHub repository under your account, so the app moves with you if you ever switch tools or hire a developer.
- Skip rebuilding sign-in and checkout by hand: mention Google sign-in or Stripe once in your prompt, and Emergent wires up the whole flow.
Emergent turns your idea into a full-stack web or mobile app, no coding required.
 No coding required
- Web & mobile apps
- Deploys instantly
Frequently Asked Questions
Your Questions, Answered
Yes, you can turn almost any website into an app, though the method depends on the site. A simple content site can be installed on your home screen or wrapped with a converter tool in minutes. A site with sign-ins, payments, or uploads is better rebuilt as a true mobile app so those features work the way phone users expect.
Installing a site as a home-screen app takes under a minute, and wrapping one with a converter tool takes a few minutes. Rebuilding a website as a true mobile app with an AI builder takes an afternoon for a first working version, plus some refining if it needs it, before other people use it. My headshot app worked on the first build, though that won't be true for every project.
Installing a site as a home-screen app is free, and most converter tools charge a monthly subscription. Rebuilding with an AI builder like Emergent runs on credits. A paid plan starts at $20 a month, and a deployed app uses 50 credits a month to stay live. The higher cost to plan for is the refining, since a few rounds of changes spend more credits than the first build does.
No, you don't need coding skills to turn your website into an app. Converter tools and AI app builders both work from plain instructions, and AI builders like Emergent write the code for you based on a description of what you want. Coding only becomes useful if you later want to change the app beyond what the builder generates.
No, a wrapper app is not the same as a true mobile app. A wrapper shows your existing website inside a native shell, so it can feel slower and can't fully use the phone's camera or other hardware. A rebuilt mobile app is written for the phone from the start, which is why it handles things like camera uploads and native sign-in more smoothly.
Yes, Emergent can rebuild your website as a cross-platform mobile app. It uses React Native and Expo to build for iPhone and Android from a single description, lets you preview the app on your own phone in Expo Go, and, according to Emergent, can submit it to the App Store and Google Play through Expo's build service.

on emergent today

Lorem ipsum dolor sit amet, consectetur adipiscing elit. Suspendisse varius enim in eros elementum tristique. Duis cursus, mi quis viverra ornare, eros dolor interdum nulla, ut commodo diam libero vitae erat. Aenean faucibus nibh et justo cursus id rutrum lorem imperdiet. Nunc ut sem vitae risus tristique posuere.