


TL;DR
- Write the plan before the first prompt: how to vibe code an app starts with a short three-feature plan, which keeps later prompts short instead of re-explaining the same feature three separate times.
- Describe the symptom, not the cause: stating in plain words exactly what broke, rather than guessing the technical reason, fixed a bug that wiped existing status data in one follow-up prompt.
- Name what stays untouched in a fix: adding "without touching the rating field" to the repair prompt landed it in a single attempt instead of introducing a new problem while solving the first.
- The full build cost 35 credits and 15 minutes: four prompts in one sitting including one bug fix, past the free plan's 10 monthly credits, so a complete build sits on the $20/month Standard tier.
- Publishing costs come after the build, not during: shipping to an app store adds $99 per year for Apple's Developer Program or a one-time $25 for Google Play, separate from any builder plan.
You can describe an app in plain English and have an AI build it for you, even if you've never written a line of code. I wanted to see how that holds up for a true beginner.
I tested it myself: one AI app builder, one sitting, one real idea taken from a blank page to something I could click through and use. I built a personal movie and TV watchlist app across four prompts, describing what I wanted in plain English and reacting to what came back each time.
It wasn't a clean run from start to finish. Adding one feature reset data I'd already entered, and fixing it took exactly one more prompt once I described what I was seeing instead of guessing at the cause.
That's exactly what this walkthrough covers step by step, real cost and real mistakes included. By the end, you'll have the same process I used to learn how to vibe code an app, from writing a short plan before you touch the tool to testing a build before you call it done, plus the five mistakes that can stall a first attempt before it goes anywhere.
What Vibe Coding Means
Vibe coding means describing the app you want, then letting an AI tool build and refine it through conversation. You describe an outcome. The AI turns that description into a working version, you react to what it built, and you repeat that loop until the app does what you need.
That loop is exactly what this guide on how to vibe code an app walks through, start to finish.
First-time builders can start without knowing a programming language because vibe coding tools handle the code. You need to describe what you want clearly, notice when something's off, and explain the problem in plain words.
You can build early apps like the walkthrough ahead by describing them in ordinary sentences, even without prior coding experience.
What You'll Need Before Starting
You don't need much to start.
Prerequisites:
- An account with an AI app builder
- A clear, specific app idea
- No technical background required
Nothing else is required. You don't need design software, a separate hosting setup, or any prior experience with a programming language.
Time required: The four build prompts took about 15 minutes in one sitting. A true first attempt usually takes longer while you get comfortable describing what you want to the tool. Budget closer to 30 minutes for your first time.
For an even more foundational rundown of getting started, see Emergent's guide to getting started.
How to Vibe Code an App: Step-by-Step
Here's how vibe coding works, broken into eight steps you can follow with your own idea. The Watchlist app here is only an example.
Step 1: Define Your App Idea and Write a Short Plan
Skipping straight to one prompt and hoping the AI figures out the rest is a common first-attempt mistake. A vague ask doesn't give it anything specific to build toward, so the tool fills the gaps with its own defaults, like a login screen nobody asked for, extra fields nobody needed, or a layout aimed at no one in particular.
I felt the pull to skip this step myself. The whole appeal of vibe coding is typing one sentence and watching something appear, so pausing to write anything down before that first prompt can feel like giving up the shortcut. Those few minutes keep the next several prompts short.
Before I opened Emergent, I wrote down three things for my own build:
- A single list of movies and shows
- Each title's status: Want to Watch or Watched
- Star ratings that only show up once something's marked Watched
The plan stays small on purpose, with three features on one screen. A first build only needs to prove the core idea works. Sorting, search, sharing, and other features can come later once the core loop is confirmed.
If there's one part of this walkthrough I'd tell a beginner not to skip, it's this one. Five minutes of writing beats re-explaining the same feature to the AI three separate times because the first prompt never said what "status" meant.
If you're stuck on what to build first, keep it personal and small. A single-purpose idea beats an ambitious, multi-feature app for a first attempt. Write your own three-item version of that plan before you type a single prompt. It takes five minutes, and it saves you from guessing later.
You may also check out this list of vibe coding examples you can test today!
Step 2: Choose the Right Type of Tool for You
There are two broad kinds of tools people use to vibe code, and picking the wrong one for your situation turns a simple build into a slog.
Two Ways to Build
The first is a conversational builder. You describe the app in a chat window, and the tool handles the code, the hosting, and the technical setup behind the scenes. The second is a code editor paired with an AI assistant, built for someone who's at least a little comfortable reading and adjusting code themselves.
The decision also involves a cost to weigh before you commit time to either path. A conversational builder like Emergent runs on a credit system.
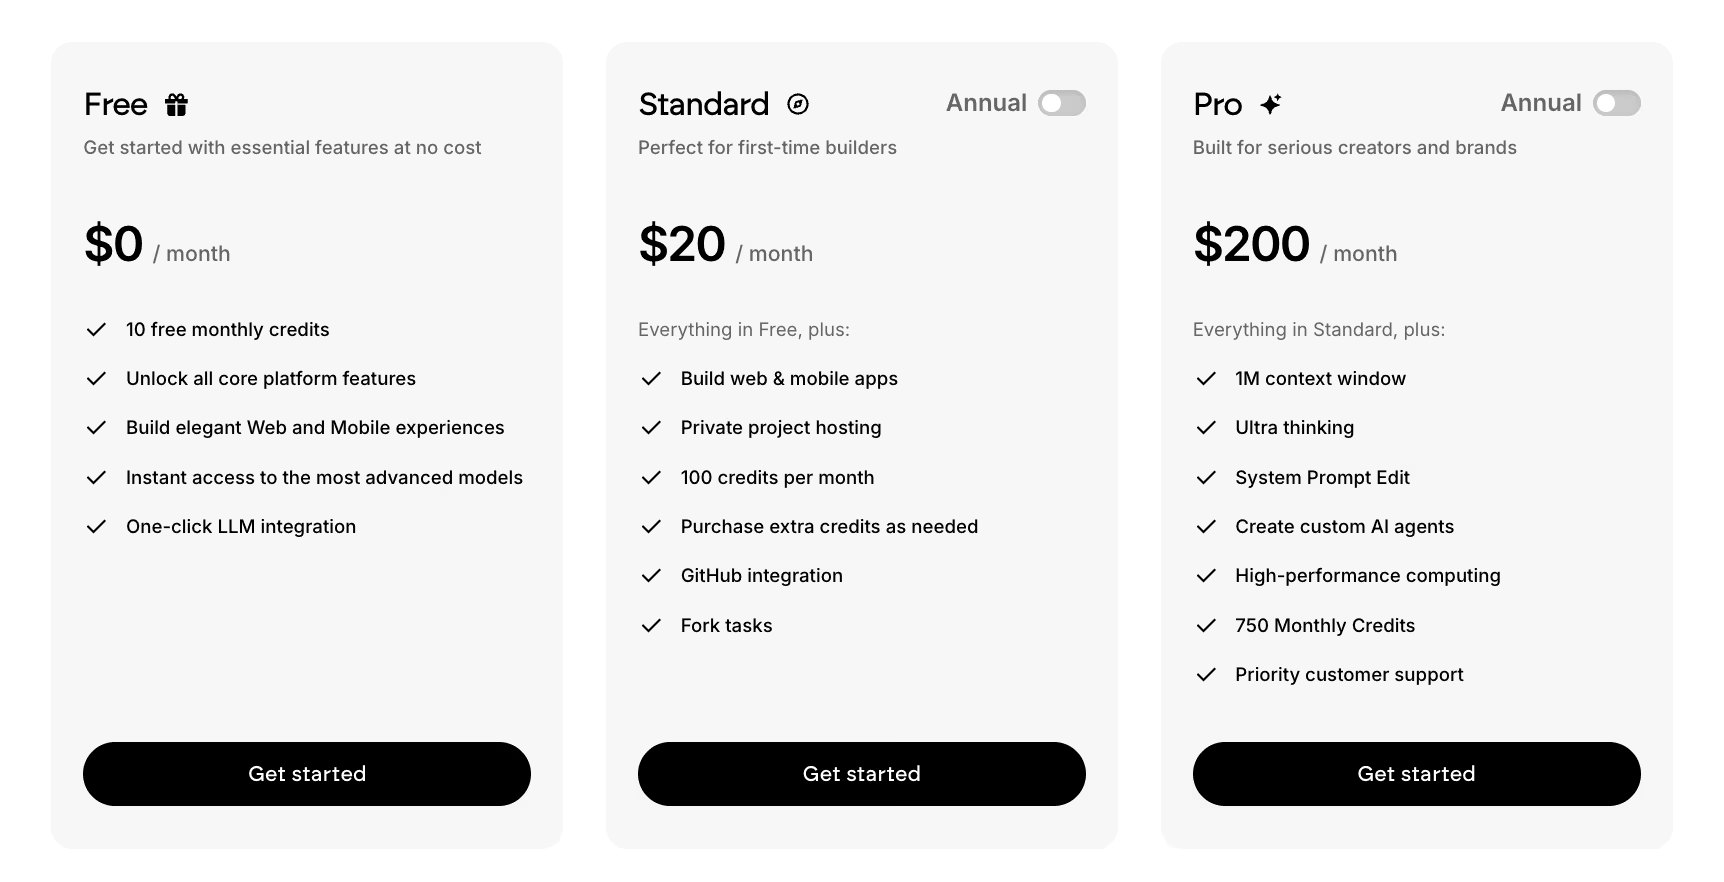
The Free plan includes 10 credits a month, enough to try a few prompts and see how the tool handles them before deciding whether to pay for more, and the Standard plan steps that up to 100 credits a month for $20/month ($17/month, billed annually) once your build gets bigger than a single afternoon project.
A code-editor-paired tool skips that credit meter, but it assumes you're already comfortable enough with code to notice when the AI assistant gets something wrong.
Why I Chose a Conversational Builder
My Watchlist is small and single-user, with no logins or payments, and nothing complicated happening underneath. A conversational builder was the obvious fit.
I used Emergent for this walkthrough because it's built around that same conversation-first workflow. You lay out what you want, it builds toward that, and you react to what comes back.
If you already know a little code and want manual control over the details, a code editor-paired tool is a better fit. If you want a direct path from an idea to something you can click through and test, a conversational builder fits that goal.
A code editor has a learning curve that can leave you dealing with syntax before you know whether the idea works.
If you want to compare specific AI app builders against each other, this vibe coding tools breakdown covers that ground in more depth than this walkthrough does.
Step 3: Write a Specific First Prompt
A vague prompt gives the tool more room to guess. This step focuses on making the first request specific.
Here's what a vague version of my prompt might have looked like: "Make me a watchlist app." That leaves the AI guessing about the fields, statuses, and whether the app needs a login. You'll spend more time correcting those guesses than you would have spent making the first prompt specific.
Here's the actual prompt I used:

"Build me a personal movie and TV watchlist app. I want one list where I can add a movie or show by title and pick a status: Want to Watch or Watched. Keep the design simple and clean, and don't add a login, this is just for me."
The tool generated the list view, the add-title form, and the status field on the first try. That cost 12 credits and seven minutes. I could add a title, pick a status, and see it appear on the list immediately.
Nothing about that first pass needed a fix before I moved on, which surprised me more than the app itself did. I'd expected to spend at least one follow-up prompt getting the status field to behave.
Notice what made that prompt work:
- A named app type
- One clear feature (the list)
- A specific field (the status options)
- One explicit constraint (no login)
Those details reduced the number of guesses the tool had to make. Copy the same structure into your first prompt, naming the app type, feature, field, and constraint upfront.
Step 4: Review What the AI Builds and Test It Right Away
A first pass that looks right isn't always correct. Click through it immediately.
After Step 3 finished, I tested before moving to the next feature. I added a real title to the list, switched its status from Want to Watch to Watched, and refreshed the screen to confirm both changes held. Only after that did I move on.
That check took about two minutes, and it didn't add anything to the 12 credits and seven minutes already spent building the first pass. A look at what's already on screen doesn't spend a fresh prompt. Only asking the AI to change something does.
In this build, the check came back clean, with the title saved, the status switched, and the refresh holding. The bug this walkthrough did hit never showed up here. It didn't surface until the next step, once a second feature landed on top of the first one.
That quick pass is worth the extra minute. Catch it early, and it's far easier to fix than three features later, once you can't remember which change caused it. A small, obvious break (a status that reverts, a field that doesn't save) is easy to miss once you're already three prompts deep into the next feature.
Skip that quick check, and a break like that can survive three more prompts before anyone notices it.
If something looks off, describe exactly what you see. Save your theory about the cause for the next step, where that habit pays off the most.
Step 5: Iterate One Feature at a Time, and Describe the Symptom
The main friction point in my build came when a new feature reset something that had worked before.
Here's exactly what happened on mine. I prompted: "When something is marked Watched, add a 1-to-5 star rating field so I can rate it after I watch it." Emergent added the star field correctly. But every title already in my list lost its status. Everything I'd marked Want to Watch or Watched reset to blank.
I described the symptom, in my own words, and left the cause to the tool:
"My existing movies lost their Want to Watch or Watched status after you added the star rating feature. Can you restore it without touching the rating field?"
The star-rating request and follow-up fix used 14 credits and five minutes together. Writing and sending the follow-up prompt took under a minute.
Describe the exact symptom in plain language. That's the single most useful habit in this whole walkthrough, and the one everything else here builds on.
A guess about the cause can waste time and credits, and so can reaching for technical terms to sound more precise. Describe what you're seeing, and let the tool work through the cause from there.
Test one feature, confirm it, then move to the next. That's how you catch a bug like this immediately, before it gets buried under three more features.
Step 6: Add Guardrails So the AI Doesn't Undo Your Own Fixes
Notice the guardrail buried in that fix prompt from Step 5: "without touching the rating field." That single clause is doing the important work. Those five words helped the fix land in one prompt, with no second attempt needed.
Without it, the AI might have rebuilt the rating field, too, while restoring the statuses. That could have introduced a second problem while fixing the first.
The fix landed in one attempt, so the step stayed at 14 credits and five minutes.
Pro Tip
State your guardrail in the same prompt as the fix or feature request so the constraint and requested change appear together.
This build only ever needed one guardrail clause, because only one earlier feature was ever at risk from a later fix. A bigger build, with more fields depending on each other, might need to name two or three things to leave alone in the same prompt.
Make this a habit any time you ask for a fix or a new feature. Name what stays untouched, right alongside what should change. It costs one extra sentence, and it can save you from chasing a new bug the fix itself introduces.
Step 7: Test the Full App Before You Call It Done
A first working version often feels finished before it's done.
Before calling my own build done, I asked for one more feature. Here's the prompt I used:
"Add a filter so I can view Want to Watch only, Watched only, or everything, using the same status field that's already there."
It went in cleanly, with no side effects this time. The prompt named the existing status field and asked the tool to use it for the filter, so the request already contained the constraint it needed. That step cost 9 credits and three minutes, the fastest and cleanest of the three.
Then I ran a full test of every feature together, including the ones I'd already built. I added a title, marked it Watched, gave it a rating, then flipped through all three filter views to confirm nothing from the Step 5 fix had broken again.
Everything held. That full pass, more than the filter toggle on its own, confirmed the app was done. A new feature can work on its own while still breaking something you fixed earlier.
If I only had time for one check before calling a build finished, I would re-test the first feature instead of checking only the newest one.
Once the newest feature works, it can be tempting to call the whole build finished. Test every feature together so you can catch a regression before you call the build done.
Step 8: Decide Whether and How to Publish
The Watchlist Stayed a Test Build
My Watchlist never left my own account. It was a test build I never intended to launch, and that was the point.
But if you want to take a build further and put it in front of real users, here's what that path involves.
What Publishing Involves
Publish to a mobile app store, and you take on an app store review process on top of your build, plus ongoing costs:
- An Apple Developer Program membership costs $99 for the year, with no monthly option.
- Google Play's developer registration fee is a one-time $25.
- You may also need a recurring builder plan once the free plan stops covering your project.
- Emergent's own pricing runs from the Free plan (10 credits a month) up through Standard at $20/month ($17/month, billed annually) for 100 credits a month, and Pro at $200/month ($167/month, billed annually) for 750 credits a month once a project needs real, ongoing usage.
Budget for the builder plan alongside any applicable app-store fees.
One-click (or near one-click) hosting setup shows up across several AI app builders. FlutterFlow offers near one-click store release, Rork offers two-click App Store publishing, and Emergent includes one-click publishing too, pushing a project toward a live address once you're ready.
Some also export the underlying code if you want more control over it later.
Common Mistakes to Avoid
These five mistakes can stall a first vibe-coded app. Four appeared directly in the walkthrough. The fifth, tool-hopping, is a common risk too, even though this walkthrough only used one tool.
- Skipping the plan: Opening the AI builder before you've written down what the app does costs you more time than the planning itself would have (see Step 1).
- One giant vague prompt: Asking for the whole app in a single vague request leaves the tool to guess the fields, statuses, and screens. Specific, outcome-driven prompts give it fewer details to guess (Step 3).
- Mistaking a working first version for a finished one: Test every feature together before calling a running build finished (Step 7).
- Tool-hopping: Switching tools every time something goes wrong can interrupt your progress and force you to learn a new workflow. Finish one small test build before judging the tool.
- Not stating constraints up front: Leaving out what should stay untouched invites the AI to change things you didn't ask it to touch (Step 6).
Catch these five early, and your first build goes from a frustrating guessing game to a short, predictable process.
The Watchlist took 15 minutes total to build, across four prompts, the Step 5 bug included. That number measures only the prompting itself. The planning, the testing, and the guardrail-writing that made those 15 minutes work all happened outside it.
You still write a plan before touching the tool, test one feature at a time, and describe problems precisely. Vibe coding swaps writing code for writing clear instructions, and the same discipline still applies to the new skill.
Advanced Tip: Draft Your Prompt With AI First
Once you're past a first build like the Watchlist, there's a move that goes a step beyond writing a specific prompt yourself. It means handing the prompt-writing to a separate AI first.
The idea is simple. You describe your app idea to a general-purpose AI chat tool first, then ask it to turn that description into a structured, detailed spec or feature list, before ever touching the app builder itself.
You then hand that spec to your app builder as the prompt. A drafted spec can surface fields, edge cases, and constraints before you open the app builder, such as a default status or an empty-list state.
The value shows up once a build outgrows a single screen. A Watchlist-sized app doesn't need it. Writing your own three-line plan and turning it into one specific prompt, the way Steps 1 through 3 of this walkthrough do, covers a build that small on its own.
But once an idea has multiple screens, several fields that depend on each other, or logic you're not confident you can describe yourself precisely, ask an AI to help you write the request before you send it. That can save a round of guessing the app builder would otherwise have to fix.
Treat the drafted spec the same way you'd treat your own plan from Step 1. Read it back before you send it, and cut anything that doesn't match what you want. An AI-drafted prompt is a starting point. Read it back and adjust it before you send it.
How Emergent Helps Beginners Vibe Code Their First App
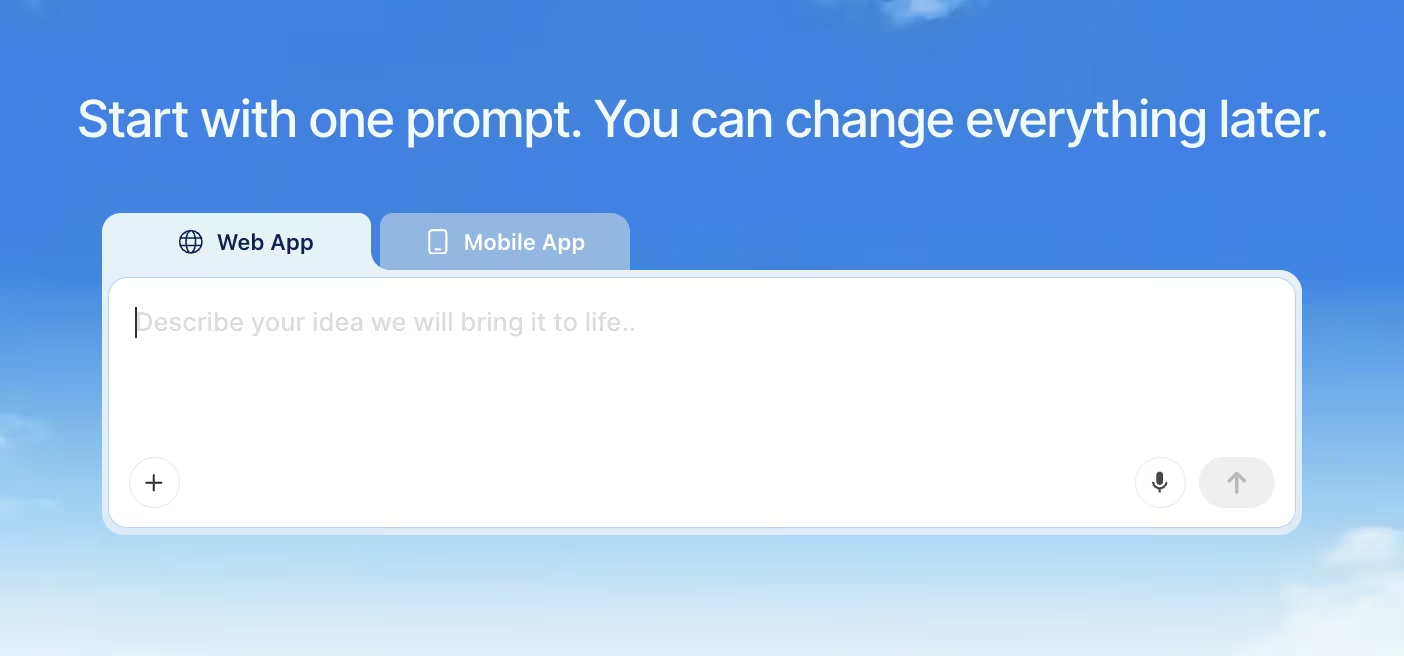
This walkthrough covers how to vibe code an app step by step; here's how Emergent supports you through the actual building, from typing a real prompt to reacting to what comes back, quirks and all.
That's exactly what the Watchlist build demonstrated. Across four prompts in one sitting, the whole thing came together for 35 credits and 15 minutes, with one bug hit and fixed along the way.
You describe the outcome you want, such as an app with a list, status, and rating field, and Emergent's underlying agents scope the request and build toward it, returning a version for you to test.
The plain-language iteration habit from Step 5 is the same habit that makes this workflow click for a first-time builder. You describe what you're seeing in everyday words, and the system translates that into a code change.
A first build like this one is intentionally small. A more complex app with logins, payments, or many connected features would need separate testing. This Watchlist build does not show how much extra iteration that work would require.
If a future build needs outside data or connections to other tools, Emergent's MCP connector supports those connections.
For a small, personal idea like the Watchlist, my test supports trying Emergent first. Skip it only once your build needs something this first version was never meant to handle.
Here's how Emergent helps a first-time builder get from idea to working app:
- Describe-the-symptom iteration: In my test, describing the lost statuses was enough for the system to fix the bug without a technical explanation.
- A working first pass, fast: The Watchlist's list view, add-title form, and status field came together in one pass, with no separate setup step before you could click through it.
- Guardrail clauses hold: Naming exactly what shouldn't change, the way Step 6's fix prompt did, kept a two-feature build from breaking a feature that already worked.
- A path to publishing when you're ready: It handles the hosting setup for you in one click, turning a finished build into something reachable at a URL.
- Built-in help when you're stuck: Emmy, Emergent's free chat assistant, answers questions about your build in context, from writing a prompt to picking an agent to troubleshooting an error, without using any credits.
Try describing your own app idea and see what a first version looks like: start building on Emergent.

Describe what you want and Emergent builds it. A real, production-ready app you can launch the same day.
- One prompt to build
- Zero code required
- Deploy in minutes