


TL;DR
- Start with one job and two roles: Decide what the portal should help someone do, then define what each role can see and change.
- Build one complete path first: Get login, dashboard, one core record, and one action working before you add extra pages.
- Test access with fake accounts: A client account should never be able to open another client's records, even through a copied link.
- Connect live data last: Prove the portal works with sample data before you sync spreadsheets, a CRM, or other business data.
- Pilot before a full rollout: Give a small group real access, watch where they get stuck, then fix those points before inviting everyone.
A good portal gives your clients, employees, or partners one place to find what they need, so you don’t have to keep answering questions like, “Can you send me that?” or “What’s the status?”
If you're learning how to create a portal website, start with access rules, build one useful workflow, test it with fake accounts, and only then move real data into it.
I reviewed the current 2026 portal search results, Emergent's August 2026 product documentation, and a recent client-portal case study to shape this process for a non-technical founder or service-business owner. The goal is a first version you can scope, build, test, and hand to real people without turning the project into a giant software specification.
What Is a Portal Website?
A portal website is a private web app for a defined group of people. After someone signs in, the portal shows information, files, tasks, or actions that fit that person's account and permissions.
For a small agency, a client might see project status, approved files, invoices, and a request form. An account manager might see every client. An admin might be able to invite people, edit records, and change settings.
Access logic is the key difference between a portal and a normal public website. It also separates a portal from a simple paid-content site. If your project is mainly about gated lessons, resources, or a community, a membership setup is usually the closer model.
Also read our guide on how to build a membership website to understand when a portal crosses into membership territory and which model fits your project.
What You'll Need Before Starting
You can plan a useful first portal on one page. Write these five items down before you open a builder:
- One job: Name the repeated task the portal will replace, such as sharing project status or collecting vendor documents.
- Two starting roles: Pick the smallest useful set, such as Admin and Client.
- A page list: Start with Login, Dashboard, Record Detail, and one form or action page.
- Sample data: Create three to five fake clients, projects, invoices, files, or requests.
- A pass/fail test: Write one sentence that proves the portal works, such as "Client A can see Project A and cannot see Project B."
If you haven't chosen a build route yet, start with who will own the portal after launch. This comparison of internal tool builders is useful because portals sit between a website and an internal business app.
Best route by portal scope:
| Build Route | Best Fit | Main Tradeoff |
|---|---|---|
| AI app builder | Custom workflow, fast first version | Needs deliberate testing |
| Visual no-code builder | Standard portal tied to existing data | Platform limits |
| Custom development | Complex rules or high-risk systems | More time and specialist work |
Time required: For a small multi-page business app with several roles and custom workflows, Emergent's current business-app tutorial gives two to four hours as a typical first-version range. A portal with sensitive data, complex integrations, or formal compliance requirements needs more review and testing before rollout.
How to Create a Portal Website Step by Step
Step 1. Define One Job the Portal Must Complete
Start with the support request or manual task you want to remove. "Build a client portal" is too broad. "Let clients check project status and download approved files without emailing us" is specific enough to build and test.
I recommend writing the first scope as one sentence you can test later. For a fictional agency called Northline Creative, I'd use this version.
Example scope: "Northline clients sign in to see their active project, current stage, due date, approved files, and one form for submitting a revision request."
That sentence already gives you the audience, main record, key data, and one action. It also gives you a reason to reject extras that don't help the first workflow.
Pro Tip
Keep the first version to one core record type. If the portal is about client projects, make Project the center. Add invoices, support tickets, contracts, or messaging only after the project flow works.
Step 2. Map Roles and Permissions Before You Design Pages
Your next job is to decide who can do what to which records. Role-based access control (RBAC) is a way to give permissions based on a person's role, such as Admin or Client.
For a beginner portal, roles are only the starting point. You also need record ownership. Two people can both have the Client role and still need access to different projects.
OWASP's current authorization guidance recommends least privilege, deny by default, and permission checks on every request. In plain English, give each account only the access it needs, block anything you haven't deliberately allowed, and check access again when someone opens or changes a record.
Starter permission map:
| Action | Admin | Client |
|---|---|---|
| View own project | Yes | Yes |
| View all projects | Yes | No |
| Update project stage | Yes | No |
| Download own files | Yes | Yes |
| Upload client request | Yes | Yes |
| Manage accounts | Yes | No |
Pro Tip
Add a rule for record ownership beside every client-facing action. "Client can view projects" is too vague to test, so tighten it to "Client can view projects where the project belongs to the signed-in account."
Step 3. List the Screens, Records, and Connections
Now turn the workflow into a small map of screens and data. Don't start with colors, fonts, or a dashboard full of charts.
For the Northline portal, I'd use six screens.
First-version screens:
- Login: Sign in and password recovery.
- Dashboard: Active project, stage, due date, and recent files.
- Project Detail: Scope, milestones, dates, and approved deliverables.
- Files: Files tied to the signed-in client's project.
- Revision Request: A form that creates a request against that project.
- Admin View: Client list, project updates, files, and account invitations.
Then list the records that power those screens. This is the same workflow-first approach used in business app development.
Record relationships:
- Account: Has a role and belongs to one client organization.
- Client: Has one or more accounts.
- Project: Belongs to one client.
- File: Belongs to one project.
- Revision Request: Belongs to one project and records who submitted it.
If your current data lives in a spreadsheet or customer relationship management (CRM) system, leave the live connection for later. Build with fake rows first so a bad rule can't expose real customer information while you're still changing the structure.
Also read our guide on how to create a business app in an afternoon to see how fast you can go from data structure to a working portal.
Step 4. Choose the Build Approach That Fits the Workflow
Choose the build route based on how custom the workflow is and who will own it after launch. A portal that only shows rows from an existing database is a different project from a portal with approvals, payments, document rules, or several kinds of accounts.
Use an AI app builder when: You have a custom workflow, want to describe it in plain English, and you're prepared to test the generated logic.
Use a visual no-code builder when: Your portal fits a standard pattern and most of the data already lives in a supported source.
Use custom development when: You have unusual security requirements, deep legacy-system dependencies, high-risk regulated data, or an engineering team that needs full control over architecture and review.
For the Northline example, I'd use Emergent because the portal needs login, different roles, connected records, forms, and a private admin view. Emergent's current AI web app builder supports pages, forms, tables, connected data, authentication, user roles, and business workflows from prompts.
You still have to prove those generated permissions with separate accounts before you trust the portal with client data.
Step 5. Write a Build Prompt With Roles and Boundaries
A useful portal prompt describes the job, roles, records, pages, and access rules. Skip decorative adjectives until the workflow is clear.
If you're starting in Emergent, Emmy can help shape that first brief. Emmy is built into Emergent's web product and can turn a plain-language idea into a build-ready prompt. It is free to use and doesn't consume credits. Emmy has context about your current project, but Emergent says it doesn't read your code or account history.
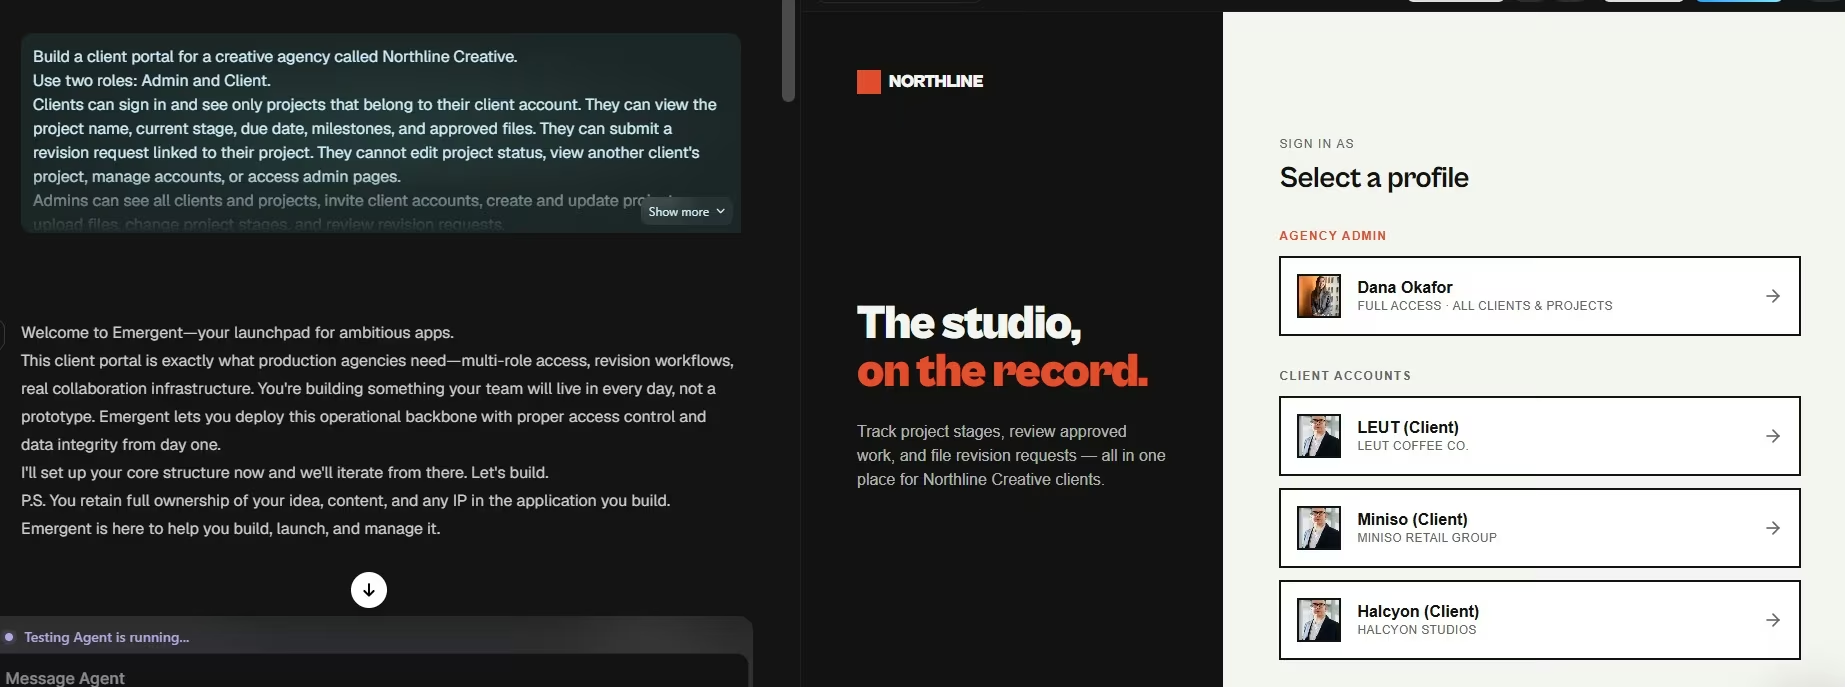
Here is the prompt I'd start with for the Northline portal:
Build a client portal for a creative agency called Northline Creative.
Use two roles, Admin and Client.
Clients can sign in and see only projects that belong to their client account. They can view the project name, current stage, due date, milestones, and approved files. They can submit a revision request linked to their project. They cannot edit project status, view another client's project, manage accounts, or access admin pages.
Admins can see all clients and projects, invite client accounts, create and update projects, upload files, change project stages, and review revision requests.
Create Login, Client Dashboard, Project Detail, Files, Revision Request, and Admin Dashboard screens.
Use sample data for three fictional clients. Do not connect real customer data yet.
Before building, show me the proposed data model, access rules, and page plan. Flag any rule that is ambiguous.
The last instruction is there for a reason. Review the plan before generation. If the builder thinks a Client can view all projects, fix the rule in the plan instead of discovering the problem after the interface exists.
Pro Tip
Ask one follow-up question after the plan appears. "List every action a Client is blocked from doing." That forces the access boundary into plain language you can compare with your permission map.
Step 6. Build and Test One Complete User Path
Build one path from sign-in to a useful outcome before you add a second workflow. For Northline, the first path is simple.
Client path:
- Sign in as Client A.
- Open the dashboard.
- Open Project A.
- Download one approved file.
- Submit one revision request.
- Confirm the request appears for the admin.
The current Emergent business-app tutorial recommends testing core workflows with separate accounts when roles differ.
After each action, ask a plain pass/fail question.
Core test questions:
- Login: Did the correct dashboard load?
- Data: Did Client A see only Client A's project?
- Action: Did the revision request save against the right project?
- Admin view: Could the admin see the new request and its client?
Don't pile on new features while one of those answers is "no." Fix the broken path first, then rerun it from the start.
Step 7. Run Negative Access Tests With Fake Accounts
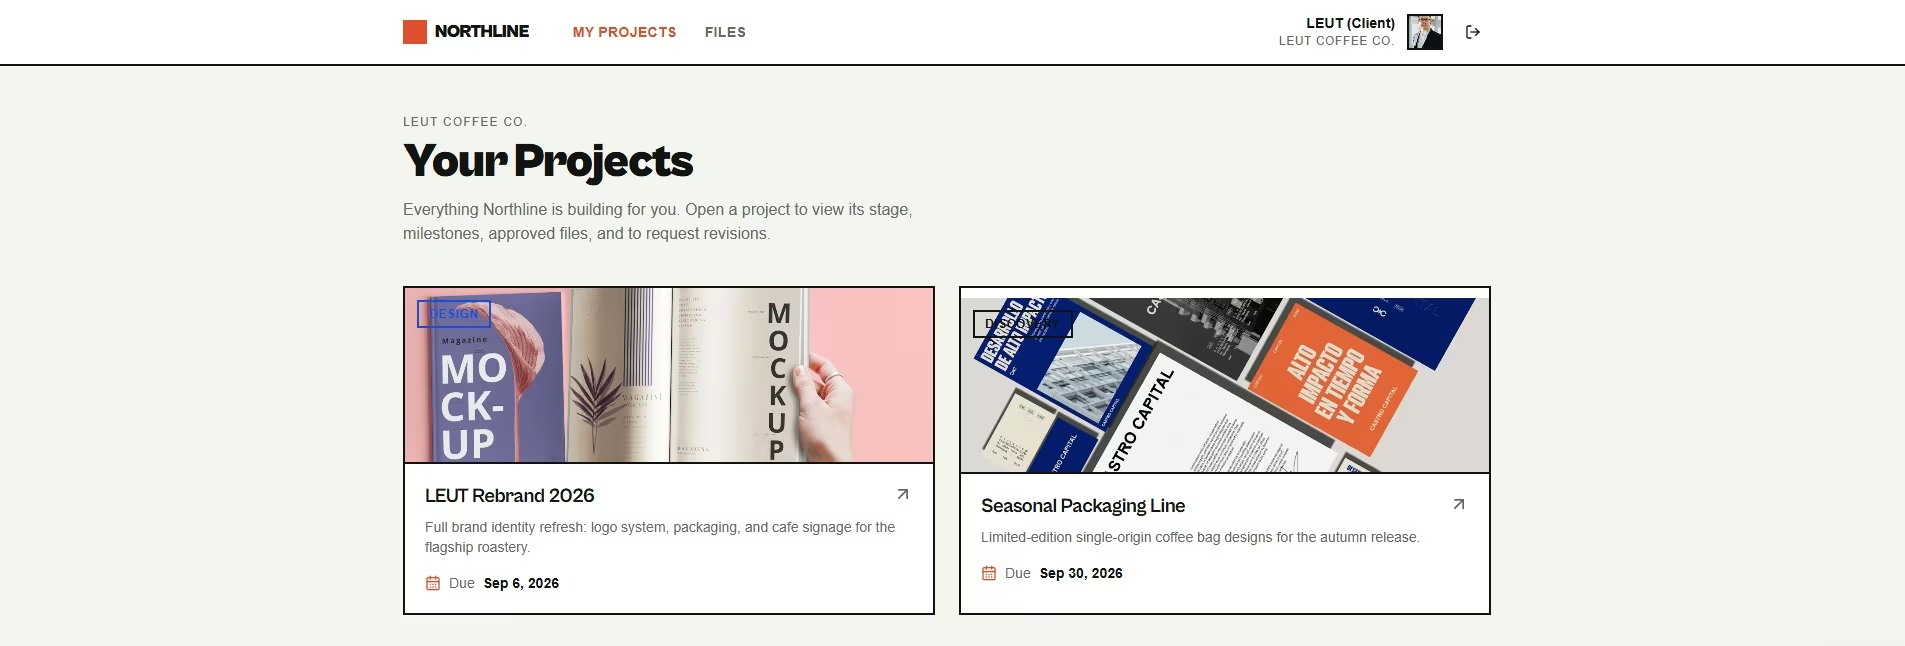
Positive tests only confirm the portal works for the right person, so you also need negative tests that confirm it blocks the wrong one.
Create three fake accounts before real data enters the system.
Test accounts:
- Admin: Can see and change every test project.
- Client A: Can see only Client A records.
- Client B: Can see only Client B records.
Run the normal path as Client A, then copy the web address for Project A. Sign out, sign in as Client B, and paste that address into the browser.
The correct result: Client B gets blocked or sent to an allowed page. Hiding Project A from the menu isn't enough if the copied address still opens the record.
Repeat the same test for files, forms, edit actions, and any downloadable links. OWASP recommends checking authorization for every request and resource, which is why this test tells you more than looking at the navigation alone.
Stop the rollout if: One client can read, edit, download, or guess a path to another client's data. Fix the ownership rule, then rerun all three accounts.
Step 8. Connect Live Data, Deploy, and Pilot With Real People
Once the fake-data version passes, connect one live source at a time. Start with the smallest dataset you can verify, such as five real projects rather than your entire client history.
For each imported or synced record, check the owner, account, status, and file links before you invite people. If your source is a CRM, spreadsheet, or database, use the same access tests again after the connection because live data can expose assumptions your sample rows didn't reveal.
When you're ready to publish on Emergent, its custom-domain documentation supports an active deployment followed by either Auto-Link or manual Domain Name System (DNS) configuration. If you want version history or a route for developer handoff, its GitHub integration supports connecting a repository, pushing and pulling code, and working with branches.
I recommend piloting with three to five real people who match the portal's main role. Give them one task, such as "Find your project status and download the latest approved file," then watch where the wording or flow makes them stop.
Real example: Emergent's Homestead client-portal case study describes one login screen with separate contractor and homeowner views. Homeowners see only their own jobs, while the contractor manages all jobs, stages, and documents.
Emergent reports 40% fewer inbound status calls and texts and about six hours per week saved on document management across 50 active jobs. I like this example because the portal stays focused on the repeated status-and-file exchange that was costing the business time.
Common Mistakes to Avoid
Most first portals go off course because the scope grows faster than the access model. Watch for these seven mistakes.
- Starting with a dashboard instead of a job: A dashboard has no value if you haven't decided what the person came to do.
- Using roles without ownership rules: "Client" doesn't explain which client's project, invoice, or file the account can open.
- Connecting live data too early: Sample data gives you room to change fields and permissions without risking customer records.
- Testing only the happy path: A successful login says nothing about whether Client B can open Client A's copied project link.
- Adding every support request as a feature: Keep the first release centered on one repeated workflow, then add features from real pilot feedback.
- Treating hidden buttons as security: A blocked menu item is only an interface choice. Access must also be denied when someone requests the protected record directly.
- Launching without an owner: Decide who updates client access, fixes stale records, reviews failed workflows, and approves future changes.
Taking Your Portal Further Without Creating a Support Burden
After the first workflow survives real use, add the next feature that removes a measured point of friction. If clients keep asking for invoices, add invoices. If your admin keeps copying the same status update into email, add a notification workflow.
Avoid turning the portal into a copy of every tool your business already uses. Before adding a feature, ask whether it belongs in the portal, in your current software, or in an integration between the two. The same decision comes up when choosing custom business software instead of stacking more off-the-shelf tools.
If the portal is becoming business-critical, connect version control early. Emergent's GitHub documentation recommends saving after major features and before large changes, which gives you a stable version to return to if the next edit breaks the flow. GitHub integration supports that workflow.
For high-risk data or complex authorization, bring in a developer or security reviewer before a broad launch. AI generation speeds up implementation, but it doesn't replace a skilled review of access logic, integrations, sensitive-data handling, or formal compliance requirements.
Emergent Makes Portal Website Creation Easier
Emergent fits this workflow because you can describe the portal, generate the app, test it, and publish from the same project instead of wiring a public site, login system, database, and custom workflow together by hand.
Its current web-app page lists authentication, user roles, forms, tables, connected data, workflows, integrations, and deployment among its app-building capabilities.
Here's how Emergent helps with a portal build:
- Prompt-based scoping: Describe the roles, screens, records, and workflows in plain language.
- Authentication and roles: Generate sign-in flows and role-based permissions as part of the app.
- Connected data: Start with sample records, then connect spreadsheets, datasets, databases, or outside services when the structure is stable.
- Testing and iteration: Preview the app, fix a broken flow through conversation, and rerun the path before publishing.
- Deployment and handoff: Publish the app, connect a custom domain, and use GitHub when you need version history or developer access.
Pricing: The Free plan starts at $0 per month with 10 free monthly credits. Standard is $20 per month with 100 credits per month, private project hosting, GitHub integration, and Fork tasks. Billed annually, Standard drops to $17 per month.
Keep deployment credit use in your scope, too. Emergent's official credits documentation says cloud deployments use 50 credits per month for each deployed app, including managed production infrastructure, monitoring, SSL, and custom domains.
If your idea is still rough, start building with Emergent.
Final Takeaway on How to Create a Portal Website
If you want to know how to create a portal website without losing weeks to rework, design access before you design screens. Define one job, map roles and record ownership, build one complete path, test what each account is forbidden to access, then connect real data.
The best first portal is rarely the one with the longest feature list. It's the one people can trust and use without asking you for help. Get that loop working first, then let real requests decide what you build next.

Describe what you want and Emergent builds it. A real, production-ready app you can launch the same day.
- One prompt to build
- Zero code required
- Deploy in minutes