



A buyer tells her agent she wants three bedrooms, a manageable commute, and enough garden space for a dog. They settle the budget on a call, she texts two neighborhoods she’s interested in, and forwards a Zillow listing she found herself.
A week later, the agent sends over a home that ignores two of her deal-breakers and never calls back to confirm the Zillow viewing. The buyer stops replying. And the agent loses the lead without ever knowing why.
None of their interactions were kept in one place. A custom real estate app with her deal-breakers next to every property would have let the agent catch the property mismatch before they sent it.
That app is what you'll build here. This tutorial walks you through creating a real estate app with Emergent that keeps every buyer's preferences, feedback, and viewing requests in one place, then publishing it as a live, shareable app.
Why Create This Real Estate App?
Handling several buyers at once can get messy. One person changes their budget, another asks to view a property, and someone else explains why they disliked a house in a text sent days ago.
Zillow found that 53% of buyers who worked with an agent preferred text or a messenger app. Texting works well for quick updates, but it is a poor medium for managing an entire property search.
A shared app gives buyers and agents a single place to manage the property search process. Instead of spreading updates across messages, spreadsheets, and separate tools, both sides can follow the same buyer journey and see what needs attention next.
What the Real Estate App Will Do
The finished app has a buyer side and an agent side. A buyer signs in to a private dashboard where they can review their home-search requirements, see homes selected by their agent, leave feedback, and request a viewing. The dashboard also shows their agent’s phone number, email address, office hours, and preferred contact method.
The agent sees the same search from an operational view. They can update the buyer’s requirements, add properties, review reactions, respond to viewing requests, and identify which clients need attention.
The build stops before contracts, payments, commissions, inspections, and closing management. Those workflows would turn a focused tutorial into a much larger brokerage system.
Need all that from the start and more? Emergent's real estate CRM tutorial covers that fuller system instead, with lead pipelines, deal tracking, and commission reporting built in.
What You Need Before You Start
You only need a few things before you begin:
- An Emergent account: You will use it to generate, test, and publish the app.
- A clear workflow: Know what the buyer should be able to do and what the agent needs to manage.
- Basic agency details: Have an agency name, agent contact information, and office hours ready for the buyer dashboard.
- A few property images: Use images you own or have permission to publish when you replace the sample listings.
- A GitHub account, if needed: Connect one later if you want to keep the code in your own repository.
You don't need to prepare a full property database before starting. We’ll ask Emergent to add sample listings during the build, then replace them with your own property information and authorized images.
How to Create a Real Estate App With Emergent
Step 1: Plan the First Version
Before opening the builder, decide what the first release needs to do.
Keep the plan focused on the people using the app and the actions they need to complete. For this project, buyers need to review selected properties, share feedback, request viewings, and check what happens next. Agents need to manage buyer preferences, respond to viewing requests, review feedback, and add properties.
Leave larger additions such as live MLS feeds, contracts, payments, and transaction management for later. A smaller brief gives you an app that is easier to build and test.
You can write the plan yourself or open Emmy, Emergent's built-in chat assistant, and describe the app in one rough sentence, such as:
"I want to build a real estate app where I pick properties for my clients, they can tell me if they're interested, and I can keep track of who needs a follow-up."
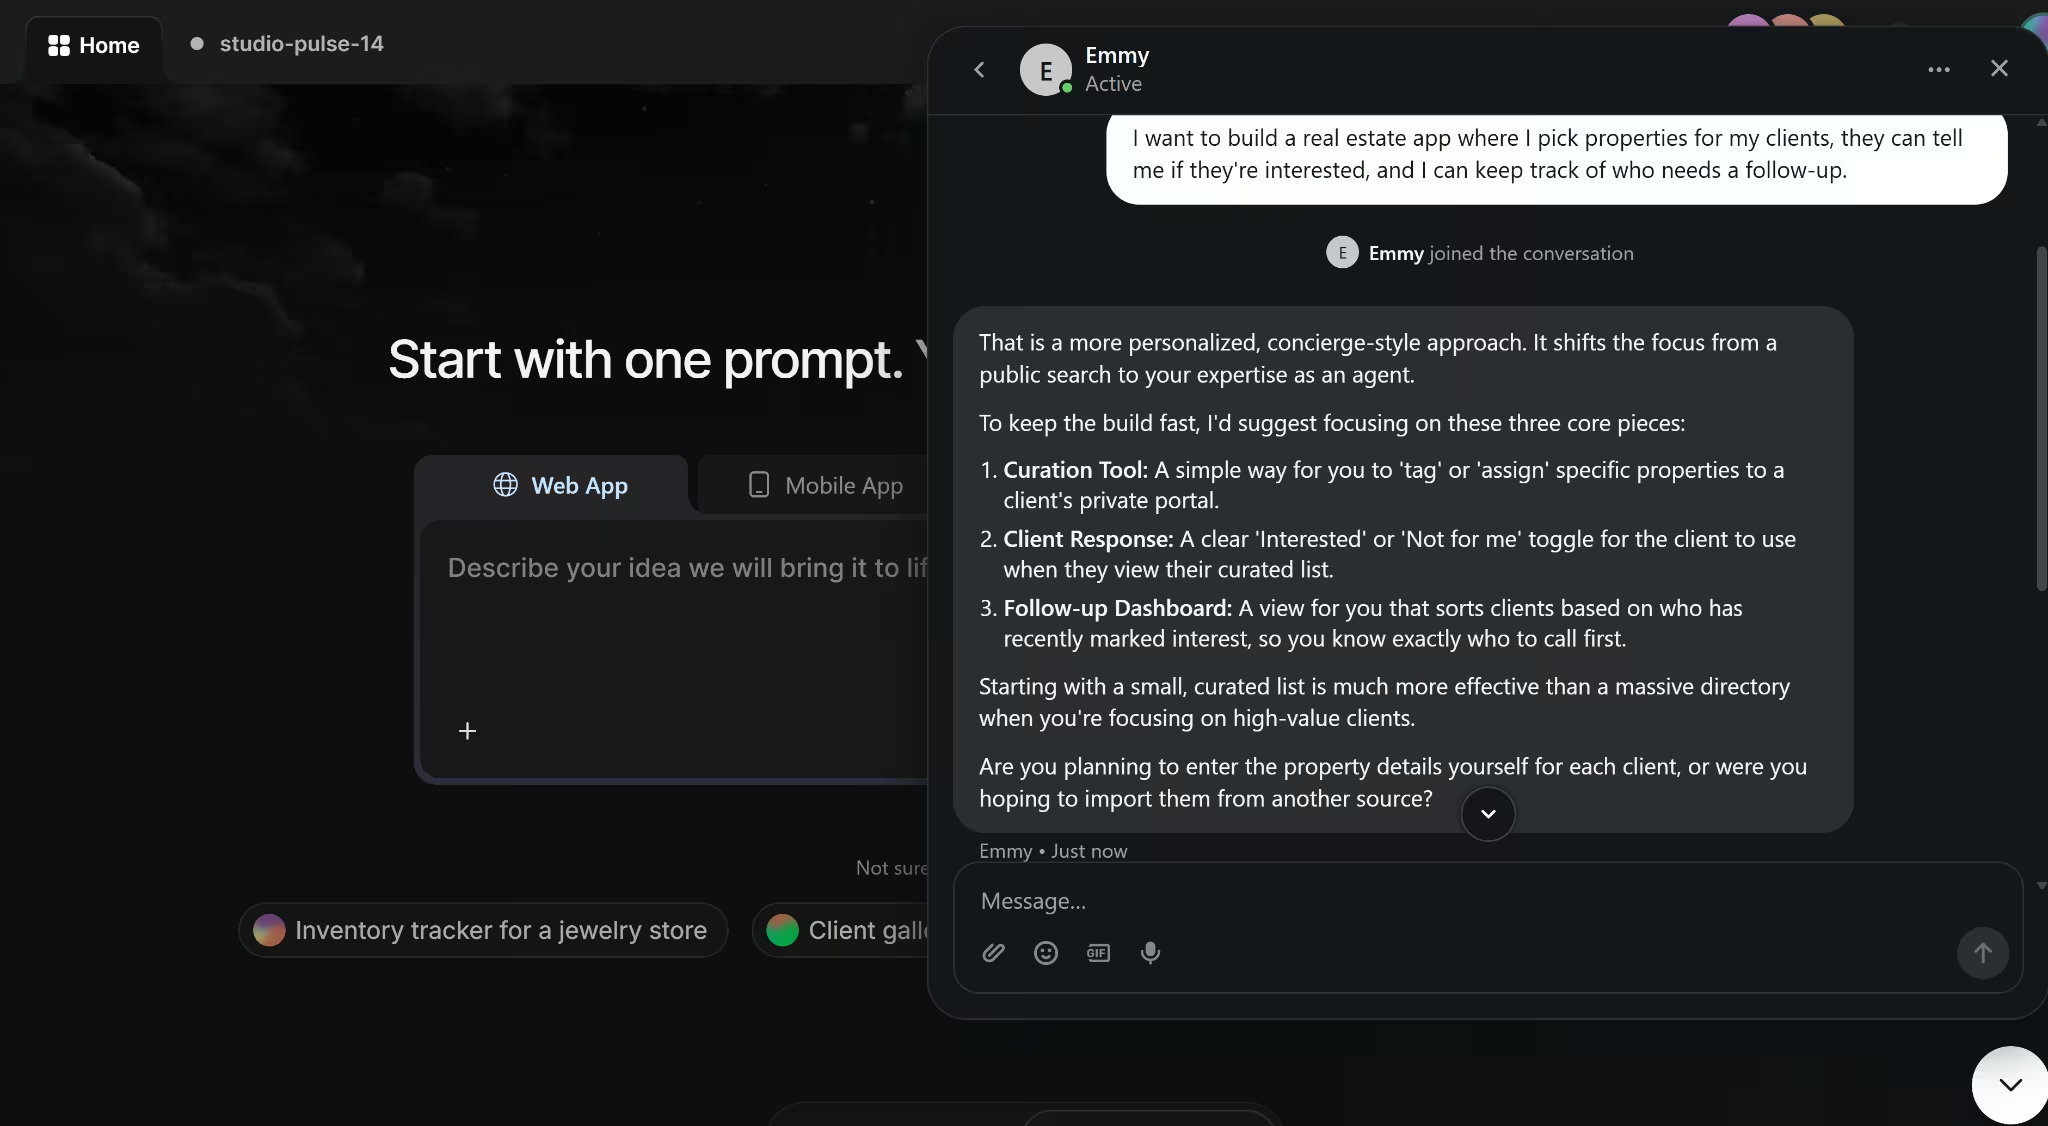
She'll ask what buyers and agents each need, flag anything you haven't decided yet, and turn your answers into a prompt you can paste straight into the builder.
She also stays open through the rest of the build. Take a screenshot of anything confusing, ask about your credit balance, or tell her what you want to change, and she'll answer on the spot.
Step 2: Write Your First Prompt
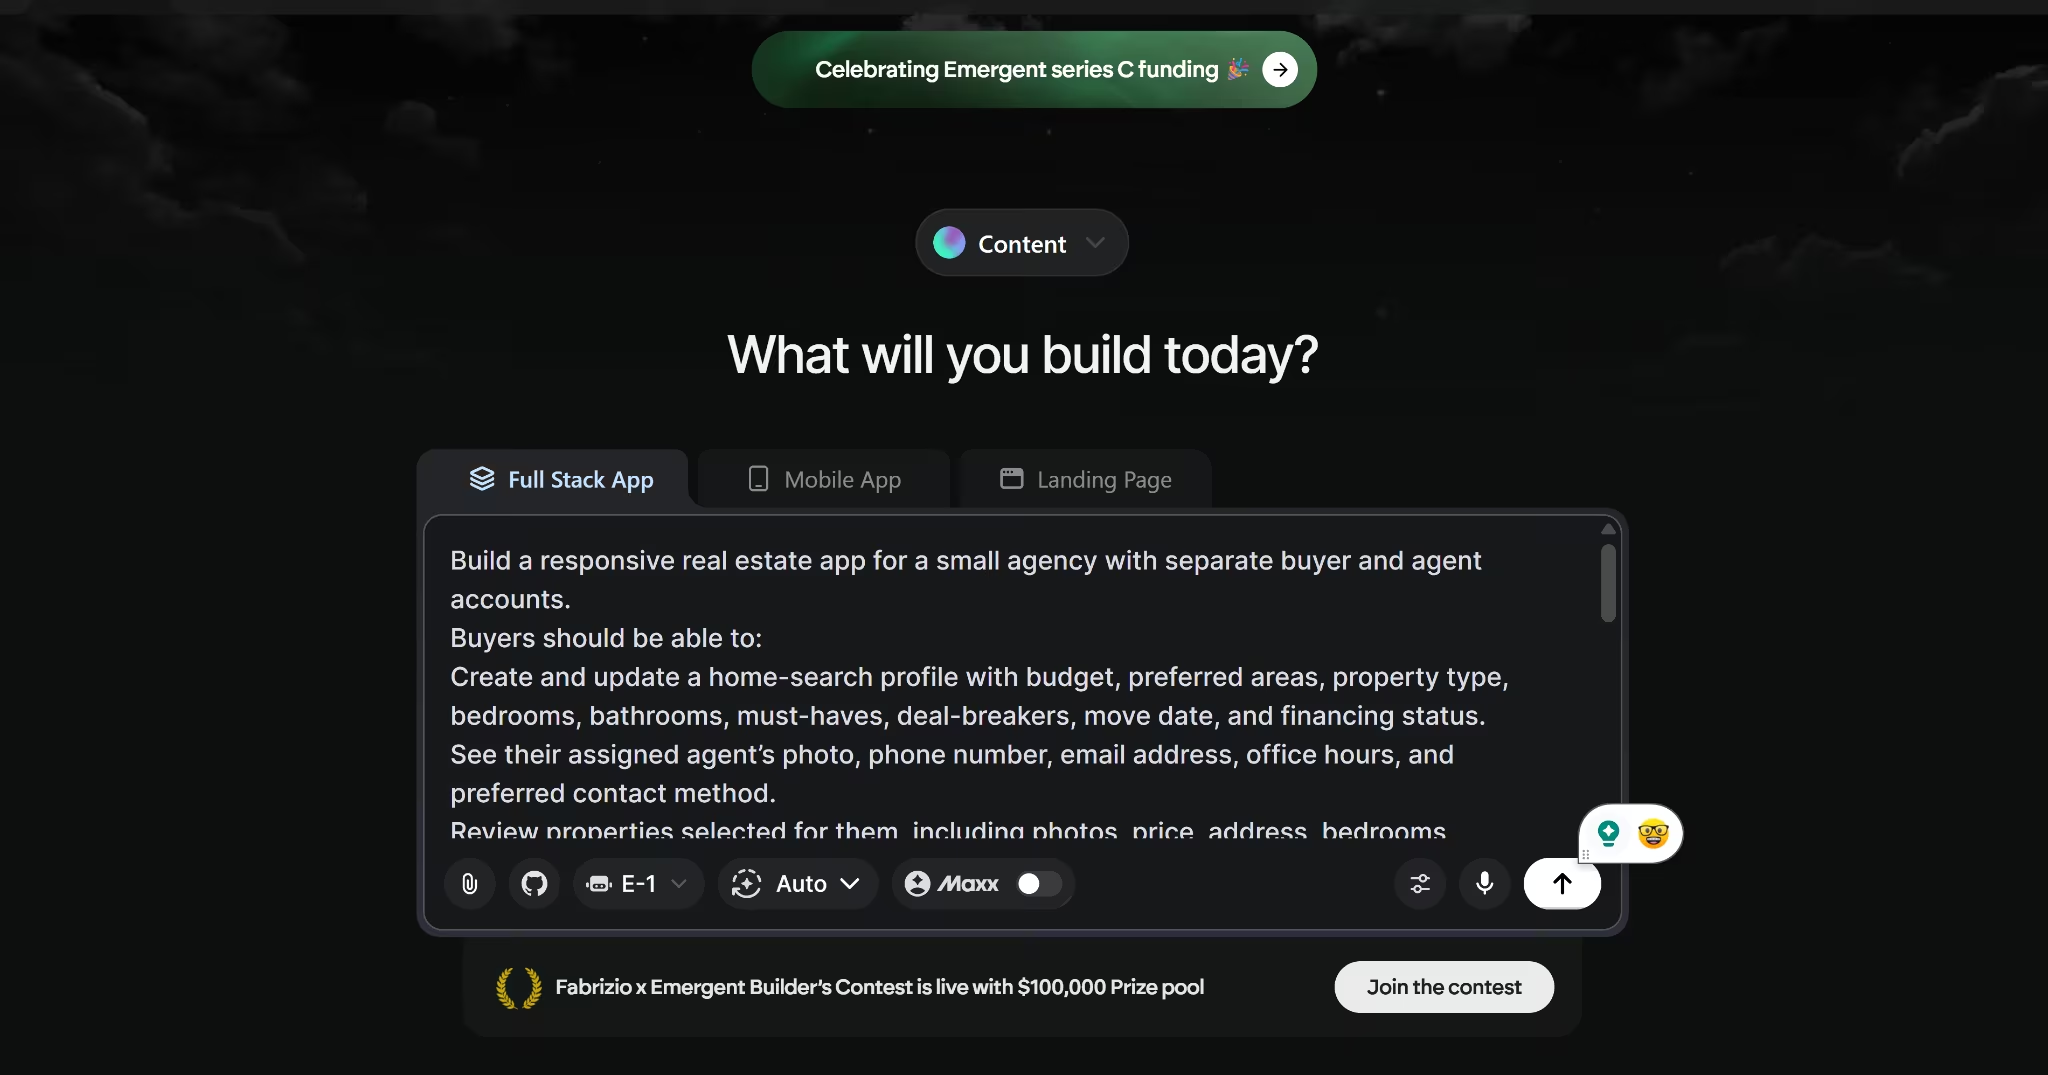
Open Emergent, choose Full Stack App, and paste in the prompt you prepared in Step 1. You can also use the prompt below and edit it to match your agency.
Build a responsive real estate app for a small agency with separate buyer and agent accounts.
Buyers should be able to:
- Create and update a home-search profile with budget, preferred areas, property type, bedrooms, bathrooms, must-haves, deal-breakers, move date, and financing status.
- See their assigned agent’s photo, phone number, email address, office hours, and preferred contact method.
- Review properties selected for them, including photos, price, address, bedrooms, bathrooms, property type, size, description, and an agent note.
- Mark each property as Interested, Maybe, or Not Interested.
- Choose a quick reason for their response and add an optional written note.
- Request a viewing by suggesting up to three dates and times.
- See confirmed viewing details and their current next action.
Agents should be able to:
- Create and manage buyer profiles.
- Add properties and assign them to specific buyers.
- Review buyer feedback and notes.
- Confirm a viewing, suggest another time, or decline the request.
- See which buyers have new feedback, pending viewing requests, overdue actions, or no recent activity.
- Set one next action for the buyer and one for the agent.
Add sample records so the app can be tested immediately. Buyers must only see their own information and assigned properties. Agents must only see buyers assigned to them.
Use a clean property-focused design with large images, clear status labels, and a mobile layout that keeps the agent contact card, next action, and property recommendations easy to find.
Submit the prompt and let Emergent generate the first version.
Step 3: Keep the Scope Focused
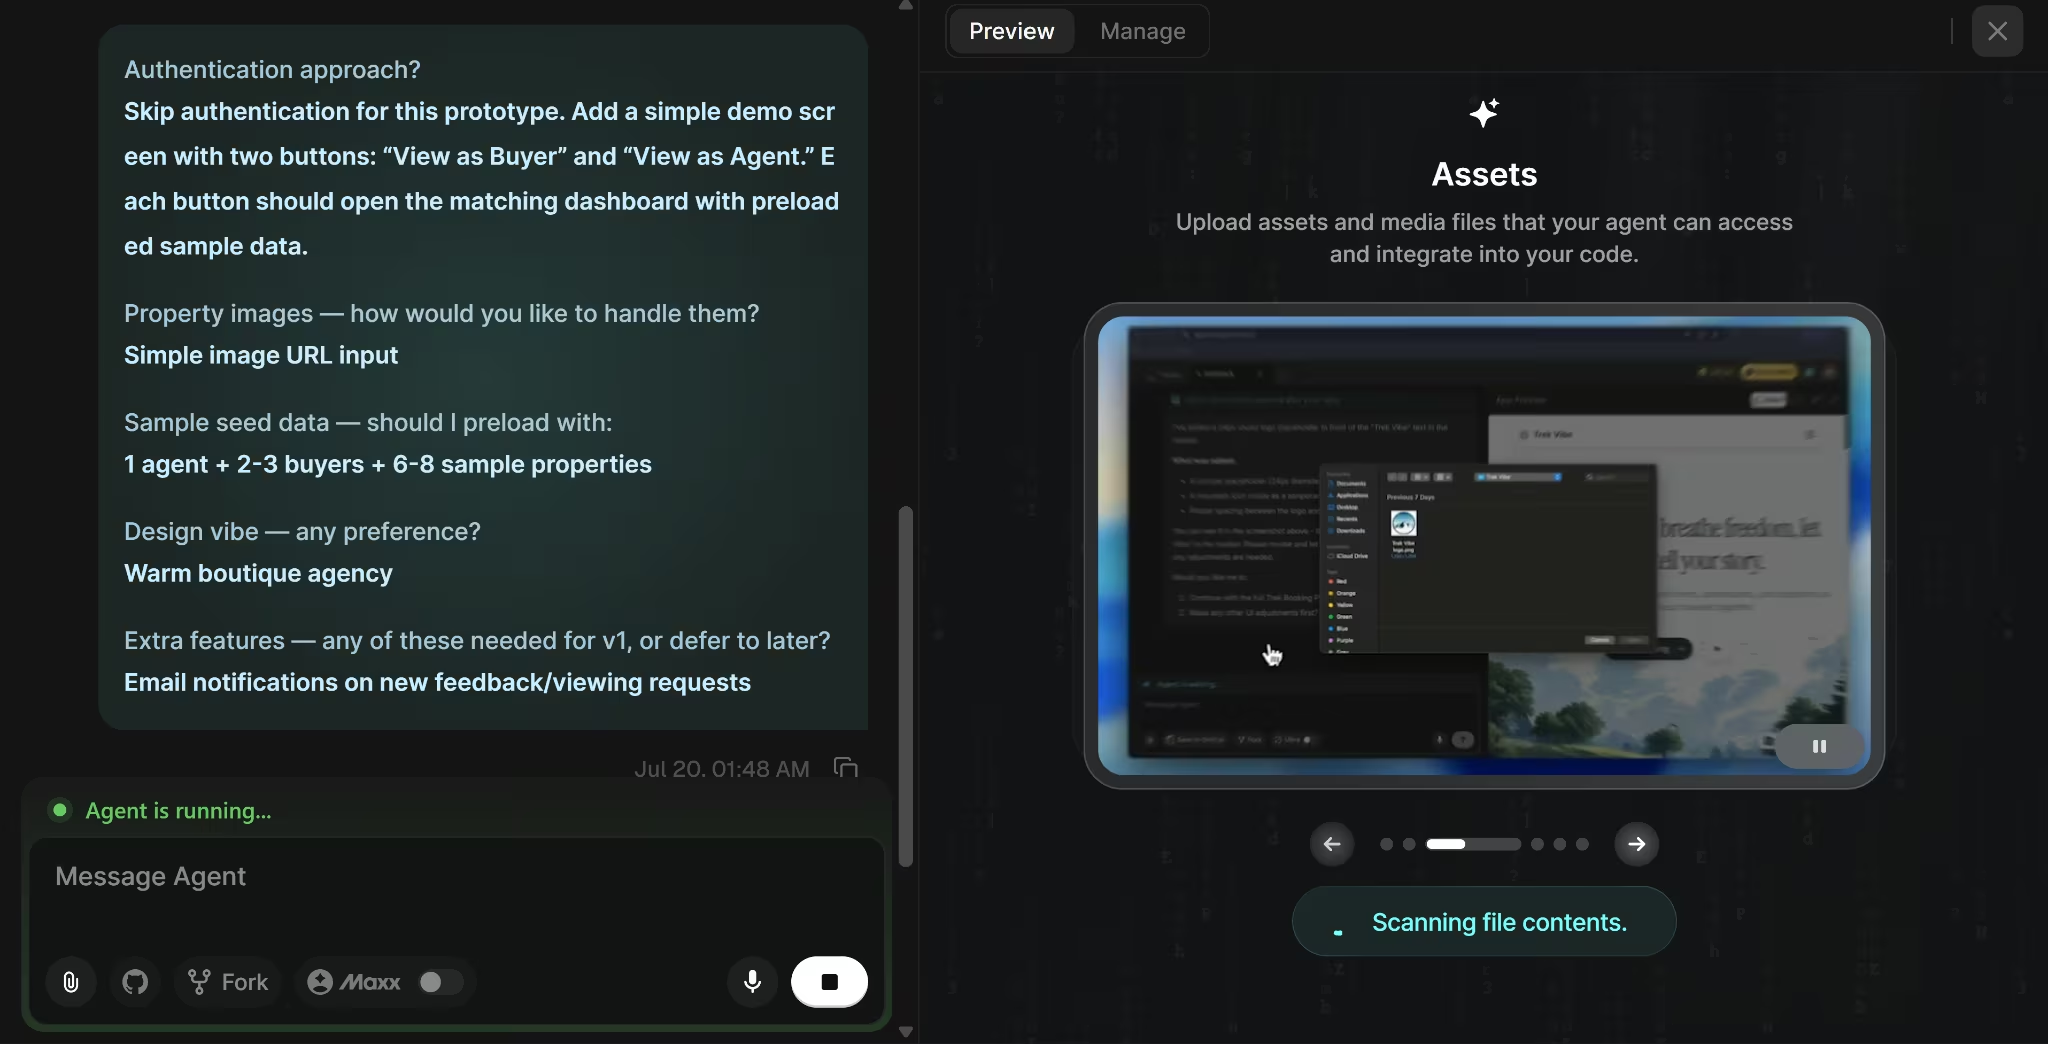
After I submitted the prompt, Emergent asked about authentication, property images, sample data, design, and notifications.
I kept my answers simple because I was building a prototype, not setting up the final version.
- Authentication: I chose a simple role switcher instead of setting up login. The prototype opens with View as Buyer and View as Agent buttons, so I could test and record both dashboards without creating accounts. The role switcher is useful for testing the prototype, but it is not secure sign-in. Replace it with buyer and agent authentication before adding client information.
- Property images: Image URLs were faster for testing. You can move to file uploads when you are ready to add your own listing photos.
- Sample data: I asked Emergent to preload one agent, a few buyers, and several properties. That gave me enough data to test recommendations, feedback, viewings, and permissions.
- Design: Warm Boutique Agency felt more appropriate for a client-facing property app than a generic admin layout.
- Notifications: I kept alerts inside the app. You can add email notifications later, after the main buyer and agent flows are working.
These choices kept the prototype easy to test.
Step 4: Watch Emergent Build the First Version
Once I answered the setup questions, Emergent started building the app. I could see the files it created, the tasks it completed, and the preview taking shape, but I did not need to configure anything while it worked.
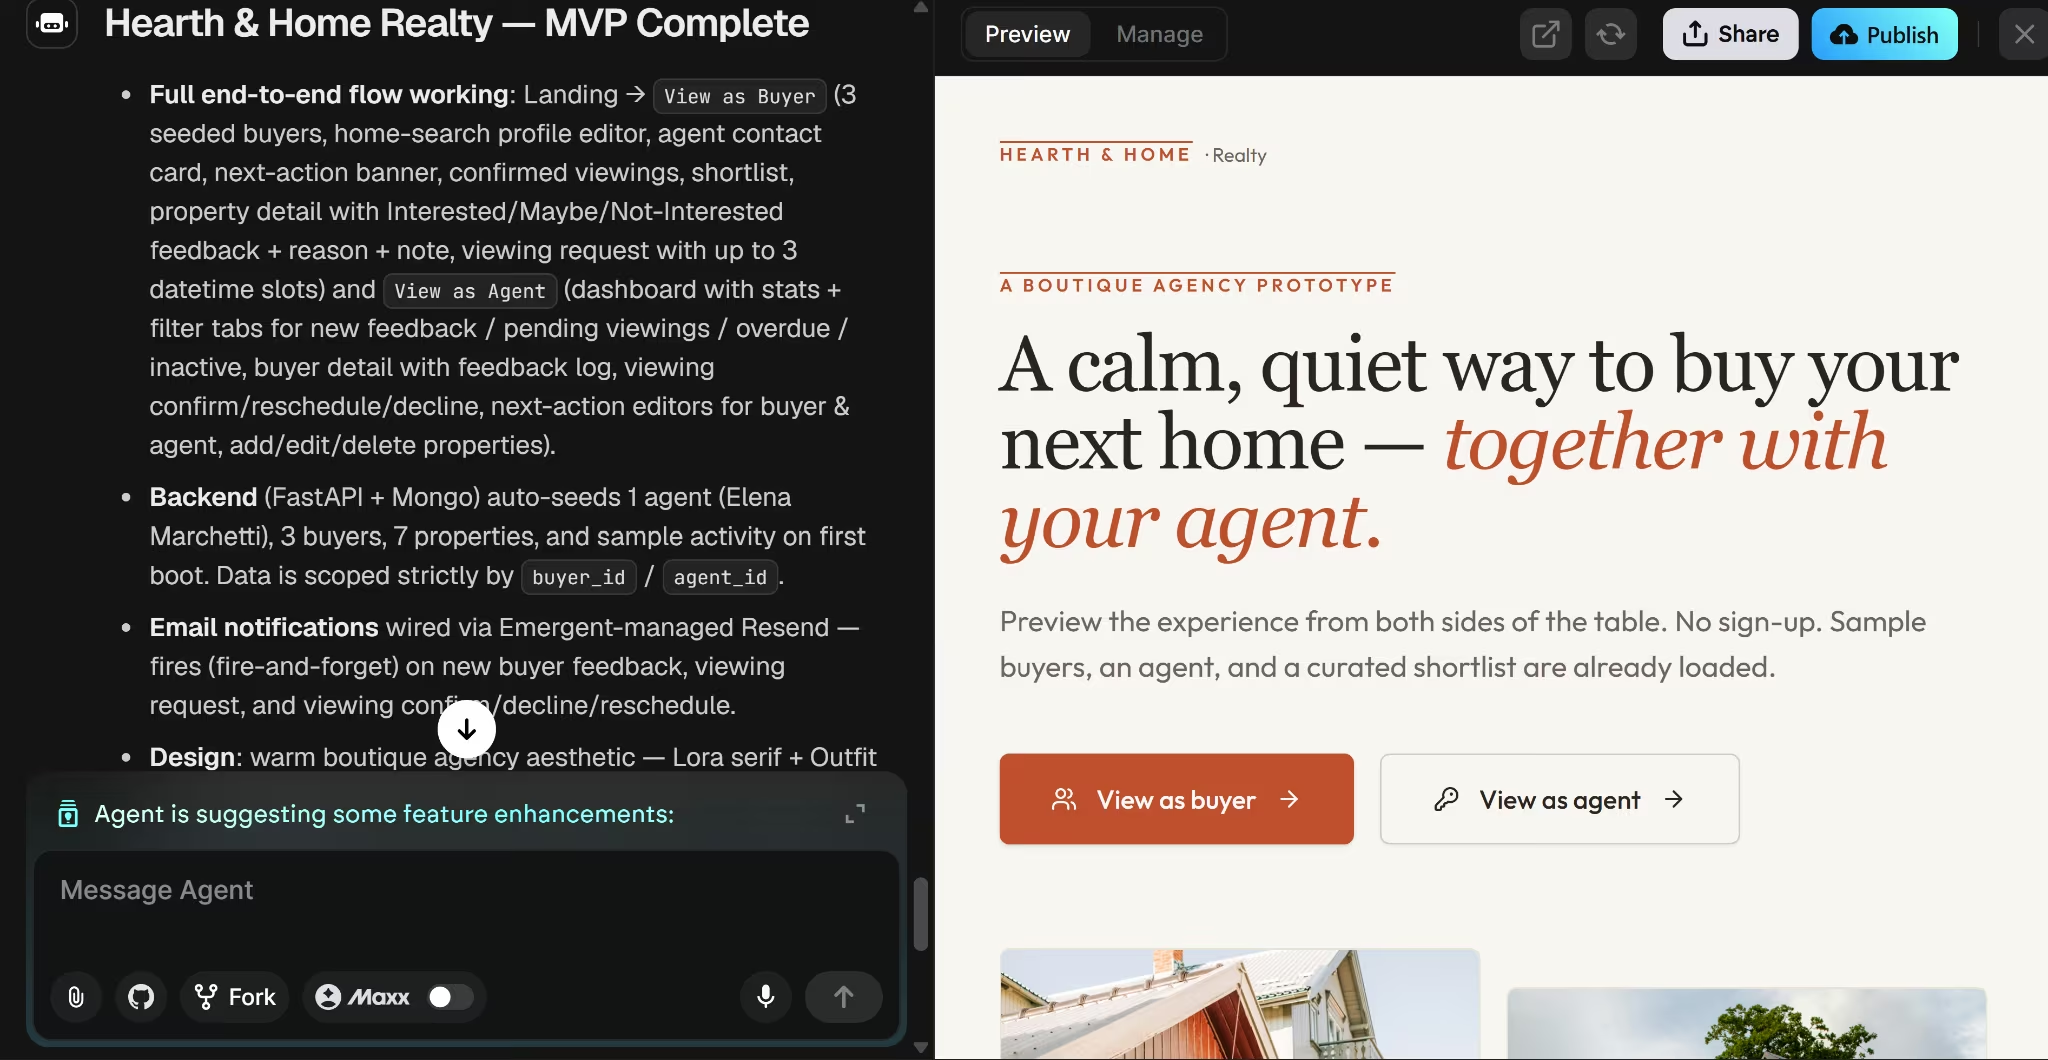
When the build finished, Emergent posted a summary of what it had created. My first version included a buyer dashboard with three sample buyers, seven properties, search preferences, an agent contact card, property feedback, viewing requests, and next actions.
The agent side included filters for new feedback, pending viewings, overdue actions, and inactive buyers. Agents could also confirm or reschedule viewings, update next actions, and add or edit properties.
Emergent generated the data layer with FastAPI and MongoDB, the frameworks that process requests and store the app’s information. It then linked every record to the correct buyer and agent.
One feature went beyond the simple prototype I had planned. Emergent connected email notifications through Resend for new feedback and viewing updates. You can keep that feature if you need it, or ask Emergent to remove it and use in-app alerts only.
Step 5: Check the Preview as a Buyer and an Agent
Open the preview and test both sides before changing the design.

I started with
View as a Buyer
. I checked whether I could update the search brief, open a property, leave feedback, request a viewing, and find the agent’s phone number and office hours.
I then switched to View as Agent. I checked whether the buyer’s changes appeared, whether viewing requests were easy to find, and whether the dashboard showed which buyer needed a reply.
The role switcher only exists to make this prototype easy to test and record.
What to check on the buyer side:
- Can the buyer review the homes selected for them?
- Can they leave a quick response and a longer note?
- Can they request a viewing?
- Can they see how to contact their agent?
What to check on the agent side:
- Can the agent see each buyer’s requirements?
- Does new feedback appear under the correct property?
- Are viewing requests easy to find?
- Does the dashboard show what needs attention?
Step 6: Fix the Issues You Found
Most of the buyer and agent flow worked, but manual testing uncovered problems the automated test missed.
On the buyer side, the Preferred Areas, Must-Haves, and Deal-Breakers fields had two editing issues:
- The fields would not accept commas, even though the labels said “comma separated.”
- I could not place the cursor between words to edit existing text. The cursor stayed at the end, so I had to backspace through the text or select and replace the whole entry.
On the agent side, the Add Property form had trouble with number fields, and new properties would not save. The error message only said “Could not save property,” so it did not explain what failed.
I sent Emergent this prompt:
Fix the buyer preferences and Add Property forms. In Preferred Areas, Must-Haves, and Deal-Breakers, allow commas and let users place the cursor anywhere in the existing text to edit between words. Do not force the cursor to the end. In the Add Property form, let users clear or replace the default zero in number fields. Investigate why new properties cannot be saved, including entries with photo URLs, and show a specific error message that explains what needs to be fixed. Keep all entered values after an error.
After the fix, repeat the buyer and agent tests from Step 5 and confirm that the forms now work without breaking feedback, viewings, or next actions.
Step 7: Test the Fixed App Again
After Emergent applied the fixes, I repeated the same tests from Step 5.
The preferences fields now accepted commas, and I could place the cursor between words to edit existing text. Property feedback, viewing requests, confirmed appointments, next actions, and agent contact details still worked as expected.
The buyer flow now worked from start to finish without the editing problems I found in the first preview.
I then switched to the agent view. I reviewed buyer feedback, responded to a viewing request, updated next actions, and added a new property. The number fields could be cleared, the property saved, and validation messages explained what needed fixing when I entered invalid information.
Both sides now worked through the main flow. With the feature and form issues fixed, the next step is to check the mobile layout and prepare the app for deployment.
Step 8: Review Emergent’s Suggested Next Actions
After a build or fix is complete, Emergent may show suggested next actions near the prompt box or in the build summary.
These suggestions are clickable. Selecting one adds it to the prompt box, where you can read it, edit it, and decide whether it fits the app.
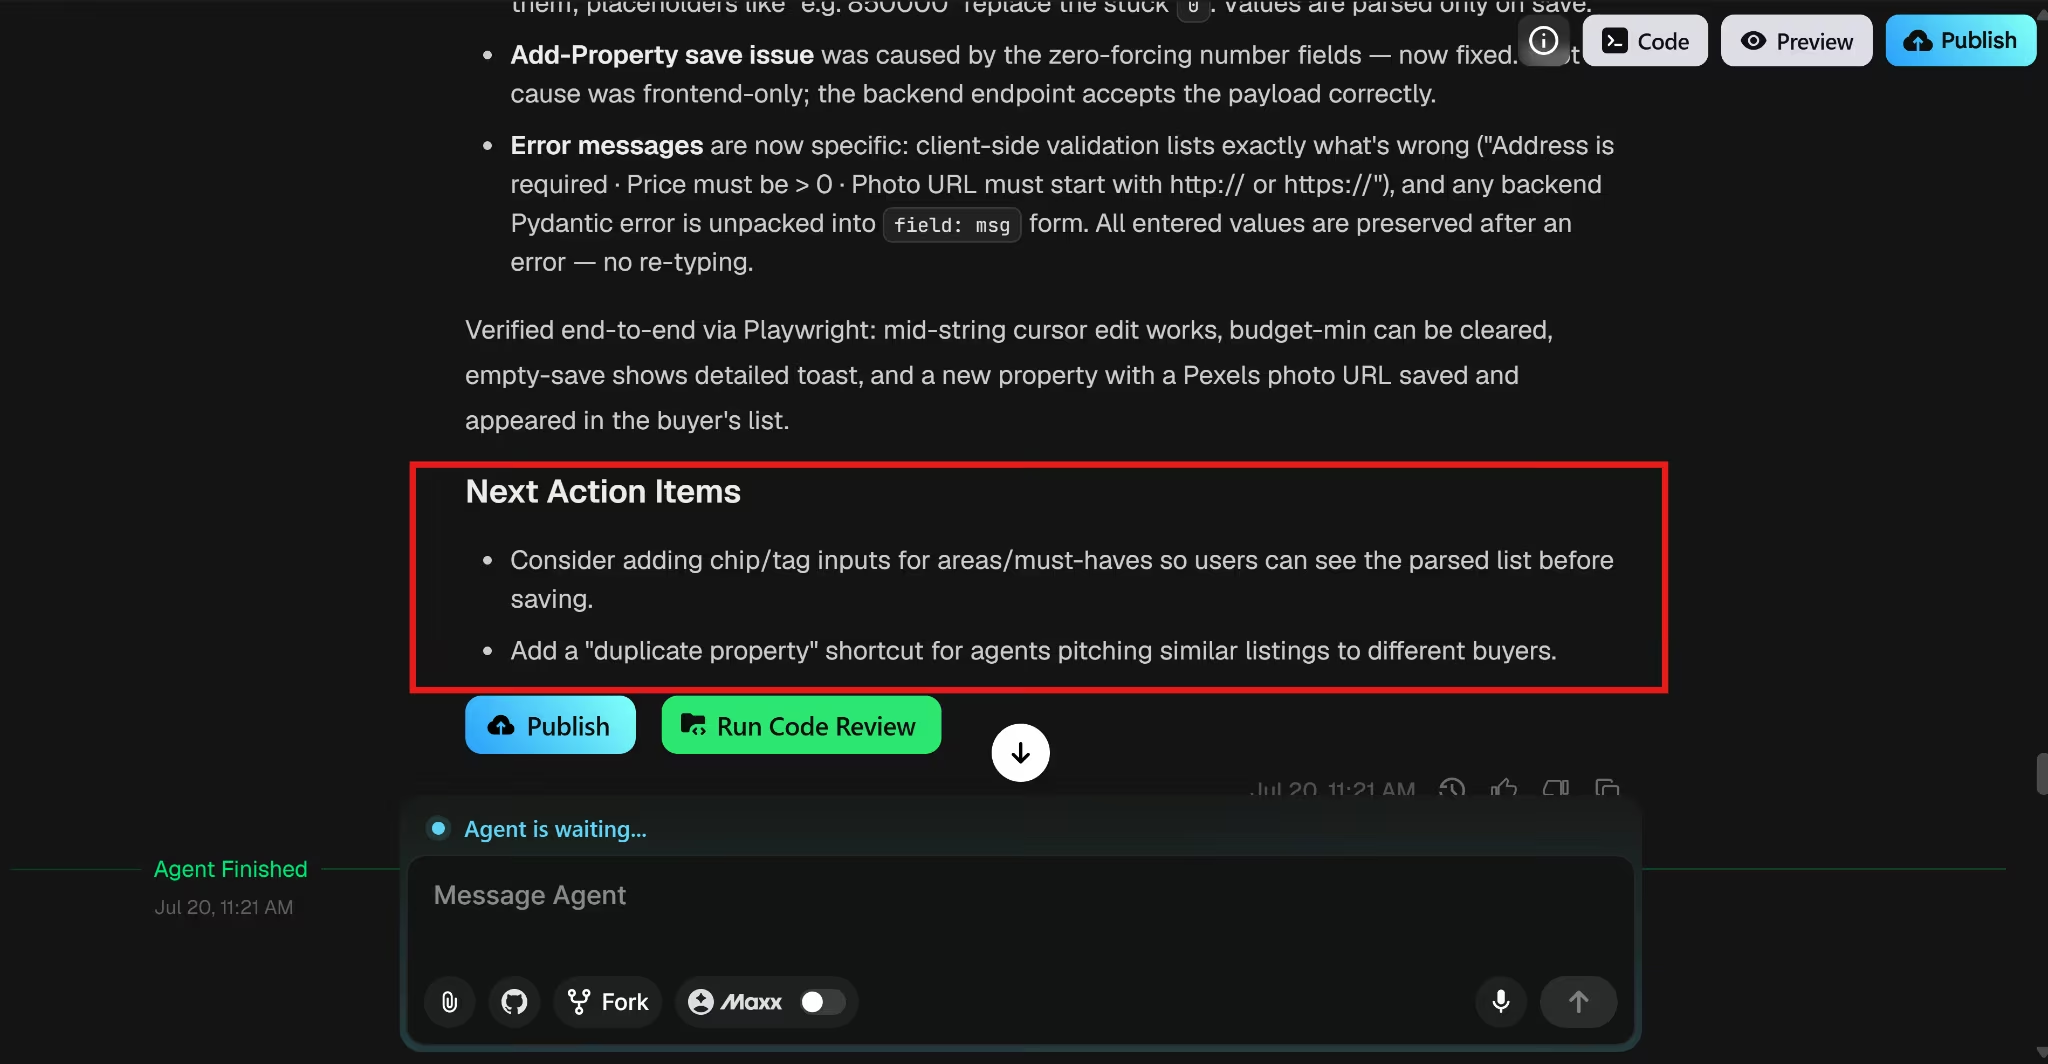
This is also a good point to add anything else you noticed during testing. You might want a clearer dashboard filter, a different property-card layout, another viewing status, or a new field in the buyer profile. Write that request in the same prompt box and add it before moving on.
Treat the suggestions as a starting point, not a checklist. Add the ideas that improve the buyer and agent flow, and leave out anything that makes the app larger without solving a current need.
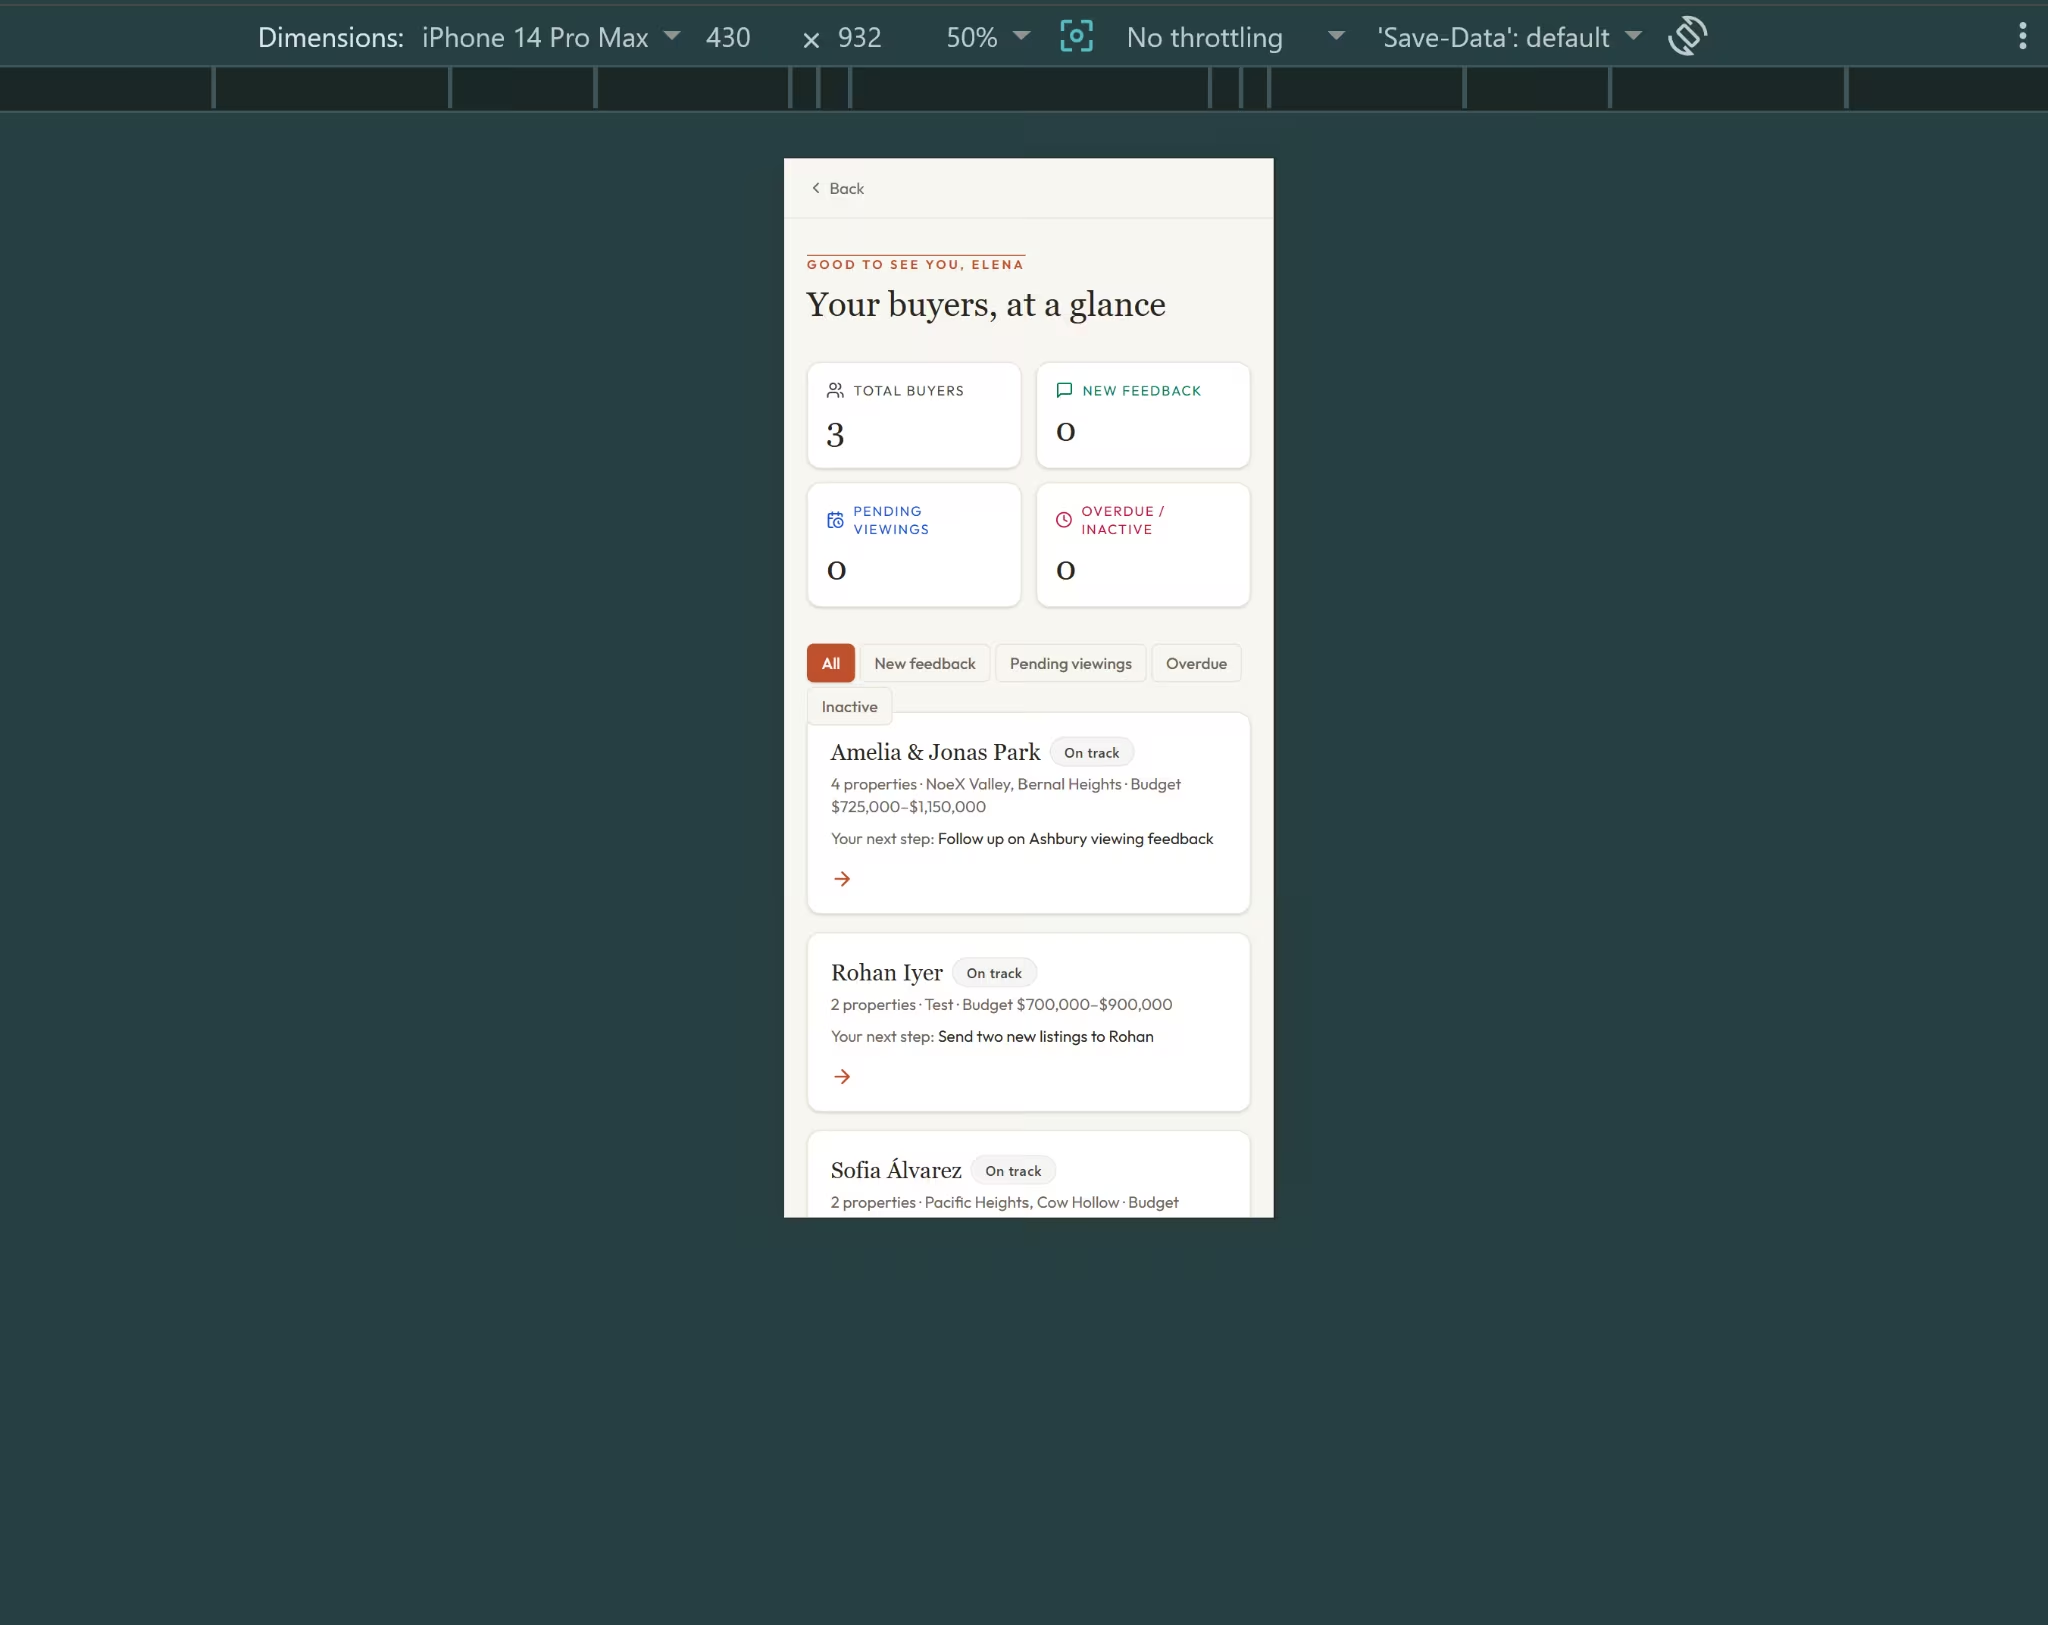
Step 9: Check the Mobile Layout
Open the app in Preview, right-click anywhere on the page, and choose Inspect.
Click the Device Toolbar button in Chrome DevTools, then open the Dimensions menu above the preview. Choose a phone model, or leave it on Responsive and enter a width between 390 and 430 pixels.
I tested the app at:
- 400 pixels in Responsive mode
- iPhone 14 Pro Max at 430 pixels
- Pixel 7 at 412 pixels
The landing page fits correctly at each size. The text wrapped inside the screen, both role buttons remained easy to tap, and the image grid adjusted without horizontal scrolling because Emergent set the page sections to adapt to smaller screens.
After checking the landing page, open View as Buyer and View as Agent using the same phone settings. Confirm that property cards, feedback controls, viewing requests, buyer details, and forms remain readable and do not extend beyond the screen.
Step 10: Replace the Demo Data
This prototype already stores its sample data in MongoDB, which Emergent set up during the build. A small agency can keep that setup and add buyers and properties through the dashboard or a CSV importer.
An agency may decide to use a separate service as the app grows. For example, it could create a Supabase project and ask Emergent to connect the app to it. The agency owns the Supabase account and supplies the project URL and keys; Emergent then builds the connection.
The same arrangement applies to external storage and media services such as Amazon S3, Google Cloud Storage, and Cloudinary. The agency creates and pays for the outside service, then asks Emergent to connect it to the app.
If you want a cheaper bulk solution, you can ask Emergent to create a CSV importer for bulk uploads. You can use this prompt:
Add separate CSV import tools for buyers and properties. Include downloadable templates, preview the rows before import, flag invalid or missing information, detect likely duplicates, and show which rows were added or rejected. Accept authorized property image URLs and keep rejected rows available for correction.
Step 11: Add Sign-In and Check Access
Once the main buyer and agent flows work, replace the demo role buttons with secure buyer and agent sign-in.
At that point, each buyer and agent should have their own login.
Ask Emergent to make that change:
Replace the demo role buttons with buyer and agent sign-in. Each buyer should only be able to see their own preferences, assigned properties, feedback, viewing requests, appointments, and agent details. Agents should only be able to see the buyers assigned to them. Block access when someone tries to open another user’s private page directly.
Test your sign-in once you’ve got it working.
Sign in as Buyer A and open one of their private pages, such as their feedback or viewing page. Copy the web address from the browser bar, sign out, and then sign in as Buyer B. Paste the same address into the browser.
Buyer B should be blocked or sent back to their own dashboard. They should not see Buyer A’s properties, feedback, appointments, or notes. This checks that the app is enforcing access rules, not just hiding pages from the menu.
For apps connected to Supabase, Emergent recommends enabling row-level security for production data. These rules control which database records a signed-in user can read or change.
The same guide warns that Supabase’s private administrator key can bypass those restrictions. Keep it in the app’s secure server-side settings, where visitors cannot view or access it.
Emergent also recommends storing private credentials in environment variables, which are secure settings kept outside the visible app code. Do not place these credentials in browser-facing code or upload them to GitHub.
Step 12: Publish the Web App
Once the app works in Preview, click Publish in the top-right corner of Emergent.
Before publishing, you can select Check app health. This opens two checks: Run Code Review for code-quality issues and Run Health Check for problems that could block publishing.
When you are ready, click Publish now.
Emergent prepares the environment, builds the app, and migrates its data. It then publishes the app and runs a final health check.
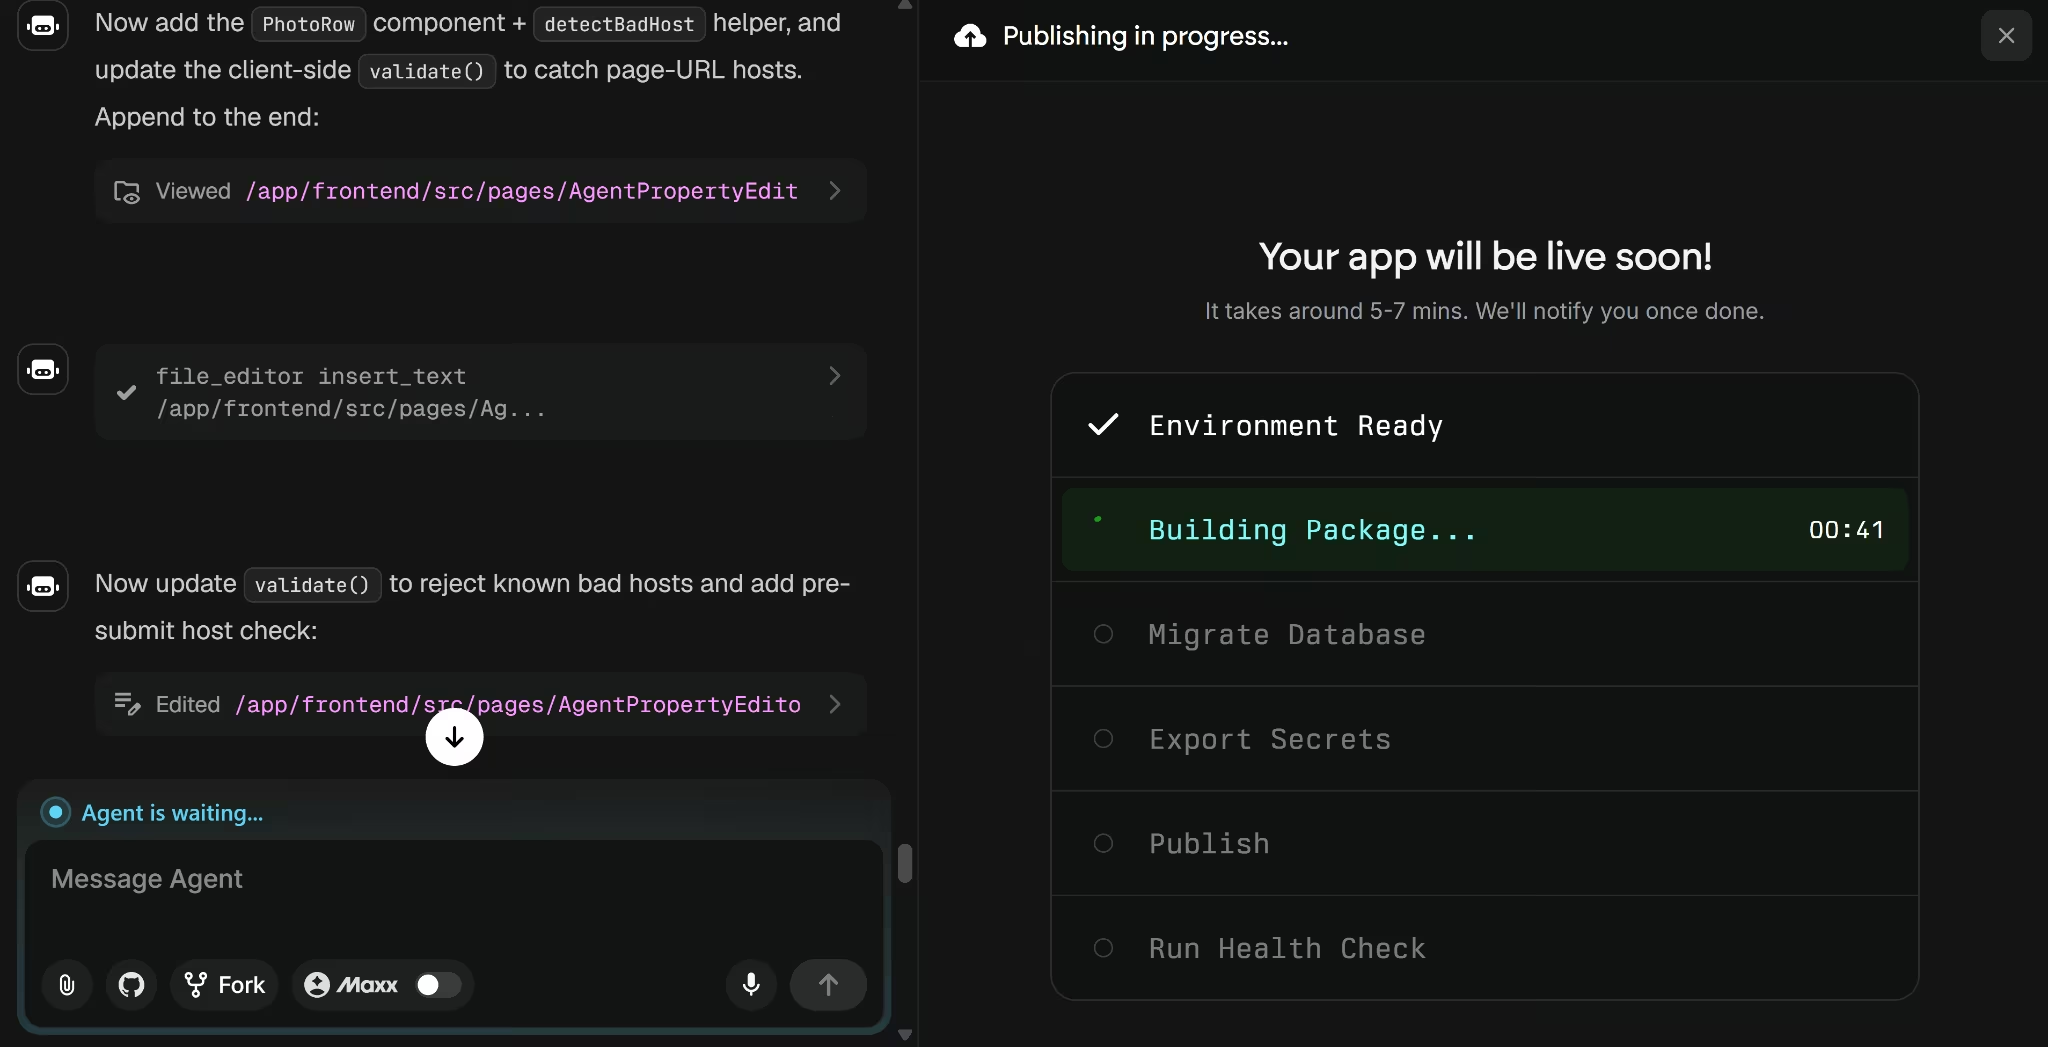
Once it finishes, open the live link in a private browser window and repeat the main buyer and agent flows.
The live link is different from the Preview link. Preview is temporary and meant for testing. The deployed link remains available until you shut down the app.
In the live link, check that you can:
- Sign in with each test role
- Open assigned properties
- Leave and review feedback
- Request and confirm a viewing
- Save a new property
- Use the app at phone width
Changes made after publishing do not automatically appear on the live version. Deploy the app again when you are ready to release an updated version.
How to Turn the Website Into a Mobile App
Your published web app already works on phones, so buyers and agents can start using it through their mobile browsers. They can also save the link to their home screen for quicker access.
A separate mobile app becomes useful when you want features such as push notifications, camera access, or a listing in the App Store and Google Play.
Emergent handles this by creating a new Mobile App project based on the workflow you already tested. Its Mobile Agent uses Expo and React Native, two standard tools for building phone apps, to create versions for both iOS and Android.
Start the mobile project with a prompt like this:
Create a mobile version of my real estate web app for iOS and Android. Keep the buyer and agent roles, property recommendations, Yes, Maybe, and Pass feedback, viewing requests, confirmed appointments, next actions, buyer preferences, and agent contact details. Connect it to the same data system as the web app so both versions use the same property, buyer, feedback, and viewing information.
Using the same data system keeps the web and mobile versions in sync. A viewing confirmed by an agent on the web should also appear as confirmed in the buyer’s mobile app.
You can test the mobile app on a real phone with Expo Go. When it is ready, Expo Application Services, or EAS, can package it for submission to the Apple App Store and Google Play.
Also read our guide on how to turn your website into an app to see what the full process looks like from web to mobile.
Document signing can be explored through the DocuSign integration after the agency defines its document and compliance process.
Payment features require more caution. A Stripe integration may suit some business workflows, but money connected to a property transaction can carry legal, accounting, and regulatory requirements.
Each extension should begin with a problem already observed in the tested app. Adding features because other property software has them will make the product harder to use and harder to manage.
Ship and Iterate With Emergent
You now have a working real estate app that supports the buyer and agent flows described above.
Start with the responsive web version, test both roles, and fix the bugs you find. Once that works, you can replace the demo data, add sign-in, connect an approved MLS or IDX feed, or create a mobile version.
Emergent gives you one place to build, test, refine, and publish the app through prompts.

Describe what you want and Emergent builds it. A real, production-ready app you can launch the same day.
- One prompt to build
- Zero code required
- Deploy in minutes